Ricoh C811DN Operating Instructions - Page 179
Checking the Port Connection, Windows 95/98/Me, Windows 2000, Windows Server 2003
 |
UPC - 026649028182
View all Ricoh C811DN manuals
Add to My Manuals
Save this manual to your list of manuals |
Page 179 highlights
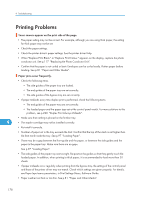
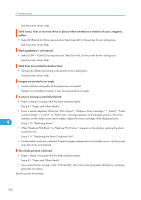
Printer Does Not Print Checking the Port Connection When the Data in indicator does not flash or light up, check the port connection as shown below to confirm the setting. • For a parallel port connection, the port must be set to LPT 1 or LPT 2. • For a USB port connection, the port must be set to USB00(n)*. *(n) varies depending on the number of printers connected. Windows 95/98/Me 1. Click [Start], point to [Settings] and then click [Printers]. 2. Click to highlight the icon of the printer. Next, on the [File] menu, click [Properties]. 3. Click the [Details] tab. 4. Check the [Print to the following port] box to confirm that the correct port is selected. Windows 2000 1. Click [Start], point to [Settings] and then click [Printers]. 2. Click to highlight the icon of the printer. Next, on the [File] menu, click [Properties]. 3. Click the [Port] tab. 4. Check the [Print to the following port] box to confirm that the correct port is selected. Windows XP, Windows Server 2003 1. Access the [Printers and Faxes] folder from [Start]. 2. Click to highlight the icon of the printer. Next, on the [File] menu, click [Properties]. 9 3. Click the [Port] tab. 4. Check the [Print to the following port] box to confirm that the correct port is selected. Windows 4.0 1. Click [Start], point to [Settings] and then click [Printers]. 2. Click to highlight the icon of the printer. Next, on the [File] menu, click [Properties]. 3. Click the [Port] tab. 4. Check the [Print to the following port] box to confirm that the correct port is selected. 177
-
 1
1 -
2
-
3
-
4
-
5
-
6
-
7
-
8
-
9
-
10
-
11
-
12
-
13
-
14
-
15
-
16
-
17
-
18
-
19
-
20
-
21
-
22
-
23
-
24
-
25
-
26
-
27
-
28
-
29
-
30
-
31
-
32
-
33
-
34
-
35
-
36
-
37
-
38
-
39
-
40
-
41
-
42
-
43
-
44
-
45
-
46
-
47
-
48
-
49
-
50
-
51
-
52
-
53
-
54
-
55
-
56
-
57
-
58
-
59
-
60
-
61
-
62
-
63
-
64
-
65
-
66
-
67
-
68
-
69
-
70
-
71
-
72
-
73
-
74
-
75
-
76
-
77
-
78
-
79
-
80
-
81
-
82
-
83
-
84
-
85
-
86
-
87
-
88
-
89
-
90
-
91
-
92
-
93
-
94
-
95
-
96
-
97
-
98
-
99
-
100
-
101
-
102
-
103
-
104
-
105
-
106
-
107
-
108
-
109
-
110
-
111
-
112
-
113
-
114
-
115
-
116
-
117
-
118
-
119
-
120
-
121
-
122
-
123
-
124
-
125
-
126
-
127
-
128
-
129
-
130
-
131
-
132
-
133
-
134
-
135
-
136
-
137
-
138
-
139
-
140
-
141
-
142
-
143
-
144
-
145
-
146
-
147
-
148
-
149
-
150
-
151
-
152
-
153
-
154
-
155
-
156
-
157
-
158
-
159
-
160
-
161
-
162
-
163
-
164
-
165
-
166
-
167
-
168
-
169
-
170
-
171
-
172
-
173
-
 174
174 -
 175
175 -
 176
176 -
 177
177 -
 178
178 -
 179
179 -
 180
180 -
 181
181 -
 182
182 -
 183
183 -
 184
184 -
185
-
186
-
187
-
188
-
189
-
190
-
191
-
192
-
193
-
194
-
195
-
196
-
197
-
198
-
199
-
200
-
201
-
202
-
203
-
204
-
205
-
206
-
207
-
208
-
209
-
210
-
211
-
212
-
213
-
214
-
215
-
216
-
217
-
218
-
219
-
220
-
221
-
222
-
223
-
224
-
225
-
226
-
227
-
228
-
229
-
230
-
231
-
232
-
233
-
234
-
235
-
236
-
237
-
238
-
239
-
240
-
241
-
242
-
243
-
244
-
245
-
246
-
247
-
248
-
249
-
250
-
251
-
252
 |
 |
