Ricoh CL7200DT2 Setup Guide - Page 85
Remove the screws by turning them counterclockwise using the provid
 |
UPC - 026649024139
View all Ricoh CL7200DT2 manuals
Add to My Manuals
Save this manual to your list of manuals |
Page 85 highlights
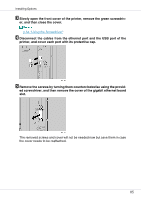
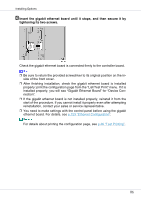
Installing Options C Slowly open the front cover of the printer, remove the green screwdriv- er, and then close the cover. p.54 "Using the Screwdriver" D Disconnect the cables from the ethernet port and the USB port of the printer, and cover each port with its protective cap. E Remove the screws by turning them counterclockwise using the provid- ed screwdriver, and then remove the cover of the gigabit ethernet board slot. The removed screws and cover will not be needed now but save them in case the cover needs to be reattached. 85
-
 1
1 -
2
-
3
-
4
-
5
-
6
-
7
-
8
-
9
-
10
-
11
-
12
-
13
-
14
-
15
-
16
-
17
-
18
-
19
-
20
-
21
-
22
-
23
-
24
-
25
-
26
-
27
-
28
-
29
-
30
-
31
-
32
-
33
-
34
-
35
-
36
-
37
-
38
-
39
-
40
-
41
-
42
-
43
-
44
-
45
-
46
-
47
-
48
-
49
-
50
-
51
-
52
-
53
-
54
-
55
-
56
-
57
-
58
-
59
-
60
-
61
-
62
-
63
-
64
-
65
-
66
-
67
-
68
-
69
-
70
-
71
-
72
-
73
-
74
-
75
-
76
-
77
-
78
-
79
-
 80
80 -
 81
81 -
 82
82 -
 83
83 -
 84
84 -
 85
85 -
 86
86 -
 87
87 -
 88
88 -
 89
89 -
 90
90 -
91
-
92
-
93
-
94
-
95
-
96
-
97
-
98
-
99
-
100
-
101
-
102
-
103
-
104
-
105
-
106
-
107
-
108
-
109
-
110
-
111
-
112
-
113
-
114
-
115
-
116
-
117
-
118
-
119
-
120
-
121
-
122
-
123
-
124
-
125
-
126
-
127
-
128
-
129
-
130
-
131
-
132
-
133
-
134
-
135
-
136
-
137
-
138
-
139
-
140
 |
 |
Installing Options
85
C
Slowly open the front cover of the printer, remove the green screwdriv-
er, and then close the cover.
p.54 “
Using the Screwdriver
”
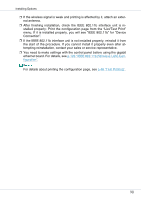
D
Disconnect the cables from the ethernet port and the USB port of the
printer, and cover each port with its protective cap.
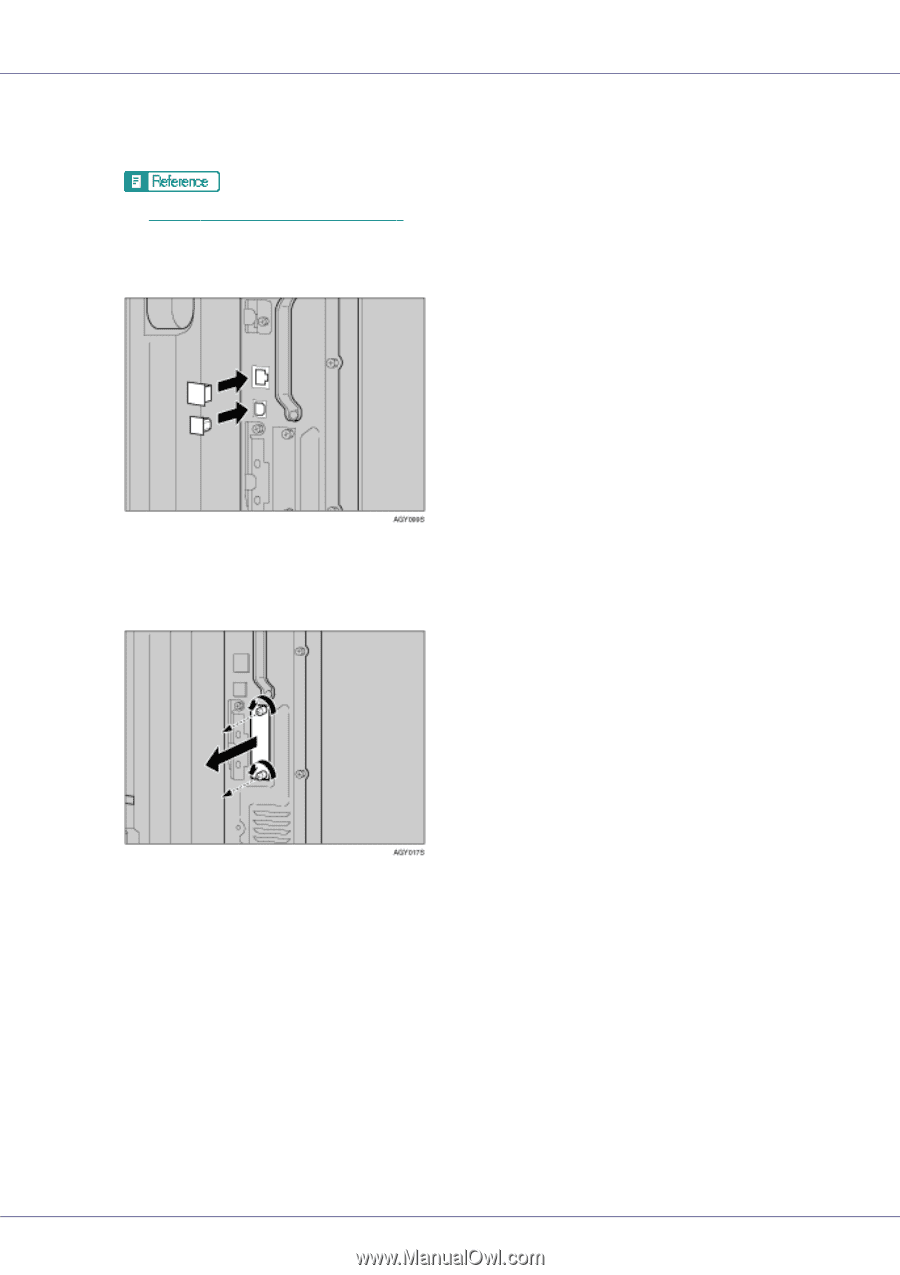
E
Remove the screws by turning them counterclockwise using the provid-
ed screwdriver, and then remove the cover of the gigabit ethernet board
slot.
The removed screws and cover will not be needed now but save them in case
the cover needs to be reattached.