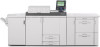
Ricoh Pro C900 User Guide
Ricoh Pro C900 Manual
 |
View all Ricoh Pro C900 manuals
Add to My Manuals
Save this manual to your list of manuals |
Ricoh Pro C900 manual content summary:
- Ricoh Pro C900 | User Guide - Page 1
Adjustment Item Menu Guide: TCRU Model Name: Pro C900S/Pro C900 Read this manual carefully before using this machine and keep it handy for future reference. 1 - Ricoh Pro C900 | User Guide - Page 2
Replacement Guide: TCRU Model Name: Pro C900S/Pro C900 1 - Ricoh Pro C900 | User Guide - Page 3
trademark of Adobe Systems Incorporated. • EFI, Fiery and Fiery Driven are registered trademarks of Electronics for Imaging, Inc. in the U.S. Patent and Trademark Office and/or certain other foreign jurisdictions. GENERAL SAFETY INSTRUCTIONS Switches and Symbols Where symbols are used on or near - Ricoh Pro C900 | User Guide - Page 4
generation (due to a power surge caused by high resistance) that can result in fire and other problems. 2. Always check the power plug and make sure power cord is damaged in any way, call for service. 4. Check the length of the power cord between the machine and power supply. Make sure the power - Ricoh Pro C900 | User Guide - Page 5
under the machine. • When disconnecting the power plug from the wall outlet, always pull the plug (not the cable). • Do not allow paper clips, staples, or other small metallic objects to fall inside the machine. • Keep toner (used or unused) and toner containers out of reach of children. • For - Ricoh Pro C900 | User Guide - Page 6
Table of Contents CONVENTIONS USED IN THIS MANUAL 2 GENERAL SAFETY INSTRUCTIONS 2 1. BEFORE YOU BEGIN 6 2. COMMON PROCEDURES 10 UNIT 28 5.2 REINSTALLING THE DRUM UNIT 30 6. DEVELOPER 33 6.1 REMOVING THE USED DEVELOPER 33 6.2 ADDING NEW DEVELOPER 38 7. IMAGE TRANSFER BELT CLEANING UNIT 41 - Ricoh Pro C900 | User Guide - Page 7
as a result of handling or operating this machine. What You Need Use only the tools and materials described in this manual. Use of other tools or materials could damage the machine or cause injury. c Accessory hex driver d Black hex screws 3 Developer bottle 4 Drum setting powder pad applicator - Ricoh Pro C900 | User Guide - Page 8
NAMES OF COMPONENTS 6 1 2 3 5 2 4 1. Toner hopper cover RPG062S 2. Front top cover 3. Inner cover 4. Left front cover 5. Right front cover 6. Control panel Parts, Screw Color Codes • Handles and levers colored purple indicate where you should pull or lift a component or part to move or - Ricoh Pro C900 | User Guide - Page 9
CONTROL PANEL (Pro C900) 7 8 1 9 2 3 4 1. User Tools 2. Counter 3. Printer function/[fierydriven] 4. ./* key 5. Enter key 6. Clear key 7. On indicator 8. Operation Switch 9. Number keys 56 8 - Ricoh Pro C900 | User Guide - Page 10
CONTROL PANEL (Pro C900S) 6 7 1 8 9 2 1. User Tools 2. Counter 3. ./* key 4. Enter key 5. Clear key 6. On indicator 7. Operation Switch 8. Number keys 9. Program 3 45 9 - Ricoh Pro C900 | User Guide - Page 11
manual, always do the following: 1. Shut down the printer controller. Depending on the type of controller, the shutdown procedure may be slightly different. For details, refer to the shutdown procedure for your machine. 2. Press the power cable and ground leakage circuit breaker, do not use the - Ricoh Pro C900 | User Guide - Page 12
be "Off". If you select "On", you can specify how long the machine waits before switching the screen. Using the number keys, you can specify a wait time of between 1 and 999 seconds. Note: For details about changing this setting, see General Settings Guide, which is supplied with this machine. 11 - Ricoh Pro C900 | User Guide - Page 13
2.2 OPENING THE TCRU DISPLAY Overview • When installed, the TCRU SD card enables an LCD display application specially designed for use with TCRU machines. • The TCRU SD card can be installed on TCRU machines only. It will not function with other models. • The LCD display application - Ricoh Pro C900 | User Guide - Page 14
shown below. Note: The [Fusing Unit] and [Others] buttons are not to be used in any of the procedures shown in this manual. For users of Pro C900, press the Printer function/[fierydriven] key to exit the Main Menu. For users of Pro C900S, press the [Program] key. When the Program menu is displayed - Ricoh Pro C900 | User Guide - Page 15
for each unit. If a [Reset PM Counter] button is pressed, the machine performs initialization for the selected unit and clears the counter for that unit. • If an error occurs during the counter clear/initialization, an error message is displayed. • If the counter clear/initialization completes - Ricoh Pro C900 | User Guide - Page 16
REMOVING THE FRONT TOP COVER Procedure 1. Open the left (2) and right (1) front covers. 2 1 2. Open the toner hopper cover (1). 1 RPG020S RPG003S 3. Remove the two screws at (1) and (2) by hand. Note: Use a coin to turn the screws if they are too tight to turn by hand. 4. Lift up the front top - Ricoh Pro C900 | User Guide - Page 17
(4) on the frame of the machine, and then attach the front top cover. 3 4 12 4 3 4 3 1 2 RPG014S 4. Fasten the two screws at (1) and (2) by hand. 5. Close the toner hopper cover (3). 3 2 1 RPG057S 6. Close the left and right front covers. 16 - Ricoh Pro C900 | User Guide - Page 18
main power switch and disconnect the ground wire from the machine and fixing heater. Replacement Message Replacement of Charger is now necessary. Replace Charger. If this message appears, use the following procedure to replace the unit. Preparation: Print out the counter list. 1. Press the [Counter - Ricoh Pro C900 | User Guide - Page 19
front covers. 2. Remove the front top cover (See " REMOVING THE FRONT TOP COVER") 3. Hold the charge corona unit (1) with the lock lever (2) pressed down. 1 2 RPG022 RPG023 4. Carefully pull the charge corona unit (1) toward you. 1 RPG024 5. Holding the sides of the charge corona unit, pull it - Ricoh Pro C900 | User Guide - Page 20
Important: To protect the charge corona unit from fingerprints, scratches, and dust: • Always hold the charge corona unit (1) with both hands. • Never touch the wire mesh (2) below. • Never allow anything to touch the wire mesh while the charge corona unit is outside the machine. 1 2 RPG012S 6. Lay - Ricoh Pro C900 | User Guide - Page 21
go no further. 2 2 1 RPG010S 2. Reattach the front top cover and close the toner hopper cover. (See "REATTACHING THE FRONT TOP COVER".) 3. Reconnect the ground leakage circuit breaker for the machine and fixing heater. 4. Press the main power switch to turn the machine on, close the left and right - Ricoh Pro C900 | User Guide - Page 22
7. Press the [Reset PM Counter] button of the item that is the corresponding color. 8. If a confirmation message appears, press the [Continue] button. Note: The counter will be reset. 9. When the counter is reset, press the [Confirm] button. 21 - Ricoh Pro C900 | User Guide - Page 23
necessary. Replace Cleaning Unit for PCU. If this message appears, use the following procedure to replace the unit. Preparation: Print out the counter list. 1. Press the [Counter] key on the control panel (see "CONTROL PANEL") and print out the counter list. 2. Switch the machine off. (See "SWITCH - Ricoh Pro C900 | User Guide - Page 24
(1), carefully pull out the development unit drawer. 1 RPG028 Important: Do not leave the development unit drawer open for a long time. Also, do not expose the part where the drum unit is visible to direct sunlight. 23 - Ricoh Pro C900 | User Guide - Page 25
lever (1) counterclockwise. 1 RPG029 8. Grasping both sides (1) of the drum cleaning unit as shown, lift the drum cleaning unit (2) straight up. 2 1 1 RPG007S 9. To avoid spilling toner, always carry the drum cleaning unit level with the exposed roller (1) facing up (not down). 1 RPG030 24 - Ricoh Pro C900 | User Guide - Page 26
1. Check the drum cleaning unit direction for reinstalling. • The waste toner collection pipe (1) should be at rear side. 1 RPG018S 2. Align the covers (1) at the front and rear edge of the drum cleaning unit with the guide rails (2), and then set the drum cleaning unit on the frame. Important: - Ricoh Pro C900 | User Guide - Page 27
knob (1), and then fasten it by turning it clockwise. 1 RPG035 6. Attach the inner cover, and then secure it by turning its three black screws clockwise using the hex driver. 7. Reinstall the charge corona unit. (See "REINSTALLING THE CHARGE CORONA UNIT") 26 - Ricoh Pro C900 | User Guide - Page 28
8. Reattach the front top cover and close the toner hopper cover. (See "REATTACHING THE FRONT TOP COVER".) 9. Reconnect the ground leakage circuit breaker for the machine and fixing heater. 10. Press the main power switch to turn the machine on, close the left and right front covers, and then wait - Ricoh Pro C900 | User Guide - Page 29
the main power switch and disconnect the ground wire from the machine and fixing heater. Replacement Message Replacement of Drum Unit is now necessary. Replace Drum Unit. If this message appears, use the following procedure to replace the unit. Preparation: Print out the counter list. 1. Press the - Ricoh Pro C900 | User Guide - Page 30
drum cleaning unit. (See "REMOVING THE DRUM CLEANING UNIT".) 4. Turn the drum lock nut (1) counterclockwise, and unlock the drum unit. 1 RPG063 5. Rotate the drum unit using its handle (1) as shown below, and then carefully pull out the drum unit. 1 RPG034 29 - Ricoh Pro C900 | User Guide - Page 31
touch the green area of the drum. 1. Set the new drum unit (1) in the development unit drawer, and make sure that the two guides (2) (front) (3) (rear) at the development unit drawer are inserted securely in the grooves (4) (front) (5) (rear) at the drum unit. 2 3 44 1 5 RPG016S 2. Take the - Ricoh Pro C900 | User Guide - Page 32
it by turning its three black screws clockwise using the hex driver. (See "REINSTALLING THE DRUM CLEANING UNIT".) 8. Reinstall the charge corona unit. (See "REINSTALLING THE CHARGE CORONA UNIT") 9. Reattach the front top cover and close the toner - Ricoh Pro C900 | User Guide - Page 33
machine's main power switch to ON, close the left and right front covers, and then wait for the machine to warm up. 12. Open the TCRU Display. (See "OPENING THE TCRU DISPLAY".) 13. Press the [Drum Unit] button. 14. Press the [Reset PM Counter] button of the item that is the corresponding color. 15 - Ricoh Pro C900 | User Guide - Page 34
developer, make sure that the machine's parts are all closed. Replacement Message Replacement of Developer is now necessary. Replace Developer. If this message appears, use the following procedure to replace the unit. Preparation: Print out the counter list. 1. Press the [Counter] key on the control - Ricoh Pro C900 | User Guide - Page 35
Procedure 1. Open the left and right front cover, open the toner hopper cover, and then remove the front top cover. (See "REMOVING THE FRONT TOP COVER".) 2. Check that the developer you are preparing is the correct color by looking at the combination of the raised markings (1) on the shutter of the - Ricoh Pro C900 | User Guide - Page 36
locks into place. 1 RPG054 7. Open the TCRU display. (See "OPENING THE TCRU DISPLAY".) 8. Press the [Developer] button. 9. Press the [Reset PM Counter Developer:Exhaust] button. 10. If a confirmation message appears, press the [Continue] button. 11. Select the developer you want to replace, and then - Ricoh Pro C900 | User Guide - Page 37
13. After removing the developer, press the [Confirm] button, and then, while pressing the lock levers on either side of the developer bottle, carefully pull the bottle toward you. Important: To avoid developer spillage while handling the developer - Ricoh Pro C900 | User Guide - Page 38
16. Attach the seal to the shutter (1) of the developer bottle, as shown. Note: To prevent developer leaking during transport, cover the developer bottle's opening. 1 RPG049 Important: At this point, begin the procedure for adding the new developer. (See "ADDING NEW DEVELOPER") 37 - Ricoh Pro C900 | User Guide - Page 39
: Be sure to switch the machine on before beginning this procedure. This procedure requires the machine to be powered. Procedure 1. Check that the developer you are preparing is the correct color by looking at the combination of the raised markings (1) on the shutter of the developer bottle. (The - Ricoh Pro C900 | User Guide - Page 40
completely away. 1 RPG050 6. Open the TCRU display. (See "OPENING THE TCRU DISPLAY".) 7. Press the [Developer] button. 8. Press the [Reset PM Counter Developer:Reload] button. 9. If a confirmation message appears, press the [Continue] button. 10. Select the developer you want to replace, and then - Ricoh Pro C900 | User Guide - Page 41
11. When the confirmation message appears, press the [Confirm] button, and then, while pressing the lock levers on either side of the developer down. 14. Reattach the front top cover and close the toner hopper cover. (See "REATTACHING THE FRONT TOP COVER".) 15. Close the left and right front cover. - Ricoh Pro C900 | User Guide - Page 42
What You Need • Accessory hex driver provided with machine. • Newspaper , switch off the main power switch and disconnect the ground use the following procedure to replace the unit. Preparation: Print out the counter list. 1. Press the [Counter] key on the control panel (see "CONTROL PANEL") and print - Ricoh Pro C900 | User Guide - Page 43
the left and right front covers. 2. Remove the two black screws (1) on the inner cover (2) for the image transfer belt cleaning unit using the hex driver. 3. Remove the inner cover (2). Note: To remove the inner cover, pull it out and slightly upward. 1 2 1 RPG044 4. Remove the black screw (1) on - Ricoh Pro C900 | User Guide - Page 44
6. Using the handle (1), carefully pull the image transfer belt cleaning unit toward you until it can go no further. 1 RPG039 7. While pressing down the lock tab (1), carefully pull out the image transfer belt cleaning unit. 1 RPG058 Important: To avoid toner spillage while handling the image - Ricoh Pro C900 | User Guide - Page 45
2 1 RPG040 RPG041 2. Fasten the black screw (1) on the image transfer belt cleaning unit using the hex driver. 3. Reconnect the ground leakage circuit breaker for the machine and fixing heater. 4. Press the main power switch to turn the machine on, close the left and right front cover, and then - Ricoh Pro C900 | User Guide - Page 46
(2) counterclockwise. 1 2 RPG037 12. Reattach the inner cover and then fasten the two black screws on the inner cover of the image transfer belt cleaning unit using the hex driver. (See "REMOVING THE IMAGE TRANSFER BELT CLEANING UNIT".) 13. Close the left and right front covers. 45 - Ricoh Pro C900 | User Guide - Page 47
RWARNING • To prevent electrical shock, switch off the main power switch and disconnect the ground wire from the machine and fixing use the following procedure to replace the unit. Preparation: Print out the counter list. 1. Press the [Counter] key on the control panel (see "CONTROL PANEL") and print - Ricoh Pro C900 | User Guide - Page 48
to the rear end. 4. Using the hex driver, remove the black screw in the front lock (2), and then slide the front lock to the front end. 1 2 RPG065S 5. Holding the paper transfer roller unit (1) with both hands, carefully lift it up and out. Important: To avoid toner - Ricoh Pro C900 | User Guide - Page 49
8.2 INSTALLING THE PAPER TRANSFER ROLLER UNIT Procedure 1. While holding the paper transfer roller unit (1) with both hands, align the stays (2) of the paper transfer roller unit with the shafts of the registration unit drawer, and then set the paper transfer roller unit on the registration unit - Ricoh Pro C900 | User Guide - Page 50
Troubleshooting: TCRU Model Name: Pro C900S/Pro C900 1 - Ricoh Pro C900 | User Guide - Page 51
1.1 GUIDE TO COMPONENTS 3 1.2 ADJUSTMENT: USING THE TCRU SD CARD 4 2. TROUBLESHOOTING SERVICE CALL PROBLEMS (SC CODES) ..5 2.1 WHAT ARE SC CODES 5 2.2 SC CODE LIST 5 3. TROUBLESHOOTING IMAGE QUALITY PROBLEMS 7 3.1 IMAGE QUALITY PROBLEMS 7 3.1.1 PROBLEM 1: WHITE SPOTS 7 3.1.2 PROBLEM 2: SHARP - Ricoh Pro C900 | User Guide - Page 52
If the machine will not print, does not print as expected, or exhibits any other problem, find the problem in this manual and troubleshoot accordingly. RCAUTION Before you replace any unit: • Always turn the machine off and unplug the power cord from the power source. • Let the machine sit idle - Ricoh Pro C900 | User Guide - Page 53
the back of the machine. 2. Turn the main power on, and then wait for the machine to warm up. 3. After the machine has started up, press the Printer function/[fierydriven] key on the control panel for users of Pro C900. For users of Pro C900S, press the [Program] key to display the Main Menu. 4. On - Ricoh Pro C900 | User Guide - Page 54
TROUBLESHOOTING SERVICE CALL PROBLEMS (SC CODES) 2.1 WHAT ARE SC CODES? If an error occurs during operation, the machine displays an SC code ("SCnnn" , where "nnn" is a three-digit number). The machine stops and cannot be used when an SC code is displayed. If an SC code appears: 1. Write down the SC - Ricoh Pro C900 | User Guide - Page 55
Code Error SC306 Charge grid high voltage error: M SC307 Charge grid high voltage error: Y SC308 Charge cleaning unit: Position error: K SC309 Charge cleaning unit: Position error: C SC310 Charge cleaning unit: Position error: M SC311 Charge cleaning unit: Position error: Y SC420 Potential - Ricoh Pro C900 | User Guide - Page 56
stained. NOTE: See the following page for an actual sample. The sample image is not at 1:1 scale. Step 1 Step 2 Step 3 Print three full-page A3 or DLT sheets in each color (cyan, yellow, magenta, and black). If you can see these white spots, replace the drum unit. If unit replacement does not - Ricoh Pro C900 | User Guide - Page 57
8 - Ricoh Pro C900 | User Guide - Page 58
3.1.2 PROBLEM 2: SHARP SPOTS These spots mark the page with very sharp dots at an actual sample. The sample image is not at 1:1 scale. Step 1 Step 2 Step 3 Print three full-page A3 or DLT sheets in each color (cyan, yellow, magenta, and black). If these sharp spots appear on the sheets, replace the - Ricoh Pro C900 | User Guide - Page 59
10 - Ricoh Pro C900 | User Guide - Page 60
. 1. If the drum is scratched: Step 1 Replace the drum unit. Step 2 If replacing the drum unit does not solve the problem, call for service. 2. If the drum is not scratched but is stained with toner: Step 1 Replace the drum cleaning unit. Step 2 If replacing the drum cleaning unit does not solve the - Ricoh Pro C900 | User Guide - Page 61
12 - Ricoh Pro C900 | User Guide - Page 62
3.1.4 PROBLEM 4: DENSITY TOO LOW Sheets are too light, especially in areas of solid fill. CAUSE: The density setting is too low. NOTE: 1:1 scale. Step 1 In [Adjustment] menu, carry out 3-820-002 (Execute Density Adj). Step 2 If adjusting the density does not solve the problem, call for service. 13 - Ricoh Pro C900 | User Guide - Page 63
14 - Ricoh Pro C900 | User Guide - Page 64
3.1.5 PROBLEM 5: DENSITY TOO HIGH Sheets are too dark, especially in areas of 1:1 scale. Step 1 Step 2 Step 3 In [Adjustment] menu, carry out 3-820-002 (Execute Density Adj). Print a few sheets. Does the image density appear darker? Yes Finished! No Replace the developer. If changing the developer - Ricoh Pro C900 | User Guide - Page 65
16 - Ricoh Pro C900 | User Guide - Page 66
3.1.6 PROBLEM 6: DIRTY BACKGROUND Random "powdered" dots appear, creating a dirty background. CAUSE: The developer has deteriorated. NOTE: See the following image is not at 1:1 scale. Step 1 Replace the developer. Step 2 If changing the developer does not solve the problem, call for service. 17 - Ricoh Pro C900 | User Guide - Page 67
18 - Ricoh Pro C900 | User Guide - Page 68
for an actual sample. The sample image is not at 1:1 scale. Step 1 Step 2 Step 3 Print three full-page A3 or DLT sheets in each color (cyan, yellow, magenta, and black). If the sheets are patchy, replace the developer. If changing the developer does not solve the problem, call for service. 19 - Ricoh Pro C900 | User Guide - Page 69
20 - Ricoh Pro C900 | User Guide - Page 70
3.1.8 PROBLEM 8: STREAKS (1) Wide streaks appear in the direction of paper feed. NOTE: If you carry out "Execute Density Adj", the machine cleans the charge corona unit. Print a few sheets. Is the problem solved? Yes Finished! No Replace the charge corona unit. If replacing the charge corona unit - Ricoh Pro C900 | User Guide - Page 71
22 - Ricoh Pro C900 | User Guide - Page 72
transfer roller unit is faulty. 1. If toner streaks appear only on the printed side of sheets: Step 1 Replace the image transfer belt cleaning unit. Step 2 If replacing the image transfer belt cleaning unit does not solve the problem, call for service. 2. If toner streaks appear only on the back of - Ricoh Pro C900 | User Guide - Page 73
3.1.10 PROBLEM 10: WHITE LINES OR DRAG MARKS White strips (about 314 mm, 12.4 inches wide) or drag marks appear on prints, or if fine white lines appear on the front of prints. CAUSE: There is dirt or oil on the surface of the drum unit. NOTE: See the following page for an actual - Ricoh Pro C900 | User Guide - Page 74
White lines 25 - Ricoh Pro C900 | User Guide - Page 75
Drag marks 26 - Ricoh Pro C900 | User Guide - Page 76
3.1.11 PROBLEM 11: TONER STAINS Toner stains appear on the prints. CAUSE: There is dirt or oil on the surface of the drum unit. Step 1 In [Adjustment] menu, enable 3-309-010 (Oil removal mode). 27 - Ricoh Pro C900 | User Guide - Page 77
. You can use A3, SRA A3, DLT, or 12"x18" for test printing. For users of Pro C900, press the Printer function/[fierydriven] key on the control panel. For Pro C900S, press the [Program] key. Press [Print]. Select the tray containing the paper you have loaded in Step 1. Select the black color. NOTE - Ricoh Pro C900 | User Guide - Page 78
Guide. Problem Sheets cannot be delivered. Cause The ends of the sheets are slightly curled. Sheets are delivered skewed. The tray's paper setting does not match the size of the paper loaded in the tray. Sheets of an undetectable type, such as color or preprinted sheets, are being used To print - Ricoh Pro C900 | User Guide - Page 79
Problem Multiple sheets feed in at once. Cause The ends of the sheets are slightly curled. Double feeding occurs when using the LCT. Sheets of differing paper types or thickness are loaded in the same paper tray. Sheets of an undetectable type, such as color or preprinted sheets, are being used. - Ricoh Pro C900 | User Guide - Page 80
4. Using the hex driver, turn the black screws to lock the front (1) and rear (2) locks. . 1 RPG043 7. Reconnect the ground leakage circuit breaker for the machine and fixing heater. 8. Press the main power switch to turn the machine on, close the left and right front cover, and then wait for - Ricoh Pro C900 | User Guide - Page 81
11. Press the [Reset PM Counter:Paper Transfer Roller Unit] button. 12. If a confirmation message appears, press the [Continue] button. Note: The counter will be reset. 13. When the counter is reset, press the [Confirm] button. Copyright © 2008, 2009 EN USA G178-9504B 50 - Ricoh Pro C900 | User Guide - Page 82
Introduction This manual contains detailed instructions and notes on the operation and use of this machine. For your safety and benefit, read this manual carefully before using the machine. Keep this manual in a handy place for quick reference. Important • Contents of this manual are subject to - Ricoh Pro C900 | User Guide - Page 83
] Menu 5 2. Display/Items and Features 6 3. Values for Settings on the [Adjustment] Menu 8 3.1 [Adjustment] List...8 3.2 Adjustment Settings 11 4. Using the [Adjustment Settings for Skilled Operators] Menu ..28 4.1 Preparation: Displaying the [Adjustment Settings for Skilled Operators] menu - Ricoh Pro C900 | User Guide - Page 84
pay attention to when using the machine, and explanations of likely causes of paper misfeeds, damage to originals, or loss of data. Be sure to read these explanations. Note: Indicates supplementary explanations of the machine's functions, and instructions on resolving user errors. [ ]: indicates the - Ricoh Pro C900 | User Guide - Page 85
on the back of the machine. 2. Turn the main power switch to ON, and wait for the machine to warm up. 3. After the machine has warmed up, press the Printer function/[fierydriven] key on the control panel for users of Pro C900. For users of Pro C900S, press the [Program] key to display the Main Menu - Ricoh Pro C900 | User Guide - Page 86
of Adjustment Settings can be scrolled or searched through by [Page] or [Line]. 4. [Finished] Exit the [Adjustment] menu. 5. Adjustment Table Enter numbers or select items using the [./*], [1-0], and [#] keys. 6. [System Status] View the status of the machine. 6 - Ricoh Pro C900 | User Guide - Page 87
2. Display/Items and Features 2.1.1 Inputting To enter numbers or select items, use the machine's [./*], [1-0], and [#] keys. 7 - Ricoh Pro C900 | User Guide - Page 88
the [Adjustment] Menu 3.1 [Adjustment] List Note: Items are displayed according to the direction of paper feed, which you can specify by pressing [Moving Direction = Horizontal (right and left)] and [Crossing Direction = Vertical (top and bottom)]. u Shift Image Adjustment SP Item 1-710 Leading - Ricoh Pro C900 | User Guide - Page 89
3.2.2 u Jogger Adjustments SP Item 6-710 Adj Leading edge stopper press 6-715 Adjust Output jog Position 6-720 End Bind Jogger Adj 6-740 vertical alignment when using the finisher shift tray. Specify this setting for each paper size. Adjust the horizontal alignment when using the finisher - Ricoh Pro C900 | User Guide - Page 90
Density Adj. 6-770 Stacker Full Setting 3. Values for Settings on the [Adjustment] Menu Description Reference Use this if the print image is misaligned by more than 2-3 mm when printing on color, pre-printed, or narrow sheets up to 147 mm wide. After disabling "Skew detection" and "Side-to-Side - Ricoh Pro C900 | User Guide - Page 91
3.2 Adjustment Settings 3.2.1 Shift Image Adjustment 3. Values for Settings on the [Adjustment] Menu 1. Using the [./*] key and [1-0] keys, enter the value you require for the setting, and then press the [#] key. Note: 1. Leading Edge Registration1,2 + shifts right. - shifts left. 2. Side-to-Side - Ricoh Pro C900 | User Guide - Page 92
LCT1 Lower Tray 010 A3/DLT LCT2 Upper Tray 011 A3/DLT LCT2 Lower Tray Note: Settings for A4/LT LCT are available only on Pro C900. 12 - Ricoh Pro C900 | User Guide - Page 93
3.2.2 Finishing Position Adjustments 3. Values for Settings on the [Adjustment] Menu 1. Using the [./*] key and [1-0] keys, enter the value you require for the setting, and then press the [#] key. SP Item 6-700 Staple Pos. Adj. 6-705 Punch Pos. Adj. (V) 6-730 Fine Adjust Booklet Adjust Across - Ricoh Pro C900 | User Guide - Page 94
3. Values for Settings on the [Adjustment] Menu SP Item No. Setting 6-735 6-755 6-760 6-780 6-781 6-782 006 007 008 009 Fold Pos. Adj. 001 002 003 004 005 006 007 008 009 Z Fold Pos. Fine Adj 001 (End) 002 003 004 005 006 007 008 Z Fold Pos. Fine Adj 001 (Frm) 002 - Ricoh Pro C900 | User Guide - Page 95
3. Values for Settings on the [Adjustment] Menu Note: Enter the degree of edge square deviation in "Rect. Angle Adj.". 15 - Ricoh Pro C900 | User Guide - Page 96
Jogger Adjustments 3. Values for Settings on the [Adjustment] Menu 1. Using the [./*] key and [1-0] keys, enter the value you require for the setting, and then press the [#] key. SP 6-710 6-715 Item Adj Leading edge stopper press Adjust Output jog Position No. Setting 001 A3 Vertical 002 B4 - Ricoh Pro C900 | User Guide - Page 97
3. Values for Settings on the [Adjustment] Menu SP 6-720 6-740 Item End Bind Jogger Adj Adj. Booklet Stapling Pos. No. Setting 010 LG Vertical 011 LT Vertical 012 LT Horizontal 013 HLT Vertical 014 HLT Horizontal 015 Other 001 A4 Horizontal 002 B5 Horizontal 003 LT Horizontal 001 A3 Vertical 002 - Ricoh Pro C900 | User Guide - Page 98
Other Adjustment Settings 1 Detect Skew 3. Values for Settings on the [Adjustment] Menu 1. Press the selection you require for the setting. SP Item 1-730 Detect Skew No. Setting Lower Tray Enable Disable Note: Settings for A4/LT LCT are available only on Pro C900. Default Value Enable 18 - Ricoh Pro C900 | User Guide - Page 99
1 Detect Side Regist 3. Values for Settings on the [Adjustment] Menu 1. Press the selection you require for the setting. SP Item No. Setting Selection 1-761 Detect Side DLT LCT2 Lower Tray Enable Disable Note: Settings for A4/LT LCT are available only on Pro C900. Default Value Enable 19 - Ricoh Pro C900 | User Guide - Page 100
1 Paper Curl Adjustment 3. Values for Settings on the [Adjustment] Menu 1. Using the [./*] key and [1-0] keys, enter the value you require for the setting, and then press the [#] key. SP 1-906 Item Paper Curl Adjustment No. Setting Selection 001 Paper 0: Default Position: Lower Path Path - Ricoh Pro C900 | User Guide - Page 101
1 Erase Paper Lead Edge 3. Values for Settings on the [Adjustment] Menu 1. Using the [./*] key and [1-0] keys, enter the value you require for the setting, and then press the [#] key. SP 1-908 Item No Setting Erase Paper Lead 001 Edge 002 003 004 005 006 007 008 009 010 011 012 013 014 - Ricoh Pro C900 | User Guide - Page 102
3. Values for Settings on the [Adjustment] Menu SP Item No Setting Default Maxim Minim Gradat Unit Value um um ion Value Value Value 025 Trace: Special5 026 Plain: Special5 027 MidThick: Special5 028 Trace: Special6 029 Plain: Special6 030 MidThick: Special6 22 - Ricoh Pro C900 | User Guide - Page 103
1 Detect Multi Feed 3. Values for Settings on the [Adjustment] Menu 1. Press the selection you require for the setting. SP 1-910 Item Detect Multi Feed No. Setting LCT2 Lower Tray Selection Enable Disable Note: Settings for A4/LT LCT are available only on Pro C900. Default Value Enable 23 - Ricoh Pro C900 | User Guide - Page 104
1 Blow Fan Duty Adj. 3. Values for Settings on the [Adjustment] Menu 1. Using the [./*] key and [1-0] keys, enter the value you require for the setting, and then press the [#] key. SP Item 1-920 Blow Fan Duty Adj. No Setting Default Maxim Minim Gradat Unit Value um um ion Value Value - Ricoh Pro C900 | User Guide - Page 105
1 Air Feed Start Time Adj. 3. Values for Settings on the [Adjustment] Menu 1. Using the [./*] key and [1-0] keys, enter the value you require for the setting, and then press the [#] key. SP Item 1-921 Air Feed Start Time Adj. No Setting Default Maxim Minim Gradat Unit Value um um ion - Ricoh Pro C900 | User Guide - Page 106
1 Initialize T Sensor 3. Values for Settings on the [Adjustment] Menu 1. Press the color to initialize the sensor, and then press the [#] key. 2. If you press [Execute], the machine carries out initialization every time the developer is replaced. SP 3-801 Item Initialize T Sensor No. Setting - Ricoh Pro C900 | User Guide - Page 107
1 Stacker Full Setting 3. Values for Settings on the [Adjustment] Menu 1. Using the [./*] key and [1-0] keys, enter the value you require for the setting, and then press the [#] key. SP 6-770 Item Stacker Full Setting No. Setting Selection 001 - 0: 100% 1: 75% 2: 50% 3: 25% Default Value - Ricoh Pro C900 | User Guide - Page 108
Operators] Menu 4. Using the [Adjustment Settings use the [Adjustment Settings for Skilled Operators] menu, you must first configure your machine's [Administrator Authentication Management] setting. 1. Press [User Tools] key on the control panel. 2. Press [System Settings] on the display. 3. Press - Ricoh Pro C900 | User Guide - Page 109
4. Using the [Adjustment Settings for Skilled Operators] Menu 4. Press [Administrator Authentication Management]. If any keys cannot be selected on the display, press [ Next]. 5. Press [Machine Management]. 6. Select [On] for "Admin. Authentication". 7. Press [OK]. 29 - Ricoh Pro C900 | User Guide - Page 110
8. Press [Exit]. 4. Using the [Adjustment Settings for Skilled Operators] Menu [Adjustment Settings for Skilled Operators] appears. 30 - Ricoh Pro C900 | User Guide - Page 111
4. Using the [Adjustment Settings for Skilled Operators] Menu 4.2 Change the [Adjustment Settings for Skilled Operators] Mode 1. Press [Adjustment Settings for Skilled Operators]. 2. Press [Login]. 3. Enter your login user name, and then press [OK]. If you are logging on as the administrator for the - Ricoh Pro C900 | User Guide - Page 112
4. Using the [Adjustment Settings for Skilled Operators] Menu 5. Enter your login password again, and then press [OK]. The screen appears for Adjustment Settings for Skilled Operators Mode. Note: If a print job is suspended, press [APL Window] instead of [Exit] to exit the Adjustment Settings for - Ricoh Pro C900 | User Guide - Page 113
4. Using the [Adjustment Settings for Skilled Operators] Menu 4.3 Values for Settings on the [ Exe Init TD Sensor Manual ProCon Staple Position Adjustment Punch Hole Position Adjustment End Bind Jogger Adjustment Adjust Output Jog Position Adjust Leading Edge Stopper Press Adjust Booklet Stapling - Ricoh Pro C900 | User Guide - Page 114
Index A Adj Leading edge stopper press, 9, 16 Adj. Booklet Stapling Pos., 9, 17 Adjust Output jog Position, 9, 16 Air , 6 Stacker Full Setting, 10, 27 Staple Pos. Adj., 13 Staple Position Adjustment, 9 [System Status], 6 Z Z Fold Pos. Fine Adj (End), 9, 14 Z Fold Pos. Fine Adj (Frm), 9, 14 34 - Ricoh Pro C900 | User Guide - Page 115
Copyright © 2008, 2009 EN USA G178-9505B 35
-
 1
1 -
 2
2 -
 3
3 -
 4
4 -
 5
5 -
 6
6 -
 7
7 -
8
-
9
-
10
-
11
-
12
-
13
-
14
-
15
-
16
-
17
-
18
-
19
-
20
-
21
-
22
-
23
-
24
-
25
-
26
-
27
-
28
-
29
-
30
-
31
-
32
-
33
-
34
-
35
-
36
-
37
-
38
-
39
-
40
-
41
-
42
-
43
-
44
-
45
-
46
-
47
-
48
-
49
-
50
-
51
-
52
-
53
-
54
-
55
-
56
-
57
-
58
-
59
-
60
-
61
-
62
-
63
-
64
-
65
-
66
-
67
-
68
-
69
-
70
-
71
-
72
-
73
-
74
-
75
-
76
-
77
-
78
-
79
-
80
-
81
-
82
-
83
-
84
-
85
-
86
-
87
-
88
-
89
-
90
-
91
-
92
-
93
-
94
-
95
-
96
-
97
-
98
-
99
-
100
-
101
-
102
-
103
-
104
-
105
-
106
-
107
-
108
-
109
-
110
-
111
-
112
-
113
-
114
-
115
 |
 |

Adjustment Item Menu Guide: TCRU
Model Name:
Pro C900S/Pro C900
Read this manual carefully before using this machine and keep it handy for future reference.
1