Ricoh Pro C900 User Guide - Page 26
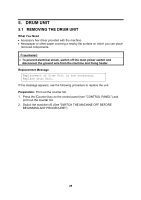
REINSTALLING THE DRUM CLEANING UNIT, Procedure, Important, Never touch the green surface of the drum
 |
View all Ricoh Pro C900 manuals
Add to My Manuals
Save this manual to your list of manuals |
Page 26 highlights
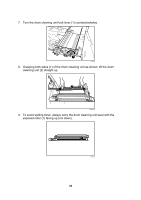
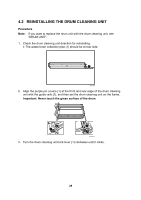
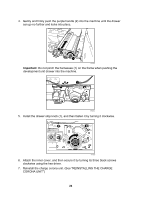
4.2 REINSTALLING THE DRUM CLEANING UNIT Procedure Note: If you want to replace the drum unit with the drum cleaning unit, see "DRUM UNIT". 1. Check the drum cleaning unit direction for reinstalling. • The waste toner collection pipe (1) should be at rear side. 1 RPG018S 2. Align the purple pin covers (1) at the front and rear edge of the drum cleaning unit with the guide rails (2), and then set the drum cleaning unit on the frame. Important: Never touch the green surface of the drum. 2 2 1 1 RPG004S 3. Turn the drum cleaning unit lock lever (1) clockwise until it clicks. 25
-
 1
1 -
2
-
3
-
4
-
5
-
6
-
7
-
8
-
9
-
10
-
11
-
12
-
13
-
14
-
15
-
16
-
17
-
18
-
19
-
20
-
 21
21 -
 22
22 -
 23
23 -
 24
24 -
 25
25 -
 26
26 -
 27
27 -
 28
28 -
 29
29 -
 30
30 -
 31
31 -
32
-
33
-
34
-
35
-
36
-
37
-
38
-
39
-
40
-
41
-
42
-
43
-
44
-
45
-
46
-
47
-
48
-
49
-
50
-
51
-
52
-
53
-
54
-
55
-
56
-
57
-
58
-
59
-
60
-
61
-
62
-
63
-
64
-
65
-
66
-
67
-
68
-
69
-
70
-
71
-
72
-
73
-
74
-
75
-
76
-
77
-
78
-
79
-
80
-
81
-
82
-
83
-
84
-
85
-
86
-
87
-
88
-
89
-
90
-
91
-
92
-
93
-
94
-
95
-
96
-
97
-
98
-
99
-
100
-
101
-
102
-
103
-
104
-
105
-
106
-
107
-
108
-
109
-
110
-
111
-
112
-
113
-
114
-
115
 |
 |
4.2
REINSTALLING THE DRUM CLEANING UNIT
Procedure
Note:
If you want to replace the drum unit with the drum cleaning unit, see
"DRUM UNIT".
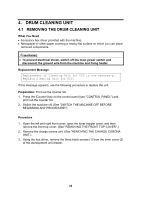
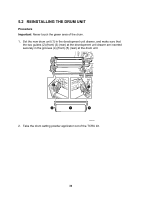
1.
Check the drum cleaning unit direction for reinstalling.
•
The waste toner collection pipe (1) should be at rear side.
RPG018S
1
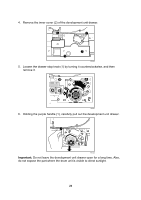
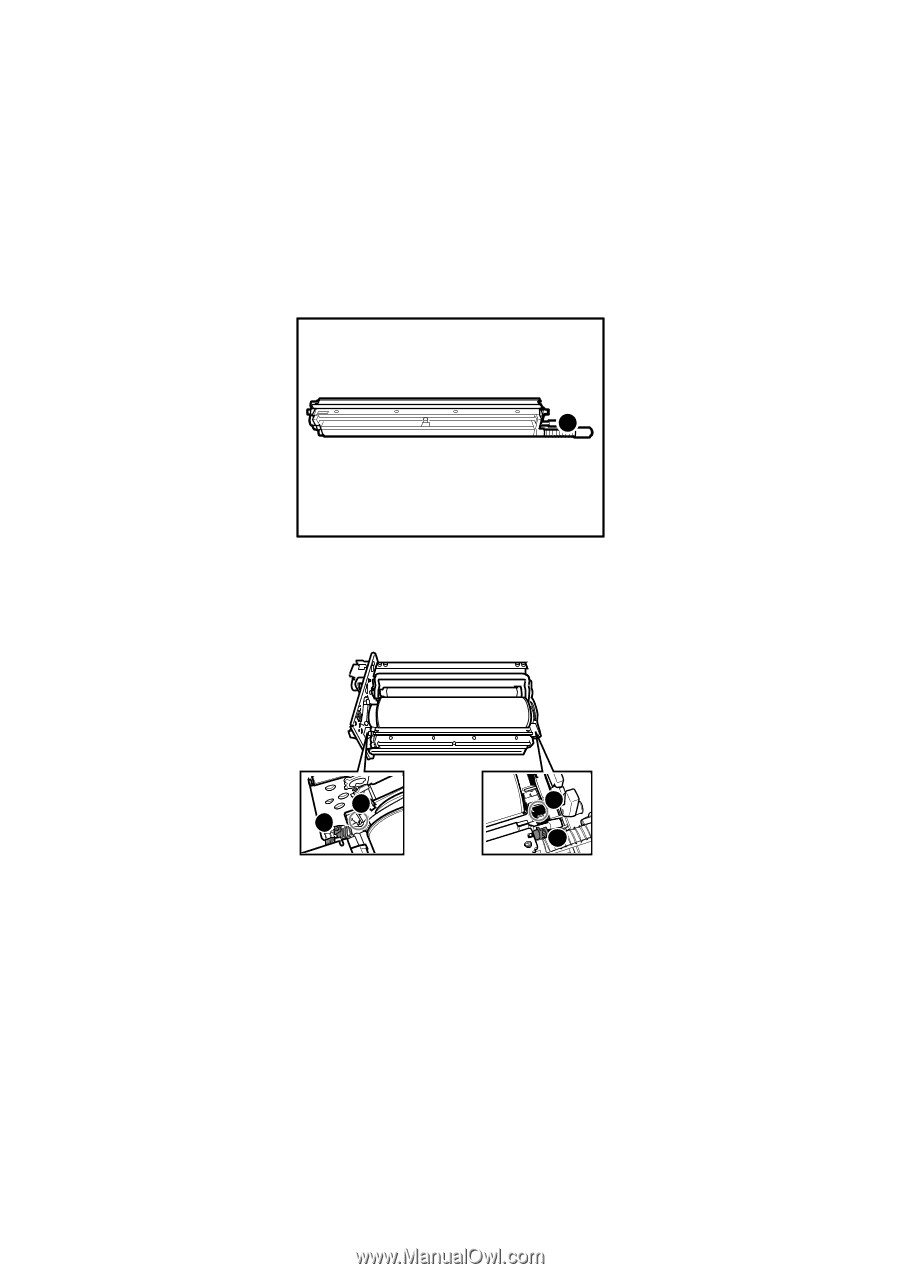
2.
Align the purple pin covers (1) at the front and rear edge of the drum cleaning
unit with the guide rails (2), and then set the drum cleaning unit on the frame.
Important
:
Never touch the green surface of the drum
.
RPG004S
1
1
2
2
3.
Turn the drum cleaning unit lock lever (1) clockwise until it clicks.
25