Ricoh Pro C900 User Guide - Page 77
Problem 12: Difference In Glossiness, Cause, Step 1 - pro c900s toner
 |
View all Ricoh Pro C900 manuals
Add to My Manuals
Save this manual to your list of manuals |
Page 77 highlights
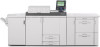
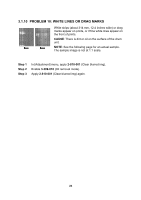
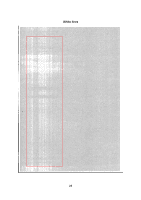
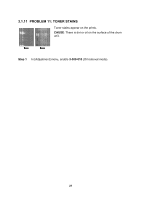
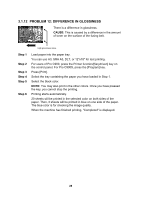
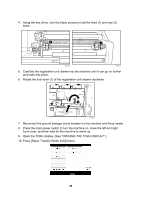
3.1.12 PROBLEM 12: DIFFERENCE IN GLOSSINESS There is a difference in glossiness. CAUSE: This is caused by a difference in the amount of toner on the surface of the fusing belt. High glossiness areas Step 1 Step 2 Step 3 Step 4 Step 5 Step 6 Load paper into the paper tray. You can use A3, SRA A3, DLT, or 12"x18" for test printing. For users of Pro C900, press the Printer function/[fierydriven] key on the control panel. For Pro C900S, press the [Program] key. Press [Print]. Select the tray containing the paper you have loaded in Step 1. Select the black color. NOTE: You may also print in the other colors. Once you have pressed the key, you cannot stop the printing. Printing starts automatically. 20 sheets will be printed in the selected color on both sides of the paper. Then, 3 sheets will be printed in blue on one side of the paper. The blue color is for checking the image quality. When the machine has finished printing, "Completed" is displayed. 28
-
 1
1 -
2
-
3
-
4
-
5
-
6
-
7
-
8
-
9
-
10
-
11
-
12
-
13
-
14
-
15
-
16
-
17
-
18
-
19
-
20
-
21
-
22
-
23
-
24
-
25
-
26
-
27
-
28
-
29
-
30
-
31
-
32
-
33
-
34
-
35
-
36
-
37
-
38
-
39
-
40
-
41
-
42
-
43
-
44
-
45
-
46
-
47
-
48
-
49
-
50
-
51
-
52
-
53
-
54
-
55
-
56
-
57
-
58
-
59
-
60
-
61
-
62
-
63
-
64
-
65
-
66
-
67
-
68
-
69
-
70
-
71
-
 72
72 -
 73
73 -
 74
74 -
 75
75 -
 76
76 -
 77
77 -
 78
78 -
 79
79 -
 80
80 -
 81
81 -
 82
82 -
83
-
84
-
85
-
86
-
87
-
88
-
89
-
90
-
91
-
92
-
93
-
94
-
95
-
96
-
97
-
98
-
99
-
100
-
101
-
102
-
103
-
104
-
105
-
106
-
107
-
108
-
109
-
110
-
111
-
112
-
113
-
114
-
115
 |
 |
