Samsung DVD-HR720 User Manual (user Manual) (ver.1.0) (English) - Page 7

Contents - manual

Page 7 highlights

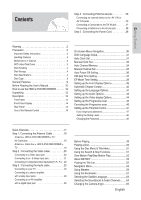
Getting Started Contents Getting Started Warning 2 Precaution 3 Important Safety Instructions 3 Handling Cautions 3 Maintenance of Cabinet 3 HDD (Hard Disk Drive 3 Disc Handling 4 Disc Storage 4 Disc Specifications 4 Disc Copy 6 General Features 9 Before Reading the User's Manual 10 How to use the HDD & DVD RECORDER 10 Unpacking 12 Description 14 Front Panel 14 Front Panel Display 14 Rear Panel 15 Tour of the Remote Control 16 Connecting & Setting up Step 4 : Connecting External devices 26 Connecting an external device to the AV 1 IN or AV 2 IN jacks 26 Connecting a Camcorder to the DV IN jack 27 Connecting a Cable box to the G-Link jack 28 Step 5 : Connecting the Power Cord 29 System Setup On-Screen Menu Navigation 30 OSD Language Setup 31 Auto Clock Set 31 Manual Clock Set 33 Auto Channel Memory 34 Manual Channel Set 35 Auto Power Off Setting 36 CM Skip Time Setting 37 EP Mode Time Setting 38 Setting up the Front Display Options 39 Automatic Chapter Creator 40 Setting up the Language Options 41 Setting up the Audio Options 42 Setting up the Video display Options 44 Setting up the Progressive scan 45 Canceling the Progressive scan 46 Setting up the Parental Control 47 If you forgot your password 47 Setting the Rating Level 48 Changing the Password 48 Quick Overview 17 Step 1: Connecting the Antenna Cable 18 Antenna + HDD & DVD RECORDER + TV : No Cable box 18 Antenna + Cable box + HDD & DVD RECORDER + TV 19 Step 2 : Connecting the Video cable 20 Connecting to a Video input jack 20 Connecting to an S-Video input jack 21 Connecting to Component video input jacks(Y ,PB, PR) . .22 Step 3 : Connecting the Audio cable 23 Connecting to your TV 23 Connecting to a stereo amplifier with analog input jacks 24 Connecting to an AV amplifier with a digital input jack 25 Playback Before Playing 49 Playing a Disc 50 Using the Disc Menu & Title Menu 51 Using the Search & Skip Functions 51 Slow Motion Play/Step Motion Play 52 About ANYKEY 53 Playing the Title List 55 Navigation Menu 56 Using Markers 59 Using the Bookmarks 61 Selecting the Subtitle Language 63 Selecting the Soundtracks & Audio Channels .........64 Changing the Camera Angle 65 English - 7

  • 1
  • 2
  • 3
  • 4
  • 5
  • 6
  • 7
  • 8
  • 9
  • 10
  • 11
  • 12
  • 13
  • 14
  • 15
  • 16
  • 17
  • 18
  • 19
  • 20
  • 21
  • 22
  • 23
  • 24
  • 25
  • 26
  • 27
  • 28
  • 29
  • 30
  • 31
  • 32
  • 33
  • 34
  • 35
  • 36
  • 37
  • 38
  • 39
  • 40
  • 41
  • 42
  • 43
  • 44
  • 45
  • 46
  • 47
  • 48
  • 49
  • 50
  • 51
  • 52
  • 53
  • 54
  • 55
  • 56
  • 57
  • 58
  • 59
  • 60
  • 61
  • 62
  • 63
  • 64
  • 65
  • 66
  • 67
  • 68
  • 69
  • 70
  • 71
  • 72
  • 73
  • 74
  • 75
  • 76
  • 77
  • 78
  • 79
  • 80
  • 81
  • 82
  • 83
  • 84
  • 85
  • 86
  • 87
  • 88
  • 89
  • 90
  • 91
  • 92
  • 93
  • 94
  • 95
  • 96
  • 97
  • 98
  • 99
  • 100
  • 101
  • 102
  • 103
  • 104
  • 105
  • 106
  • 107
  • 108
  • 109
  • 110
  • 111
  • 112
  • 113
  • 114
  • 115
  • 116
  • 117
  • 118
  • 119
  • 120
  • 121
  • 122
  • 123
  • 124
  • 125
  • 126
  • 127
  • 128
  • 129
  • 130
  • 131
  • 132
  • 133
  • 134
  • 135
  • 136
  • 137
  • 138
  • 139
  • 140
  • 141
  • 142
  • 143
  • 144
  • 145
  • 146
  • 147
  • 148
  • 149
  • 150
  • 151
  • 152
  • 153
  • 154
  • 155
  • 156
  • 157
  • 158
  • 159
  • 160
  • 161
  • 162
  • 163
  • 164
  • 165
  • 166
  • 167
  • 168

G
etting Started
English
- 7
Contents
Getting Started
Getting Started
Warning . . . . . . . . . . . . . . . . . . . . . . . . . . . . . . . . . . .2
Precaution . . . . . . . . . . . . . . . . . . . . . . . . . . . . . . . . .3
Important Safety Instructions . . . . . . . . . . . . . . . . . . . . . .3
Handling Cautions . . . . . . . . . . . . . . . . . . . . . . . . . . . . . .3
Maintenance of Cabinet . . . . . . . . . . . . . . . . . . . . . . . . . .3
HDD (Hard Disk Drive) . . . . . . . . . . . . . . . . . . . . . . . . . . .3
Disc Handling . . . . . . . . . . . . . . . . . . . . . . . . . . . . . . . . . .4
Disc Storage . . . . . . . . . . . . . . . . . . . . . . . . . . . . . . . . . . .4
Disc Specifications . . . . . . . . . . . . . . . . . . . . . . . . . . . . . .4
Disc Copy . . . . . . . . . . . . . . . . . . . . . . . . . . . . . . . . . . . . .6
General Features
. . . . . . . . . . . . . . . . . . . . . . . . . . .9
Before Reading the User’s Manual . . . . . . . . . . . . .10
How to use the HDD & DVD RECORDER . . . . . . .10
Unpacking . . . . . . . . . . . . . . . . . . . . . . . . . . . . . . . .12
Description . . . . . . . . . . . . . . . . . . . . . . . . . . . . . . . .14
Front Panel
. . . . . . . . . . . . . . . . . . . . . . . . . . . . . . . . . .14
Front Panel Display . . . . . . . . . . . . . . . . . . . . . . . . . . . .14
Rear Panel
. . . . . . . . . . . . . . . . . . . . . . . . . . . . . . . . . .15
Tour of the Remote Control . . . . . . . . . . . . . . . . . . . . . .16
Connecting & Setting up
Quick Overview . . . . . . . . . . . . . . . . . . . . . . . . . . .17
Step 1: Connecting the Antenna Cable . . . . . . . . .18
Antenna + HDD & DVD RECORDER + TV :
No Cable box . . . . . . . . . . . . . . . . . . . . . . . . . . . . . . .18
Antenna + Cable box + HDD & DVD RECORDER +
TV . . . . . . . . . . . . . . . . . . . . . . . . . . . . . . . . . . . . . . . .19
Step 2 : Connecting the Video cable . . . . . . . . . . .20
Connecting to a Video input jack . . . . . . . . . . . . . . . .20
Connecting to an
S-Video input jack . . . . . . . . . . . . .21
Connecting to Component video input jacks(Y ,P
B
, P
R
)
. .22
Step 3 : Connecting the Audio cable . . . . . . . . . . .23
Connecting to your TV . . . . . . . . . . . . . . . . . . . . . . . .23
Connecting to a stereo amplifier
with analog input jacks
. . . . . . . . . . . . . . . . . . . . . . .24
Connecting to an AV amplifier
with a digital input jack
. . . . . . . . . . . . . . . . . . . . . . .25
Step 4 : Connecting External devices . . . . . . . . . .26
Connecting an external device to the
AV 1 IN or
AV 2 IN jacks . . . . . . . . . . . . . . . . . . . . . . . . . . . . . . .26
Connecting a Camcorder to the DV IN jack . . . . . . . .27
Connecting a Cable box to the G-Link jack . . . . . . . .28
Step 5 : Connecting the Power Cord
. . . . . . . . . .29
System Setup
System Setup
On-Screen Menu Navigation
.....................................
30
OSD Language Setup
...............................................
31
Auto Clock Set
...........................................................
31
Manual Clock Set
.......................................................
33
Auto Channel Memory
...............................................
34
Manual Channel Set
..................................................
35
Auto Power Off Setting
..............................................
36
CM Skip Time Setting
................................................
37
EP Mode Time Setting
...............................................
38
Setting up the Front Display Options
........................
39
Automatic Chapter Creator
........................................
40
Setting up the Language Options
.............................
41
Setting up the Audio Options
.....................................
42
Setting up the Video display Options
........................
44
Setting up the Progressive scan
...............................
45
Canceling the Progressive scan
...............................
46
Setting up the Parental Control
.................................
47
If you forgot your password
............................................
47
Setting the Rating Level
..................................................
48
Changing the Password
.................................................
48
Playback
Playback
Before Playing
............................................................
49
Playing a Disc
.............................................................
50
Using the Disc Menu & Title Menu
...........................
51
Using the Search & Skip Functions
..........................
51
Slow Motion Play/Step Motion Play
..........................
52
About ANYKEY
..........................................................
53
Playing the Title List
...................................................
55
Navigation Menu
........................................................
56
Using Markers
............................................................
59
Using the Bookmarks
................................................
61
Selecting the Subtitle Language
...............................
63
Selecting the Soundtracks & Audio Channels
.........
64
Changing the Camera Angle
.....................................
65