Samsung MZ-5PA128B User Manual - Page 95
Verifying that a backup is successful, Editing backup settings
 |
View all Samsung MZ-5PA128B manuals
Add to My Manuals
Save this manual to your list of manuals |
Page 95 highlights
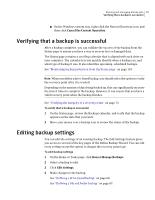
Running and managing backup jobs 95 Verifying that a backup is successful ■ On the Windows system tray, right-click the Norton Ghost tray icon, and then click Cancel the Current Operation. Verifying that a backup is successful After a backup completes, you can validate the success of the backup from the Status page to ensure you have a way to recover lost or damaged data. The Status page contains a scrolling calendar that is aligned with each drive on your computer. The calendar lets you quickly identify when a backup ran, and what type of backup it was. It also identifies upcoming, scheduled backups. See "Monitoring backup protection from the Status page" on page 118. Note: When you define a drive-based backup, you should select the option to verify the recovery point after it is created. Depending on the amount of data being backed up, this can significantly increase the time it takes to complete the backup. However, it can ensure that you have a valid recovery point when the backup finishes. See "Verifying the integrity of a recovery point" on page 73. To verify that a backup is successful 1 On the Status page, review the Backups calendar, and verify that the backup appears on the date that you ran it. 2 Move your mouse over a backup icon to review the status of the backup. Editing backup settings You can edit the settings of an existing backup. The Edit Settings feature gives you access to several of the key pages of the Define Backup Wizard. You can edit every setting except the option to change the recovery point type. To edit backup settings 1 On the Home or Tasks page, click Run or Manage Backups. 2 Select a backup to edit. 3 Click Edit Settings. 4 Make changes to the backup. See "Defining a drive-based backup" on page 60. See "Defining a file and folder backup" on page 87.
-
 1
1 -
2
-
3
-
4
-
5
-
6
-
7
-
8
-
9
-
10
-
11
-
12
-
13
-
14
-
15
-
16
-
17
-
18
-
19
-
20
-
21
-
22
-
23
-
24
-
25
-
26
-
27
-
28
-
29
-
30
-
31
-
32
-
33
-
34
-
35
-
36
-
37
-
38
-
39
-
40
-
41
-
42
-
43
-
44
-
45
-
46
-
47
-
48
-
49
-
50
-
51
-
52
-
53
-
54
-
55
-
56
-
57
-
58
-
59
-
60
-
61
-
62
-
63
-
64
-
65
-
66
-
67
-
68
-
69
-
70
-
71
-
72
-
73
-
74
-
75
-
76
-
77
-
78
-
79
-
80
-
81
-
82
-
83
-
84
-
85
-
86
-
87
-
88
-
89
-
 90
90 -
 91
91 -
 92
92 -
 93
93 -
 94
94 -
 95
95 -
 96
96 -
 97
97 -
 98
98 -
 99
99 -
 100
100 -
101
-
102
-
103
-
104
-
105
-
106
-
107
-
108
-
109
-
110
-
111
-
112
-
113
-
114
-
115
-
116
-
117
-
118
-
119
-
120
-
121
-
122
-
123
-
124
-
125
-
126
-
127
-
128
-
129
-
130
-
131
-
132
-
133
-
134
-
135
-
136
-
137
-
138
-
139
-
140
-
141
-
142
-
143
-
144
-
145
-
146
-
147
-
148
-
149
-
150
-
151
-
152
-
153
-
154
-
155
-
156
-
157
-
158
-
159
-
160
-
161
-
162
-
163
-
164
-
165
-
166
-
167
-
168
-
169
-
170
-
171
-
172
-
173
-
174
-
175
-
176
-
177
-
178
-
179
-
180
-
181
-
182
-
183
-
184
-
185
-
186
-
187
-
188
-
189
-
190
-
191
-
192
-
193
-
194
-
195
-
196
-
197
-
198
-
199
-
200
-
201
-
202
-
203
-
204
-
205
-
206
-
207
-
208
-
209
-
210
-
211
-
212
-
213
 |
 |
