Sharp AR-P450 AR-P350 AR-P450 Operation Manual - Page 66
Misfeed Removal
 |
View all Sharp AR-P450 manuals
Add to My Manuals
Save this manual to your list of manuals |
Page 66 highlights
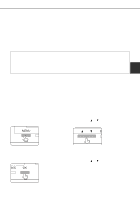
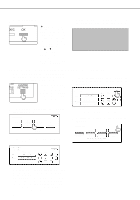
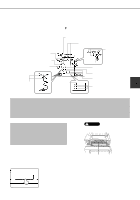
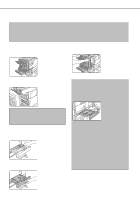
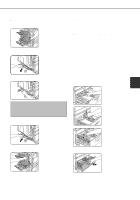
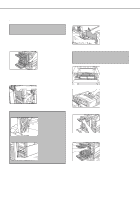
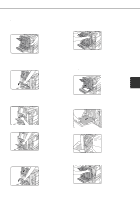
MISFEED REMOVAL When the machine is being operated from the operation panel on the main unit: q If the machine is not equipped with a scanner, all messages will appear on the display panel of the main unit. For machines equipped with a scanner, messages will appear on the touch panel display on the scanner module. When a misfeed has occurred, printing will stop and the message shown below will appear. Follow the procedure below to remove misfed paper. PAPER JAM. [i] NOTES q Do not damage or touch the photoconductive drum. (See pages 1-5 and 4-6.) q Be careful not to tear the misfed paper during removal. q If paper is accidentally torn during removal, be sure to remove all pieces. CAUTION The fusing unit is hot. Take care in removing paper. Fusing unit General misfeed removal procedure If the INFORMATION key is pressed when a misfeed has occurred, messages will appear giving guidance for misfeed removal. The messages will appear in sequence and can be viewed by using the and keys. 1 Press the INFORMATION key. The messages in the table below provide guidance for misfeed removal. For more detailed guidance refer to the pages indicated in the table. 2 Press the key. Use the or keys on the operation panel to scroll through the guidance messages. Message PULL OUT TRAY * AND CHECK THE PAPER. OPEN THE LOWER LEFT COVER. OPEN THE LEFT COVER. REMOVE PAPER FROM BYPASS TRAY. OPEN THE DUPLEX COVER. OPEN THE MAIL-BIN COVER. OPEN THE CENTER COVER. OPEN THE FINISHER TOP COVER. SLIDE THE FINISHER AWAY FROM MACHINE. OPEN THE FINISHER FRONT COVER. Page 4-4 4-5 4-6 4-7 4-7 5-8 5-8,5-14 5-14, 5-24 5-24 5-24 3 Press the INFORMATION key to close the misfeed removal guidance. 4-2
-
 1
1 -
2
-
3
-
4
-
5
-
6
-
7
-
8
-
9
-
10
-
11
-
12
-
13
-
14
-
15
-
16
-
17
-
18
-
19
-
20
-
21
-
22
-
23
-
24
-
25
-
26
-
27
-
28
-
29
-
30
-
31
-
32
-
33
-
34
-
35
-
36
-
37
-
38
-
39
-
40
-
41
-
42
-
43
-
44
-
45
-
46
-
47
-
48
-
49
-
50
-
51
-
52
-
53
-
54
-
55
-
56
-
57
-
58
-
59
-
60
-
 61
61 -
 62
62 -
 63
63 -
 64
64 -
 65
65 -
 66
66 -
 67
67 -
 68
68 -
 69
69 -
 70
70 -
 71
71 -
72
-
73
-
74
-
75
-
76
-
77
-
78
-
79
-
80
-
81
-
82
-
83
-
84
-
85
-
86
-
87
-
88
-
89
-
90
-
91
-
92
-
93
-
94
-
95
-
96
-
97
-
98
-
99
-
100
-
101
-
102
-
103
-
104
-
105
-
106
-
107
-
108
-
109
-
110
-
111
-
112
 |
 |
