Sony Ericsson Z520a User Guide - Page 64
Organizer, Synchronization, New Account, Continue, Connection, Remote Initiation, Sync. Interval
 |
View all Sony Ericsson Z520a manuals
Add to My Manuals
Save this manual to your list of manuals |
Page 64 highlights
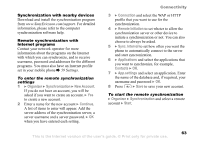
Synchronization with nearby devices Download and install the synchronization program from www.SonyEricsson.com/support. For detailed information, please refer to the computer synchronization software help. Remote synchronization with Internet programs Contact your network operator for more information about the programs on the Internet with which you can synchronize, and to receive username, password and addresses for the different programs. You must also have an Internet profile set in your mobile phone % 59 Settings. To enter the remote synchronization settings 1 } Organizer } Synchronization } New Account. If you do not have an account, you will be asked if you want to create an account. } Yes to create a new account. 2 Enter a name for the new account } Continue. A list of items to enter will appear. Add the server address of the synchronization server, a server username and a server password. } OK when you have entered each setting. Connectivity 3 } Connection and select the WAP or HTTP profile that you want to use for the synchronization. 4 } Remote Initiation to set wheter to allow the synchronization server or other device to initiate a synchronization or not. You can also choose to always be asked. 5 } Sync. Interval to set how often you want the phone to automatically connect to the server and start syncronization. 6 } Applications and select the applications that you want to synchronize, for example, Contacts } OK. 7 } App.settings and select an application. Enter the name of the database and, if required, your username and password } OK. 8 Press } Save to save your new account. To start the remote synchronization } Organizer } Synchronization and select a remote account } Start. This is the Internet version of the user's guide. © Print only for private use. 63
-
 1
1 -
2
-
3
-
4
-
5
-
6
-
7
-
8
-
9
-
10
-
11
-
12
-
13
-
14
-
15
-
16
-
17
-
18
-
19
-
20
-
21
-
22
-
23
-
24
-
25
-
26
-
27
-
28
-
29
-
30
-
31
-
32
-
33
-
34
-
35
-
36
-
37
-
38
-
39
-
40
-
41
-
42
-
43
-
44
-
45
-
46
-
47
-
48
-
49
-
50
-
51
-
52
-
53
-
54
-
55
-
56
-
57
-
58
-
 59
59 -
 60
60 -
 61
61 -
 62
62 -
 63
63 -
 64
64 -
 65
65 -
 66
66 -
 67
67 -
 68
68 -
 69
69 -
70
-
71
-
72
-
73
-
74
-
75
-
76
-
77
-
78
-
79
-
80
-
81
-
82
-
83
-
84
-
85
-
86
-
87
-
88
-
89
-
90
-
91
-
92
-
93
-
94
-
95
-
96
-
97
-
98
-
99
-
100
 |
 |