Sony DCR-TRV80 Operating Instructions - Page 64
Interval Recording
 |
View all Sony DCR-TRV80 manuals
Add to My Manuals
Save this manual to your list of manuals |
Page 64 highlights
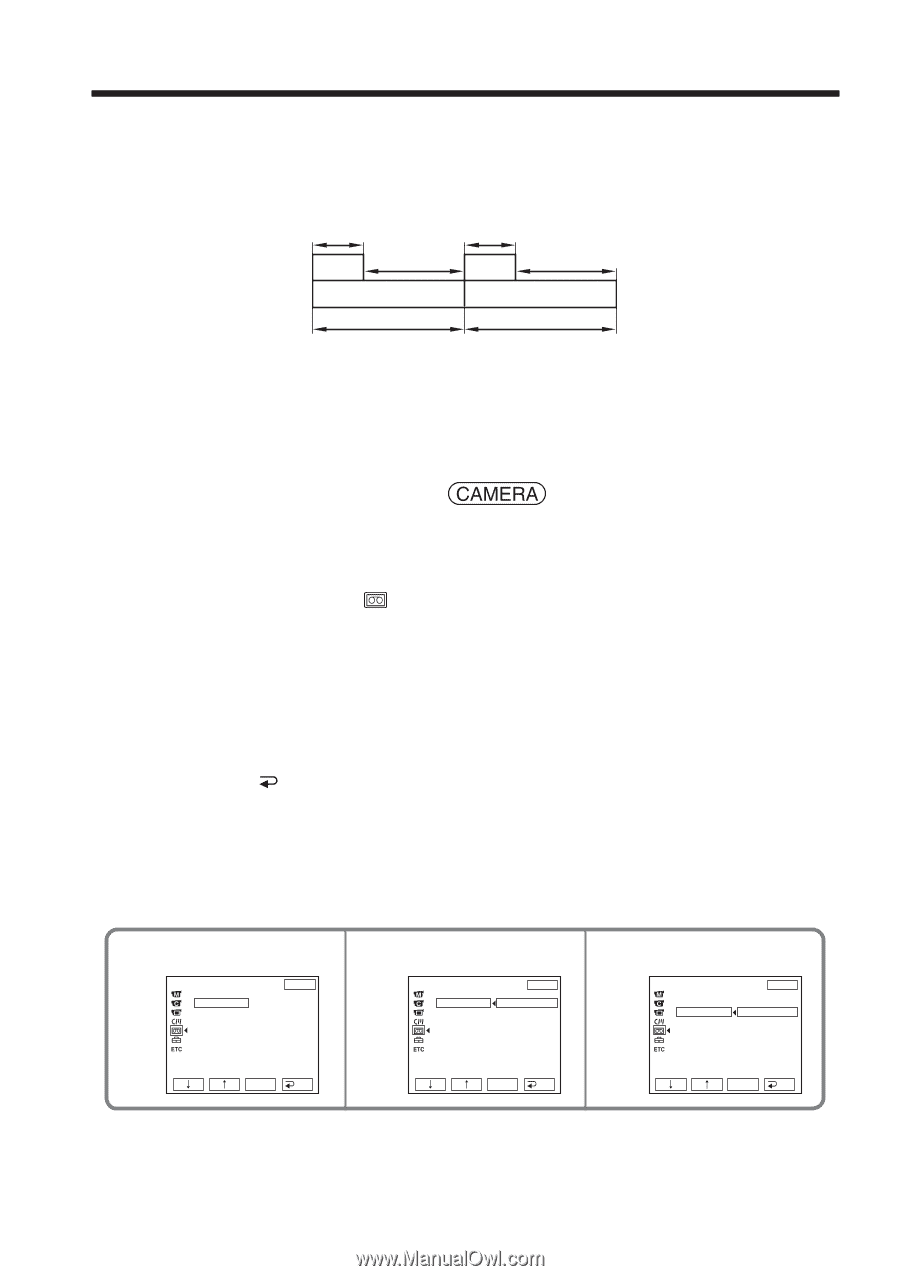
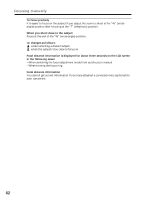
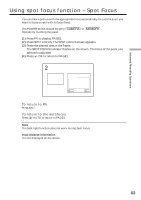
Interval Recording You can make a time-lapse recording by setting your camcorder to automatically record and standby sequentially. You can achieve an excellent recording for flowering, emergence, etc. with this function. Example 1 s 9 min 59 s [a] [b] 10 min [a] REC TIME [b] INTERVAL 1 s 9 min 59 s [a] [b] 10 min There may be a discrepancy in recording time of up to +/- six frames from the selected time. The POWER switch should be set to . Operate by touching the panel. (1) Press FN to display PAGE1. (2) Press MENU to display the menu. (3) Select INT. REC in , then press EXEC (p. 179). (4) Select SET, then press EXEC. (5) Select INTERVAL, then press EXEC. (6) Select a desired interval time, then press EXEC. The time: 30SEC y 1MIN y 5MIN y 10MIN (7) Select REC TIME, then press EXEC. (8) Select a desired recording time, then press EXEC. The time: 0.5SEC y 1SEC y 1.5SEC y 2SEC (9) Press RET. (10) Set INT. REC to ON, then press EXEC. (11) Press EXIT to return to FN. The INTERVAL TAPE indicator flashes on the screen. (12) Press START/STOP to start Interval Recording. The INTERVAL TAPE indicator lights up during Interval Recording. 4 TAPE SET I NT. REC I NTERVAL REC T I ME EXIT 30SEC EXEC RET. 5 TAPE SET I NT. REC I NTERVAL REC T I ME EXIT 30SEC 1M I N 5M I N 10M I N EXEC RET. 7 TAPE SET I NT. REC I NTERVAL REC T I ME EXIT 0 . 5SEC 1SEC 1 . 5SEC 2SEC EXEC RET. To cancel Interval Recording Set INT. REC to OFF in the menu settings. 64
-
 1
1 -
2
-
3
-
4
-
5
-
6
-
7
-
8
-
9
-
10
-
11
-
12
-
13
-
14
-
15
-
16
-
17
-
18
-
19
-
20
-
21
-
22
-
23
-
24
-
25
-
26
-
27
-
28
-
29
-
30
-
31
-
32
-
33
-
34
-
35
-
36
-
37
-
38
-
39
-
40
-
41
-
42
-
43
-
44
-
45
-
46
-
47
-
48
-
49
-
50
-
51
-
52
-
53
-
54
-
55
-
56
-
57
-
58
-
 59
59 -
 60
60 -
 61
61 -
 62
62 -
 63
63 -
 64
64 -
 65
65 -
 66
66 -
 67
67 -
 68
68 -
 69
69 -
70
-
71
-
72
-
73
-
74
-
75
-
76
-
77
-
78
-
79
-
80
-
81
-
82
-
83
-
84
-
85
-
86
-
87
-
88
-
89
-
90
-
91
-
92
-
93
-
94
-
95
-
96
-
97
-
98
-
99
-
100
-
101
-
102
-
103
-
104
-
105
-
106
-
107
-
108
-
109
-
110
-
111
-
112
-
113
-
114
-
115
-
116
-
117
-
118
-
119
-
120
-
121
-
122
-
123
-
124
-
125
-
126
-
127
-
128
-
129
-
130
-
131
-
132
-
133
-
134
-
135
-
136
-
137
-
138
-
139
-
140
-
141
-
142
-
143
-
144
-
145
-
146
-
147
-
148
-
149
-
150
-
151
-
152
-
153
-
154
-
155
-
156
-
157
-
158
-
159
-
160
-
161
-
162
-
163
-
164
-
165
-
166
-
167
-
168
-
169
-
170
-
171
-
172
-
173
-
174
-
175
-
176
-
177
-
178
-
179
-
180
-
181
-
182
-
183
-
184
-
185
-
186
-
187
-
188
-
189
-
190
-
191
-
192
-
193
-
194
-
195
-
196
-
197
-
198
-
199
-
200
-
201
-
202
-
203
-
204
-
205
-
206
-
207
-
208
-
209
-
210
-
211
-
212
-
213
-
214
-
215
-
216
-
217
-
218
-
219
-
220
 |
 |