Sony SRG360SHE Product Manual Operation Manual SRG-360SHE - Page 54
System log Tab, Access log Tab, Video Menu, Picture Tab
 |
View all Sony SRG360SHE manuals
Add to My Manuals
Save this manual to your list of manuals |
Page 54 highlights
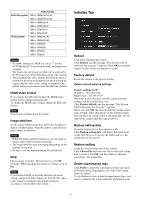
Firmware Upgrade Use this to upgrade the firmware. Click Select the file and select the firmware to upgrade, then click Open. The confirmation dialog is displayed. Operate according to the contents. System log Tab The data of the software activity of the camera is recorded in this log. It includes data that is useful if a problem occurs. Click Reload to reload the latest data. Access log Tab The access record of the camera is displayed. Click Reload to reload the latest data. Video Menu When you click Video in the Administrator menu, the Video menu appears. Use this menu to set the functions of the camera. The Video menu consists of the Picture, Video codec, Superimpose, and Day/Night ICR tabs. Picture Tab You can set the color conditions, exposure, etc., of the camera. Preview screen Preview the image and adjust the picture setting. Exposure You can also set from the remote controller. See "EXPOSURE Menu" on page 41. Mode Adjust the settings of exposure. Full auto: The camera performs the gain, iris and shutter speed adjustments automatically. Shutter priority: The camera performs the gain and iris adjustments automatically, and you can select the shutter speed. Iris priority: The camera performs the gain and shutter speed adjustments automatically, and you can select the iris. Manual: Adjust the gain, iris and shutter speed manually. Bright: Adjust the brightness level (combined with gain or iris) of the camera. Note When the gain limit setting is set to a value other than 43 dB (maximum), the brightness level range is also limited. 54
-
 1
1 -
2
-
3
-
4
-
5
-
6
-
7
-
8
-
9
-
10
-
11
-
12
-
13
-
14
-
15
-
16
-
17
-
18
-
19
-
20
-
21
-
22
-
23
-
24
-
25
-
26
-
27
-
28
-
29
-
30
-
31
-
32
-
33
-
34
-
35
-
36
-
37
-
38
-
39
-
40
-
41
-
42
-
43
-
44
-
45
-
46
-
47
-
48
-
 49
49 -
 50
50 -
 51
51 -
 52
52 -
 53
53 -
 54
54 -
 55
55 -
 56
56 -
 57
57 -
 58
58 -
 59
59 -
60
-
61
-
62
-
63
-
64
-
65
-
66
-
67
-
68
-
69
-
70
-
71
-
72
-
73
-
74
-
75
 |
 |
