Sony STR-DN1030 Operating Instructions (Large File - 11.51 MB) - Page 116
NEO6 CIN or NEO6 MUS is selected, Press GUI MODE to select GUI OFF.
 |
View all Sony STR-DN1030 manuals
Add to My Manuals
Save this manual to your list of manuals |
Page 116 highlights
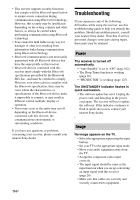
• Check that the connecting cords are away from a transformer or motor, and at least 3 meters (10 feet) away from a TV set or fluorescent light. • Move your audio equipment away from the TV. • The plugs and jacks are dirty. Wipe them with a cloth slightly moistened with alcohol. There is no sound, or only a very lowlevel sound is heard from specific speakers. • Connect a pair of headphones to the PHONES jack to verify that sound is output from the headphones. If only one channel is output from the headphones, the equipment may not be connected to the receiver correctly. Check that all the cords are fully inserted into the jacks on both the receiver and the equipment. If both channels are output from the headphones, the front speaker may not be connected to the receiver correctly. Check the connection of the front speaker which is not outputting any sound. • Make sure you have connected to both the L and R jacks of an analog equipment, analog equipment requires both L and R jack connections. Use an audio cord (not supplied). • Adjust the speaker level (page 94). • Check that the speaker settings are appropriate for the setup using the Auto Calibration menu or "SP Pattern" in the Speaker Settings menu. Then check that sound is output from each speaker correctly, using "Test Tone" in the Speaker Settings menu. • Some discs have no Dolby Digital Surround EX information. • Check that the subwoofer is connected correctly and securely. • Make sure you have turned on your subwoofer. • Depending on the selected sound field, no sound will be available from the subwoofer. • When all speakers are set to "Large" and "NEO6 CIN" or "NEO6 MUS" is selected, there is no sound from the subwoofer. There is no sound from a specific equipment. • Check that the equipment is connected correctly to the audio input jacks for that equipment. • Check that the cord(s) used for the connection is (are) fully inserted into the jacks on both the receiver and the equipment. • Check the INPUT MODE (page 88). • Check that the equipment is connected correctly to the HDMI jack for that equipment. • You cannot listen to the Super Audio CD by connecting HDMI. • Depending on the playback equipment, you may need to set up the HDMI setting of the equipment. Refer to the operating instructions supplied with each equipment. • Be sure to use a High Speed HDMI cable when you view images or listen to sound, especially for the 1080p, Deep Color (Deep Colour) or 3D transmission. • Sound may not be output from the receiver while the GUI appears on the TV screen. Press GUI MODE to select "GUI OFF". • Audio signals (format, sampling frequency, bit length, etc.) transmitted from an HDMI jack may be suppressed by the connected equipment. Check the setup of the connected equipment if the image is poor or the sound does not come out of the equipment connected via the HDMI cable. • When the connected equipment is not compatible with copyright protection technology (HDCP), the image and/or the sound from the HDMI TV OUT jack may be distorted or may not be output. If this is the case, check the specification of the connected equipment. 116US
-
 1
1 -
2
-
3
-
4
-
5
-
6
-
7
-
8
-
9
-
10
-
11
-
12
-
13
-
14
-
15
-
16
-
17
-
18
-
19
-
20
-
21
-
22
-
23
-
24
-
25
-
26
-
27
-
28
-
29
-
30
-
31
-
32
-
33
-
34
-
35
-
36
-
37
-
38
-
39
-
40
-
41
-
42
-
43
-
44
-
45
-
46
-
47
-
48
-
49
-
50
-
51
-
52
-
53
-
54
-
55
-
56
-
57
-
58
-
59
-
60
-
61
-
62
-
63
-
64
-
65
-
66
-
67
-
68
-
69
-
70
-
71
-
72
-
73
-
74
-
75
-
76
-
77
-
78
-
79
-
80
-
81
-
82
-
83
-
84
-
85
-
86
-
87
-
88
-
89
-
90
-
91
-
92
-
93
-
94
-
95
-
96
-
97
-
98
-
99
-
100
-
101
-
102
-
103
-
104
-
105
-
106
-
107
-
108
-
109
-
110
-
 111
111 -
 112
112 -
 113
113 -
 114
114 -
 115
115 -
 116
116 -
 117
117 -
 118
118 -
 119
119 -
 120
120 -
 121
121 -
122
-
123
-
124
-
125
-
126
-
127
-
128
-
129
-
130
-
131
-
132
 |
 |