Sony STR-DN1030 Operating Instructions (Large File - 11.51 MB) - Page 47
Using a wired LAN connection, Select Wired LAN Settings - receiver manual
 |
View all Sony STR-DN1030 manuals
Add to My Manuals
Save this manual to your list of manuals |
Page 47 highlights
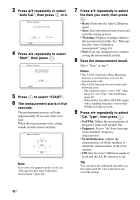
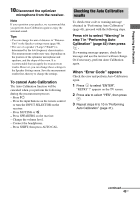
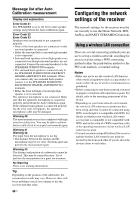
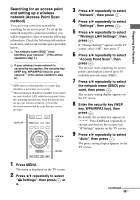
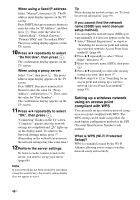
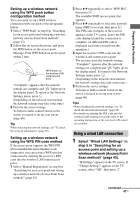
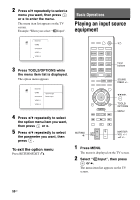
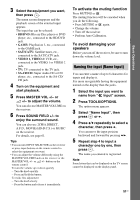
Preparing the Receiver Setting up a wireless network using the WPS push button configuration method You can easily set up a WPS wireless connection with one push of the designated button. 1 Select "WPS Push" in step 6 in "Searching for an access point and setting up a wireless network (Access Point Scan method)" (page 45). 2 Follow the on-screen directions, and press the WPS button on the access point. Message: Push WPS button on access point within 2 min WPS button on the wireless LAN router/access point "Complete!" appears after the network settings are complete and " " lights up on the display panel. To return to the Network Settings menu, press . (Depending on the network environment, the network settings may take some time.) 3 Perform the server settings. To listen to audio content stored on the server, you need to set up your server (page 66). Tip When checking the network settings, see "To check the network information" (page 99). Setting up a wireless network using the WPS PIN code method If the access point supports the WPS PIN (Personal Identification Number) code connection, you can set up a WPS wireless connection by entering the receiver's PIN code into the wireless LAN router/access point. 1 Select "Manual Registration" in step 6 in "Searching for an access point and setting up a wireless network (Access Point Scan method)" (page 45). 2 Press V/v repeatedly to select "WPS PIN", then press . The available SSID (access point) list appears. 3 Press V/v repeatedly to select the network name (SSID) you want, then press . The PIN code (8 digits) of the receiver appears on the TV screen. Leave the PIN code displayed until the connection is complete. (A different PIN code is displayed each time you perform this operation.) 4 Input the receiver's PIN code into the wireless LAN router/access point. The receiver starts the network settings. "Complete!" appears after the network settings are complete and " " lights up on the display panel. To return to the Network Settings menu, press . (Depending on the network environment, the network settings may take some time.) 5 Perform the server settings. To listen to audio content stored on the server, you need to set up your server (page 66). Tips • When checking the network settings, see "To check the network information" (page 99). • For details on entering the PIN code into the wireless LAN router/access point, refer to the operating instructions of the wireless LAN router/ access point. Using a wired LAN connection 1 Select "Wired LAN Settings" in step 5 in "Searching for an access point and setting up a wireless network (Access Point Scan method)" (page 45). "IP Settings" appears on the TV screen. If "Change Setting?" appears on the TV screen, select "OK", then press . continued 47US
-
 1
1 -
2
-
3
-
4
-
5
-
6
-
7
-
8
-
9
-
10
-
11
-
12
-
13
-
14
-
15
-
16
-
17
-
18
-
19
-
20
-
21
-
22
-
23
-
24
-
25
-
26
-
27
-
28
-
29
-
30
-
31
-
32
-
33
-
34
-
35
-
36
-
37
-
38
-
39
-
40
-
41
-
 42
42 -
 43
43 -
 44
44 -
 45
45 -
 46
46 -
 47
47 -
 48
48 -
 49
49 -
 50
50 -
 51
51 -
 52
52 -
53
-
54
-
55
-
56
-
57
-
58
-
59
-
60
-
61
-
62
-
63
-
64
-
65
-
66
-
67
-
68
-
69
-
70
-
71
-
72
-
73
-
74
-
75
-
76
-
77
-
78
-
79
-
80
-
81
-
82
-
83
-
84
-
85
-
86
-
87
-
88
-
89
-
90
-
91
-
92
-
93
-
94
-
95
-
96
-
97
-
98
-
99
-
100
-
101
-
102
-
103
-
104
-
105
-
106
-
107
-
108
-
109
-
110
-
111
-
112
-
113
-
114
-
115
-
116
-
117
-
118
-
119
-
120
-
121
-
122
-
123
-
124
-
125
-
126
-
127
-
128
-
129
-
130
-
131
-
132
 |
 |