Sony VRDMC10 Operating Instructions - Page 49
One Touch Disc Burn
 |
UPC - 027242735675
View all Sony VRDMC10 manuals
Add to My Manuals
Save this manual to your list of manuals |
Page 49 highlights
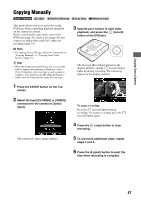
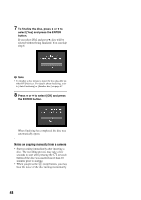
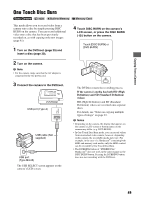
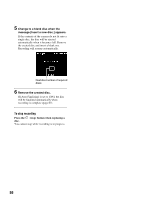
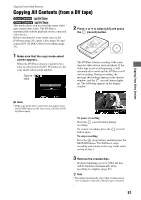
Copying From a Camera One Touch Disc Burn This mode allows you to record video from a camera onto a disc by simply pressing DISC BURN on the camera. You can record additional video onto a disc that has been previously recorded on, as with copying only new images (page 41). 1 Turn on the DVDirect (page 29) and insert a disc (page 30). 2 Turn on the camera. b Note • For the camera, make sure that the AC adapter is connected to the AC power cord. 3 Connect the camera to the DVDirect. USB port (Type A) USB cable (Not supplied) USB port (Type Mini-B) The USB SELECT screen appears on the camera's LCD screen. HANDYCAM 4 Touch DISC BURN on the camera's LCD screen, or press the DISC BURN ( ) button on the camera. Touch [DISC BURN] or [DVD BURN] The DVDirect starts the recording process. If the camera's media has both HD (High Definition) and SD (Standard Definition) videos: HD (High Definition) and SD (Standard Definition) videos are recorded onto separate discs. For details, see "Notes on copying multiple types of image" on page 23. b Notes • Depending on the camera, the display that appears on the camera's LCD screen or button names on the camera may differ. (e.g. DVD BURN) • In One Touch Disc Burn mode, you can record videos from an attached video camera; however, depending on the camera, the recordable media may vary. For example, in the case of a Handycam® containing both HDD and memory card media, only the HDD content can be recorded by One Touch Disc Burn. • The DUBBING button of "HYBRID Plus" Handycam® does not work in the same manner as the DISC BURN button. Pressing the DUBBING button does not start recording with the DVDirect. 49
-
 1
1 -
2
-
3
-
4
-
5
-
6
-
7
-
8
-
9
-
10
-
11
-
12
-
13
-
14
-
15
-
16
-
17
-
18
-
19
-
20
-
21
-
22
-
23
-
24
-
25
-
26
-
27
-
28
-
29
-
30
-
31
-
32
-
33
-
34
-
35
-
36
-
37
-
38
-
39
-
40
-
41
-
42
-
43
-
 44
44 -
 45
45 -
 46
46 -
 47
47 -
 48
48 -
 49
49 -
 50
50 -
 51
51 -
 52
52 -
 53
53 -
 54
54 -
55
-
56
-
57
-
58
-
59
-
60
-
61
-
62
-
63
-
64
-
65
-
66
-
67
-
68
-
69
-
70
-
71
-
72
-
73
-
74
-
75
-
76
-
77
-
78
-
79
-
80
-
81
-
82
-
83
-
84
 |
 |
