Sony WF-1000XM5 Help Guide - Page 73
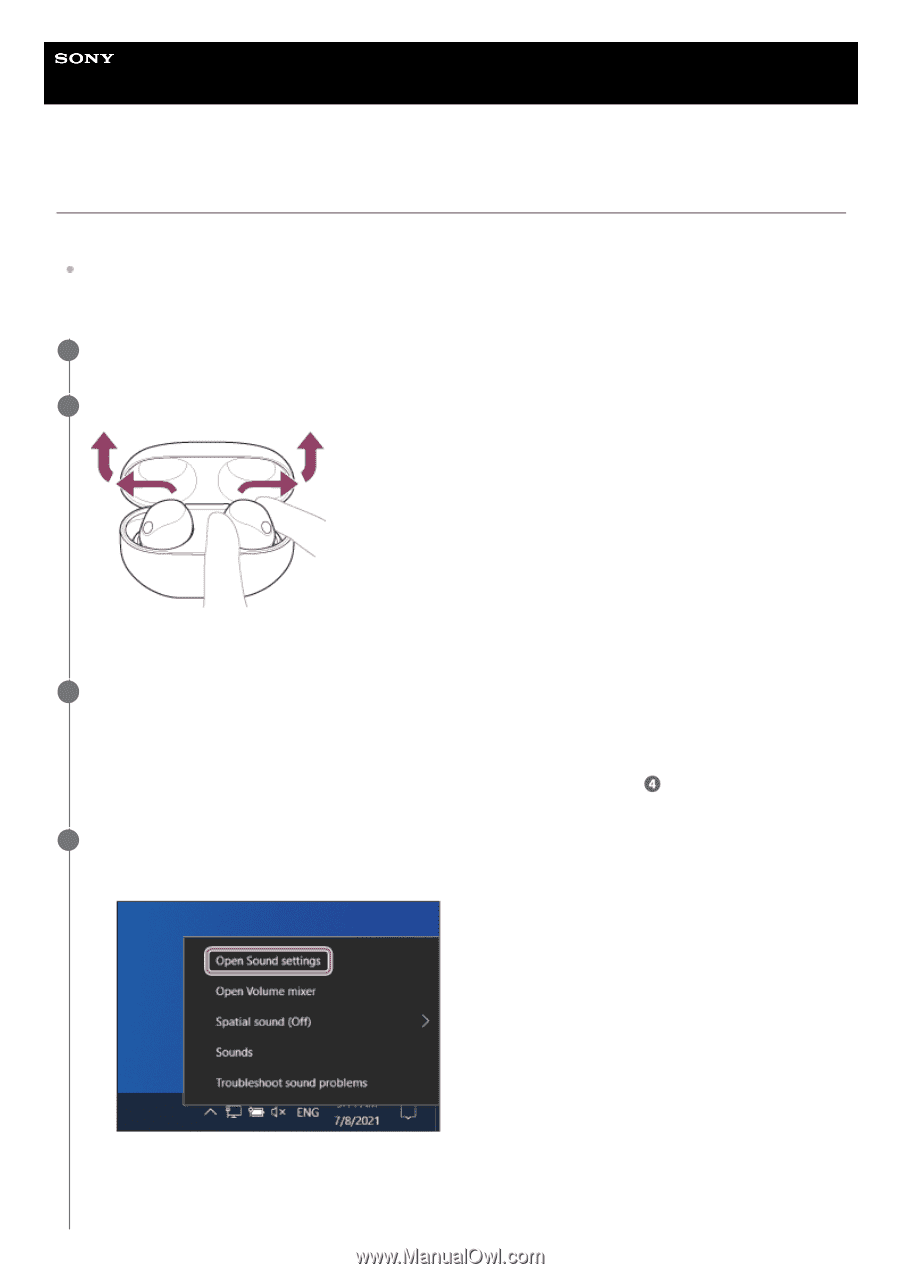
Lay the headset units on their sides and remove them from the charging case.
 |
View all Sony WF-1000XM5 manuals
Add to My Manuals
Save this manual to your list of manuals |
Page 73 highlights
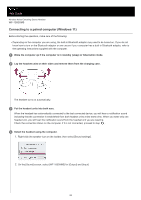
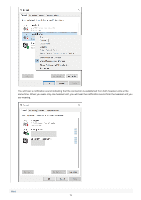
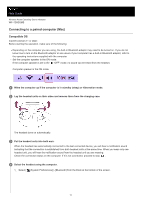
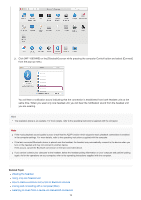
Help Guide Wireless Noise Canceling Stereo Headset WF-1000XM5 Connecting to a paired computer (Windows 10) Before starting the operation, make sure of the following: Depending on the computer you are using, the built-in Bluetooth adaptor may need to be turned on. If you do not know how to turn on the Bluetooth adaptor or are unsure if your computer has a built-in Bluetooth adaptor, refer to the operating instructions supplied with the computer. 1 Wake the computer up if the computer is in standby (sleep) or hibernation mode. 2 Lay the headset units on their sides and remove them from the charging case. The headset turns on automatically. 3 Put the headset units into both ears. When the headset has automatically connected to the last connected device, you will hear a notification sound indicating that the connection is established from both headset units at the same time. When you wear only one headset unit, you will hear the notification sound from the headset unit you are wearing. Check the connection status on the computer. If it is not connected, proceed to step . 4 Select the headset using the computer. 1. Right-click the speaker icon on the toolbar, then select [Open Sound settings]. 2. From the [Choose your output device] drop-down menu, select [Headphones (WF-1000XM5 Stereo)]. 73
-
 1
1 -
2
-
3
-
4
-
5
-
6
-
7
-
8
-
9
-
10
-
11
-
12
-
13
-
14
-
15
-
16
-
17
-
18
-
19
-
20
-
21
-
22
-
23
-
24
-
25
-
26
-
27
-
28
-
29
-
30
-
31
-
32
-
33
-
34
-
35
-
36
-
37
-
38
-
39
-
40
-
41
-
42
-
43
-
44
-
45
-
46
-
47
-
48
-
49
-
50
-
51
-
52
-
53
-
54
-
55
-
56
-
57
-
58
-
59
-
60
-
61
-
62
-
63
-
64
-
65
-
66
-
67
-
 68
68 -
 69
69 -
 70
70 -
 71
71 -
 72
72 -
 73
73 -
 74
74 -
 75
75 -
 76
76 -
 77
77 -
 78
78 -
79
-
80
-
81
-
82
-
83
-
84
-
85
-
86
-
87
-
88
-
89
-
90
-
91
-
92
-
93
-
94
-
95
-
96
-
97
-
98
-
99
-
100
-
101
-
102
-
103
-
104
-
105
-
106
-
107
-
108
-
109
-
110
-
111
-
112
-
113
-
114
-
115
-
116
-
117
-
118
-
119
-
120
-
121
-
122
-
123
-
124
-
125
-
126
-
127
-
128
-
129
-
130
-
131
-
132
-
133
-
134
-
135
-
136
-
137
-
138
-
139
-
140
-
141
-
142
-
143
-
144
-
145
-
146
-
147
-
148
-
149
-
150
-
151
-
152
-
153
-
154
-
155
-
156
-
157
-
158
-
159
-
160
-
161
-
162
-
163
-
164
-
165
-
166
-
167
-
168
-
169
-
170
-
171
-
172
-
173
-
174
-
175
-
176
-
177
-
178
 |
 |