TP-Link 3G/4G TL-MR3220 V2 User Guide - Page 72
Rule
 |
View all TP-Link 3G/4G manuals
Add to My Manuals
Save this manual to your list of manuals |
Page 72 highlights
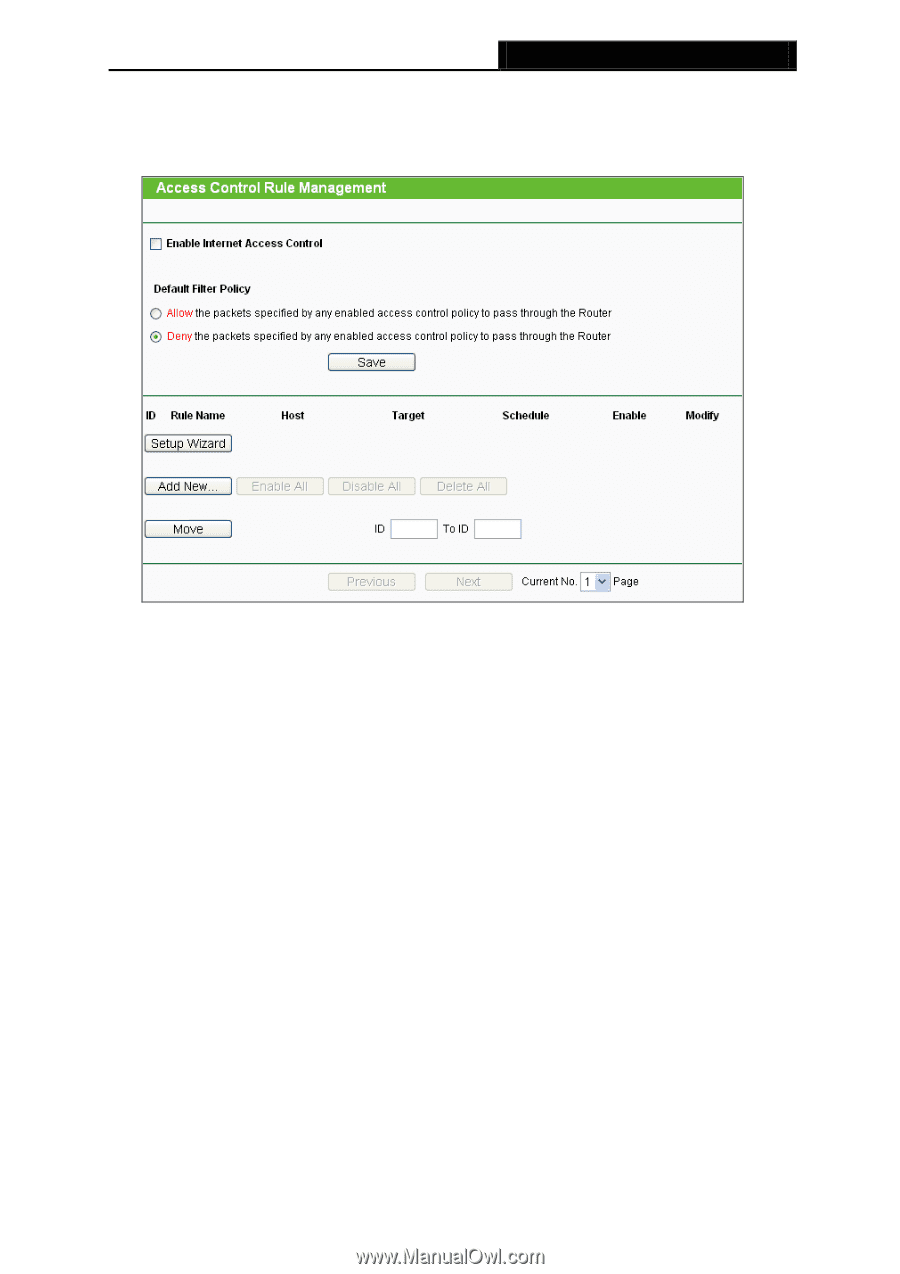
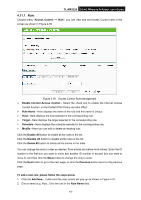
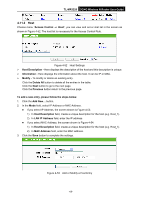
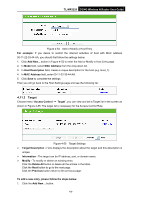
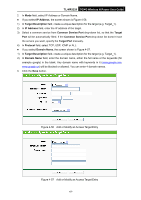
TL-MR3220 3G/4G Wireless N Router User Guide 4.11.1 Rule Choose menu "Access Control → Rule", you can view and set Access Control rules in the screen as shown in Figure 4-50. Figure 4-50 Access Control Rule Management Enable Internet Access Control - Select the check box to enable the Internet Access Control function, so the Default Filter Policy can take effect. Rule Name - Here displays the name of the rule and this name is unique. Host - Here displays the host selected in the corresponding rule. Target - Here displays the target selected in the corresponding rule. Schedule - Here displays the schedule selected in the corresponding rule. Modify - Here you can edit or delete an existing rule. Click the Enable All button to enable all the rules in the list. Click the Disable All button to disable all the rules in the list. Click the Delete All button to delete all the entries in the table. You can change the entry's order as desired. Fore entries are before hind entries. Enter the ID number in the first box you want to move and another ID number in second box you want to move to, and then click the Move button to change the entry's order. Click the Next button to go to the next page, or click the Previous button return to the previous page. To add a new rule, please follow the steps below. 1. Click the Add New... button and the next screen will pop-up as shown in Figure 4-51. 2. Give a name (e.g. Rule_1) for the rule in the Rule Name field. -63-
-
 1
1 -
2
-
3
-
4
-
5
-
6
-
7
-
8
-
9
-
10
-
11
-
12
-
13
-
14
-
15
-
16
-
17
-
18
-
19
-
20
-
21
-
22
-
23
-
24
-
25
-
26
-
27
-
28
-
29
-
30
-
31
-
32
-
33
-
34
-
35
-
36
-
37
-
38
-
39
-
40
-
41
-
42
-
43
-
44
-
45
-
46
-
47
-
48
-
49
-
50
-
51
-
52
-
53
-
54
-
55
-
56
-
57
-
58
-
59
-
60
-
61
-
62
-
63
-
64
-
65
-
66
-
 67
67 -
 68
68 -
 69
69 -
 70
70 -
 71
71 -
 72
72 -
 73
73 -
 74
74 -
 75
75 -
 76
76 -
 77
77 -
78
-
79
-
80
-
81
-
82
-
83
-
84
-
85
-
86
-
87
-
88
-
89
-
90
-
91
-
92
-
93
-
94
-
95
-
96
-
97
-
98
-
99
-
100
-
101
-
102
-
103
-
104
-
105
-
106
-
107
-
108
-
109
 |
 |