TP-Link 3G/4G TL-MR3220 V2 User Guide - Page 73
Click Here To Add New Host List
 |
View all TP-Link 3G/4G manuals
Add to My Manuals
Save this manual to your list of manuals |
Page 73 highlights
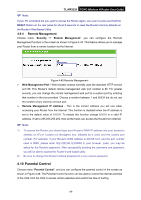
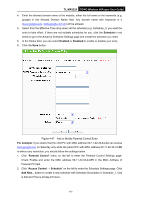
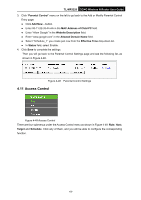
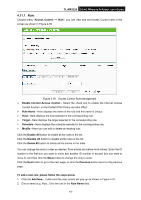
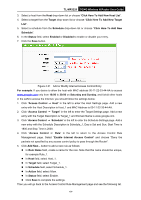
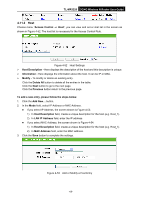
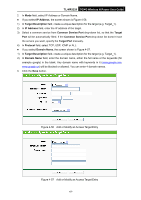
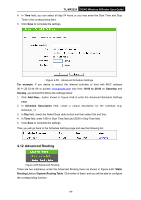
TL-MR3220 3G/4G Wireless N Router User Guide 3. Select a host from the Host drop-down list or choose "Click Here To Add New Host List". 4. Select a target from the Target drop-sown list or choose "Click Here To Add New Target List". 5. Select a schedule from the Schedule drop-down list or choose "Click Here To Add New Schedule". 6. In the Status field, select Enabled or Disabled to enable or disable your entry. 7. Click the Save button. Figure 4-51 Add or Modify Internet Access Control Entry For example: If you desire to allow the host with MAC address 00-11-22-33-44-AA to access www.google.com only from 18:00 to 20:00 on Saturday and Sunday, and forbid other hosts in the LAN to access the Internet, you should follow the settings below: 1. Click "Access Control → Host" in the left to enter the Host Settings page. Add a new entry with the Host Description is Host_1 and MAC Address is 00-11-22-33-44-AA. 2. Click "Access Control → Target" in the left to enter the Target Settings page. Add a new entry with the Target Description is Target_1 and Domain Name is www.google.com. 3. Click "Access Control → Schedule" in the left to enter the Schedule Settings page. Add a new entry with the Schedule Description is Schedule_1, Day is Sat and Sun, Start Time is 1800 and Stop Time is 2000. 4. Click "Access Control → Rule" in the left to return to the Access Control Rule Management page. Select "Enable Internet Access Control" and choose "Deny the packets not specified by any access control policy to pass through the Router". 5. Click Add New... button to add a new rule as follows: In Rule Name field, create a name for the rule. Note that this name should be unique, for example Rule_1. In Host field, select Host_1. In Target field, select Target_1. In Schedule field, select Schedule_1. In Action field, select Allow. In Status field, select Enable. Click Save to complete the settings. Then you will go back to the Access Control Rule Management page and see the following list. -64-
-
 1
1 -
2
-
3
-
4
-
5
-
6
-
7
-
8
-
9
-
10
-
11
-
12
-
13
-
14
-
15
-
16
-
17
-
18
-
19
-
20
-
21
-
22
-
23
-
24
-
25
-
26
-
27
-
28
-
29
-
30
-
31
-
32
-
33
-
34
-
35
-
36
-
37
-
38
-
39
-
40
-
41
-
42
-
43
-
44
-
45
-
46
-
47
-
48
-
49
-
50
-
51
-
52
-
53
-
54
-
55
-
56
-
57
-
58
-
59
-
60
-
61
-
62
-
63
-
64
-
65
-
66
-
67
-
 68
68 -
 69
69 -
 70
70 -
 71
71 -
 72
72 -
 73
73 -
 74
74 -
 75
75 -
 76
76 -
 77
77 -
 78
78 -
79
-
80
-
81
-
82
-
83
-
84
-
85
-
86
-
87
-
88
-
89
-
90
-
91
-
92
-
93
-
94
-
95
-
96
-
97
-
98
-
99
-
100
-
101
-
102
-
103
-
104
-
105
-
106
-
107
-
108
-
109
 |
 |
