TP-Link TL-WR840N User Guide - Page 51
Address Reservation
 |
View all TP-Link TL-WR840N manuals
Add to My Manuals
Save this manual to your list of manuals |
Page 51 highlights
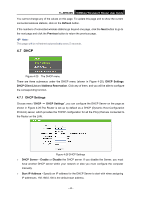
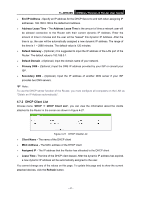
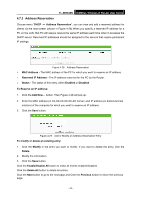
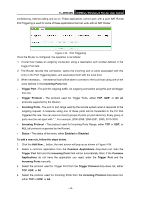
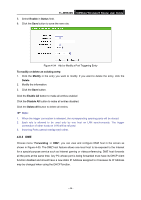
4.7.3 Address Reservation TL-WR840N 300Mbps Wireless N Router User Guide Choose menu "DHCP → Address Reservation", you can view and add a reserved address for clients via the next screen (shown in Figure 4-28).When you specify a reserved IP address for a PC on the LAN, that PC will always receive the same IP address each time when it accesses the DHCP server. Reserved IP addresses should be assigned to the servers that require permanent IP settings. Figure 4-28 Address Reservation MAC Address - The MAC address of the PC for which you want to reserve an IP address. Reserved IP Address - The IP address reserved for the PC by the Router. Status - The status of this entry, either Enabled or Disabled. To Reserve an IP address: 1. Click the Add New... button. Then Figure 4-29 will pop up. 2. Enter the MAC address (in XX-XX-XX-XX-XX-XX format.) and IP address (in dotted-decimal notation) of the computer for which you want to reserve an IP address. 3. Click the Save button. Figure 4-29 Add or Modify an Address Reservation Entry To modify or delete an existing entry: 1. Click the Modify in the entry you want to modify. If you want to delete the entry, click the Delete. 2. Modify the information. 3. Click the Save button. Click the Enable/Disable All button to make all entries enabled/disabled Click the Delete All button to delete all entries. Click the Next button to go to the next page and Click the Previous button to return the previous page. - 42 -
-
 1
1 -
2
-
3
-
4
-
5
-
6
-
7
-
8
-
9
-
10
-
11
-
12
-
13
-
14
-
15
-
16
-
17
-
18
-
19
-
20
-
21
-
22
-
23
-
24
-
25
-
26
-
27
-
28
-
29
-
30
-
31
-
32
-
33
-
34
-
35
-
36
-
37
-
38
-
39
-
40
-
41
-
42
-
43
-
44
-
45
-
 46
46 -
 47
47 -
 48
48 -
 49
49 -
 50
50 -
 51
51 -
 52
52 -
 53
53 -
 54
54 -
 55
55 -
 56
56 -
57
-
58
-
59
-
60
-
61
-
62
-
63
-
64
-
65
-
66
-
67
-
68
-
69
-
70
-
71
-
72
-
73
-
74
-
75
-
76
-
77
-
78
-
79
-
80
-
81
-
82
-
83
-
84
-
85
-
86
-
87
-
88
-
89
-
90
-
91
-
92
-
93
-
94
-
95
-
96
-
97
-
98
-
99
-
100
-
101
-
102
-
103
-
104
 |
 |
