Toshiba GSC-R30 Owners Manual - Page 135
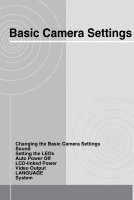
Changing the Basic Camera Settings
 |
View all Toshiba GSC-R30 manuals
Add to My Manuals
Save this manual to your list of manuals |
Page 135 highlights
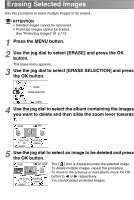
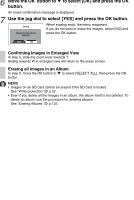
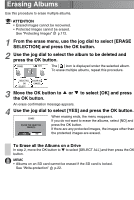
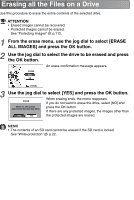
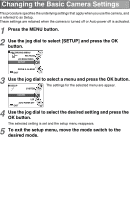
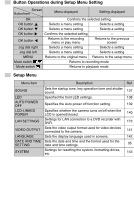
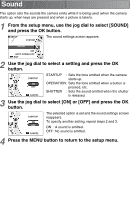
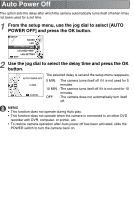
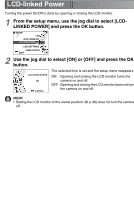
Changing the Basic Camera Settings This procedure specifies the underlying settings that apply when you use the camera, and is referred to as Setup. These settings are retained when the camera is turned off or Auto power off is activated. 1 Press the MENU button. 2 Use the jog dial to select [SETUP] and press the OK button. RECORDING MENU REC PAUSE LCD BRIGHTNESS SETUP DRIVE & ALBUM EXIT 3 Use the jog dial to select a menu and press the OK button. ■ SETUP The settings for the selected menu are appear. SYSTEM SOUND LED AUTO POWER OFF EXIT 4 Use the jog dial to select the desired setting and press the OK button. The selected setting is set and the setup menu reappears. 5 To exit the setup menu, move the mode switch to the desired mode.
-
 1
1 -
2
-
3
-
4
-
5
-
6
-
7
-
8
-
9
-
10
-
11
-
12
-
13
-
14
-
15
-
16
-
17
-
18
-
19
-
20
-
21
-
22
-
23
-
24
-
25
-
26
-
27
-
28
-
29
-
30
-
31
-
32
-
33
-
34
-
35
-
36
-
37
-
38
-
39
-
40
-
41
-
42
-
43
-
44
-
45
-
46
-
47
-
48
-
49
-
50
-
51
-
52
-
53
-
54
-
55
-
56
-
57
-
58
-
59
-
60
-
61
-
62
-
63
-
64
-
65
-
66
-
67
-
68
-
69
-
70
-
71
-
72
-
73
-
74
-
75
-
76
-
77
-
78
-
79
-
80
-
81
-
82
-
83
-
84
-
85
-
86
-
87
-
88
-
89
-
90
-
91
-
92
-
93
-
94
-
95
-
96
-
97
-
98
-
99
-
100
-
101
-
102
-
103
-
104
-
105
-
106
-
107
-
108
-
109
-
110
-
111
-
112
-
113
-
114
-
115
-
116
-
117
-
118
-
119
-
120
-
121
-
122
-
123
-
124
-
125
-
126
-
127
-
128
-
129
-
 130
130 -
 131
131 -
 132
132 -
 133
133 -
 134
134 -
 135
135 -
 136
136 -
 137
137 -
 138
138 -
 139
139 -
 140
140 -
141
-
142
-
143
-
144
-
145
-
146
-
147
-
148
-
149
-
150
-
151
-
152
-
153
-
154
-
155
-
156
-
157
-
158
-
159
-
160
-
161
-
162
-
163
-
164
-
165
-
166
-
167
-
168
-
169
-
170
-
171
-
172
-
173
-
174
-
175
-
176
-
177
-
178
-
179
-
180
-
181
-
182
-
183
-
184
-
185
-
186
-
187
-
188
-
189
-
190
-
191
-
192
-
193
-
194
-
195
-
196
-
197
-
198
-
199
-
200
-
201
-
202
-
203
-
204
-
205
-
206
-
207
-
208
-
209
-
210
-
211
-
212
-
213
-
214
-
215
-
216
-
217
-
218
-
219
-
220
-
221
-
222
-
223
-
224
-
225
-
226
-
227
-
228
-
229
-
230
-
231
-
232
-
233
-
234
-
235
-
236
-
237
-
238
-
239
-
240
-
241
-
242
-
243
-
244
-
245
-
246
-
247
-
248
-
249
-
250
-
251
-
252
-
253
-
254
-
255
-
256
-
257
-
258
-
259
-
260
-
261
-
262
-
263
-
264
-
265
-
266
-
267
 |
 |
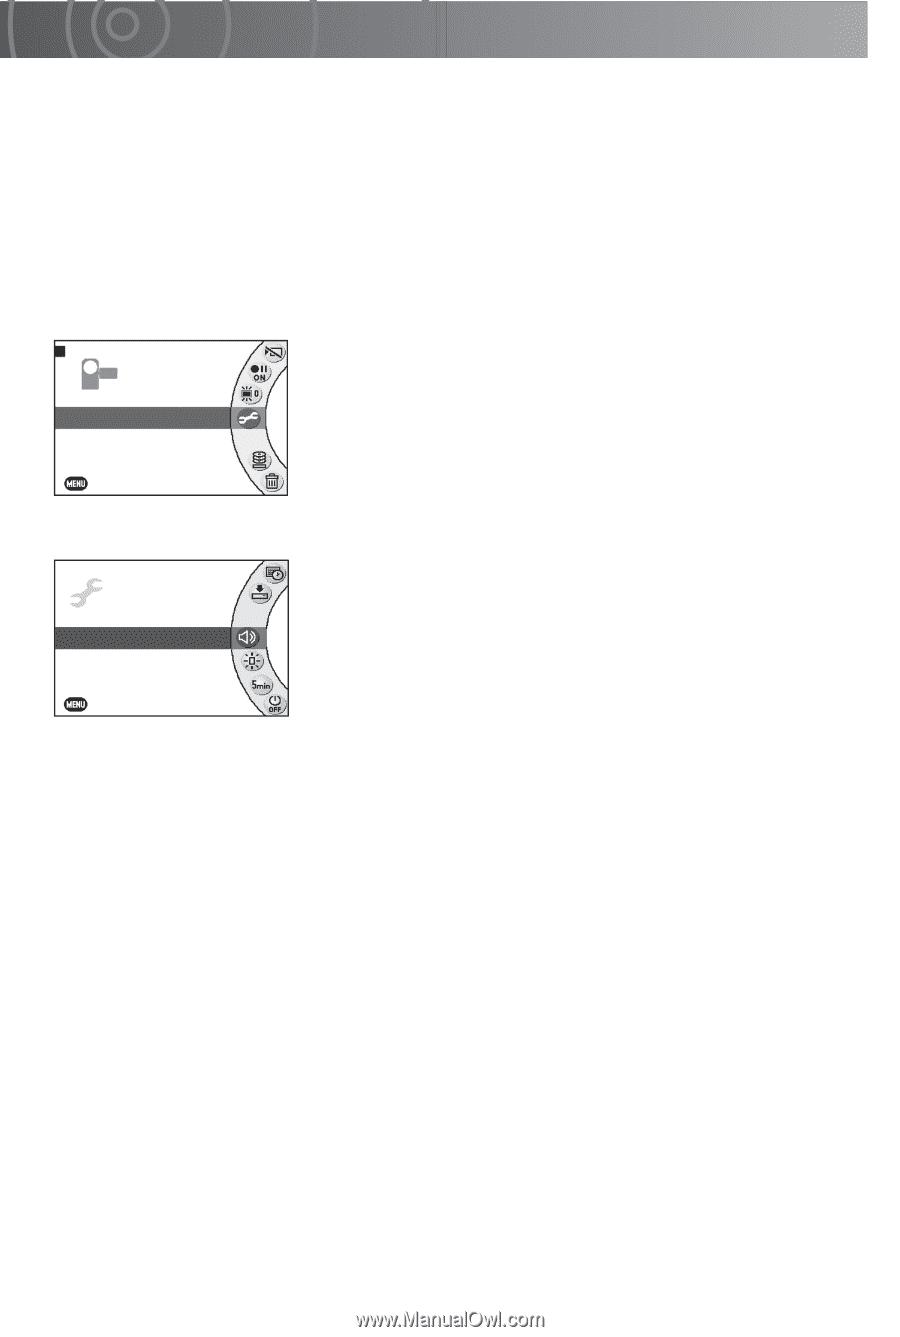
Changing the Basic Camera Settings
This procedure specifies the underlying settings that apply when you use the camera, and
is referred to as Setup.
These settings are retained when the camera is turned off or Auto power off is activated.
1
Press the MENU button.
2
Use the jog dial to select [SETUP] and press the OK
button.
3
Use the jog dial to select a menu and press the OK button.
The settings for the selected menu are appear.
4
Use the jog dial to select the desired setting and press the
OK button.
The selected setting is set and the setup menu reappears.
5
To exit the setup menu, move the mode switch to the
desired mode.
RECORDING MENU
LCD BRIGHTNESS
REC PAUSE
SETUP
DRIVE & ALBUM
EXIT
■
SETUP
SYSTEM
SOUND
AUTO POWER OFF
LED
EXIT