Toshiba NB510 PLL72C-02401D Users Manual Canada; English - Page 60
Adjusting Microphone Level, Audio Enhancements, Realtek HD Audio Manager, Information
 |
View all Toshiba NB510 PLL72C-02401D manuals
Add to My Manuals
Save this manual to your list of manuals |
Page 60 highlights
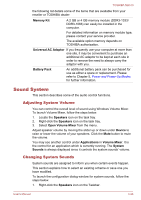
2. Select Sounds from the menu. TOSHIBA NB510 Adjusting Microphone Level Follow the steps below to change the microphone recording level. 1. Right click on the speaker icon on the Taskbar, and select Recording devices from the sub menu. 2. Select Microphone, and click Properties. 3. On the Levels tab move the Microphone slider to increase or decrease the microphone volume level. If you feel the microphone volume level is inadequate, move the Microphone Boost slider to a higher level. Audio Enhancements In order to apply the sound effects for your current speaker, follow the steps below. 1. Right click on the speaker icon on the Taskbar, and select Playback devices from the sub menu. 2. Select Speakers, and click Properties. 3. On the Enhancements tab select the sound effects you would like, and click Apply. Realtek HD Audio Manager You can confirm and change the audio configuration using the Realtek Audio Manager. To launch the Realtek Audio Manager, click Start -> Control Panel, select Large icons from View by, then click Realtek HD Audio Manager. When you first launch the Realtek Audio Manager, you will see two device tabs. Speakers is the default output device. Microphone is the default input device. To change the default device, click the Set Default Device button under the chosen device tab. Information Click the information button to view hardware information, software information, and language setting. Power Management The audio controller in your computer can be turned off when the audio function is not used. To adjust the configuration of audio power management, click the Power Management button . Speaker Configuration Click the Auto Test button to confirm the internal speakers or the headphone sound is coming from the right direction. User's Manual 3-27
-
 1
1 -
2
-
3
-
4
-
5
-
6
-
7
-
8
-
9
-
10
-
11
-
12
-
13
-
14
-
15
-
16
-
17
-
18
-
19
-
20
-
21
-
22
-
23
-
24
-
25
-
26
-
27
-
28
-
29
-
30
-
31
-
32
-
33
-
34
-
35
-
36
-
37
-
38
-
39
-
40
-
41
-
42
-
43
-
44
-
45
-
46
-
47
-
48
-
49
-
50
-
51
-
52
-
53
-
54
-
 55
55 -
 56
56 -
 57
57 -
 58
58 -
 59
59 -
 60
60 -
 61
61 -
 62
62 -
 63
63 -
 64
64 -
 65
65 -
66
-
67
-
68
-
69
-
70
-
71
-
72
-
73
-
74
-
75
-
76
-
77
-
78
-
79
-
80
-
81
-
82
-
83
-
84
-
85
-
86
-
87
-
88
-
89
-
90
-
91
-
92
-
93
-
94
-
95
-
96
-
97
-
98
-
99
-
100
-
101
-
102
-
103
-
104
-
105
-
106
-
107
-
108
-
109
-
110
-
111
-
112
-
113
-
114
-
115
-
116
-
117
-
118
-
119
-
120
-
121
-
122
-
123
-
124
-
125
-
126
-
127
-
128
-
129
 |
 |