Tripp Lite SU10KRT3U Owner's Manual for SmartOnline Single-Phase 10kVA UPS 932 - Page 10
Connect PDU to Power Module, Connect Battery Pack to Power Module - battery backup
 |
View all Tripp Lite SU10KRT3U manuals
Add to My Manuals
Save this manual to your list of manuals |
Page 10 highlights
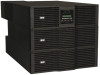
Connection continued Connect PDU to Power Module 1 Follow the procedure in the Mounting section to mount the UPS power module in the rack. Tighten all screws before proceeding. 2 Loosen the screw A securing the PDU contact cover B . Slide the cover away from the contacts C . Tighten the screws D to secure the cover in the open position. 3 Align the PDU E with the PDU connection terminals F on the rear panel of the UPS power module, then push into place. Tighten all four screws on the PDU before proceeding. C D A 2 B F Connect Battery Pack to Power Module 1 Insert the male battery pack connector A at the end of the battery pack cable into the female battery pack connector B on the power module. (Remove the female battery pack connector cover for access.) Small sparks may occur - this is normal. Note: The power module does not contain internal batteries. Battery packs are charged prior to shipping, but maximum battery backup runtime will not be available until the battery has been charged for 24 hours. If additional battery backup runtime is required, connect additional battery packs to the primary battery pack's female battery pack connector C . If battery pack is not available you can still power up UPS system through its "independent battery startup feature" which will supply UPS power to connected equipment, but not provide battery backup. See Startup and Shutdown section for more information. 3 A 201102089 93-2982.indb 10 1 10 E B C 7/11/2011 3:49:01 PM
-
 1
1 -
2
-
3
-
4
-
 5
5 -
 6
6 -
 7
7 -
 8
8 -
 9
9 -
 10
10 -
 11
11 -
 12
12 -
 13
13 -
 14
14 -
 15
15 -
16
-
17
-
18
-
19
-
20
-
21
-
22
-
23
-
24
-
25
-
26
-
27
-
28
-
29
-
30
-
31
-
32
-
33
-
34
-
35
-
36
-
37
-
38
-
39
-
40
-
41
-
42
-
43
-
44
-
45
-
46
-
47
-
48
-
49
-
50
-
51
-
52
-
53
-
54
-
55
-
56
-
57
-
58
-
59
-
60
-
61
-
62
-
63
-
64
-
65
-
66
-
67
-
68
-
69
-
70
-
71
-
72
-
73
-
74
-
75
-
76
-
77
-
78
-
79
-
80
-
81
-
82
-
83
-
84
 |
 |
