Brother International DCP 585CW Network Users Manual - English - Page 126
Creating a user defined File Name, Pre-configuring your FTP profiles, Network, Scan to FTP, File Name1
 |
UPC - 012502620464
View all Brother International DCP 585CW manuals
Add to My Manuals
Save this manual to your list of manuals |
Page 126 highlights
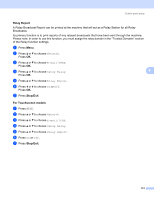
Control panel setup Creating a user defined File Name 6 In addition to the seven preset file names you can store two user defined file names that can be used for creating an FTP Server Profile. a Press Menu. b Press a or b to choose Network. Press OK. c Press a or b to choose Scan to FTP. Press OK. d Press a or b to choose File Name1 or File Name2. Press OK. e Enter a file name you want to use. A maximum of 15 characters can be entered for each of the user 6 defined names. Press OK. f Press Stop/Exit. Pre-configuring your FTP profiles 6 a Press Menu. b Press a or b to choose Network. Press OK. c Press a or b to choose Scan to FTP. Press OK. d Press a or b to choose Setup Profile. Press OK. e Press a or b to choose Not Registered. Press OK. f Press a or b to choose Profile Name. Press OK. g Enter the name that you want to use for the profile of the FTP server. This name will be displayed on the LCD of the machine and can be up to 30 characters. Press OK. h Press a or b to choose Host Address. Press OK. i Enter the Host Address (for example ftp.example.com) (up to 60 characters) or the IP address (for example 192.23.56.189). Press OK. 116
-
 1
1 -
2
-
3
-
4
-
5
-
6
-
7
-
8
-
9
-
10
-
11
-
12
-
13
-
14
-
15
-
16
-
17
-
18
-
19
-
20
-
21
-
22
-
23
-
24
-
25
-
26
-
27
-
28
-
29
-
30
-
31
-
32
-
33
-
34
-
35
-
36
-
37
-
38
-
39
-
40
-
41
-
42
-
43
-
44
-
45
-
46
-
47
-
48
-
49
-
50
-
51
-
52
-
53
-
54
-
55
-
56
-
57
-
58
-
59
-
60
-
61
-
62
-
63
-
64
-
65
-
66
-
67
-
68
-
69
-
70
-
71
-
72
-
73
-
74
-
75
-
76
-
77
-
78
-
79
-
80
-
81
-
82
-
83
-
84
-
85
-
86
-
87
-
88
-
89
-
90
-
91
-
92
-
93
-
94
-
95
-
96
-
97
-
98
-
99
-
100
-
101
-
102
-
103
-
104
-
105
-
106
-
107
-
108
-
109
-
110
-
111
-
112
-
113
-
114
-
115
-
116
-
117
-
118
-
119
-
120
-
 121
121 -
 122
122 -
 123
123 -
 124
124 -
 125
125 -
 126
126 -
 127
127 -
 128
128 -
 129
129 -
 130
130 -
 131
131 -
132
-
133
-
134
-
135
-
136
-
137
-
138
-
139
-
140
-
141
-
142
-
143
-
144
-
145
-
146
-
147
-
148
-
149
-
150
-
151
-
152
-
153
-
154
-
155
-
156
-
157
-
158
-
159
-
160
-
161
-
162
-
163
-
164
-
165
-
166
-
167
-
168
-
169
-
170
-
171
-
172
-
173
-
174
-
175
-
176
-
177
-
178
-
179
-
180
-
181
-
182
-
183
-
184
-
185
-
186
-
187
-
188
-
189
-
190
-
191
-
192
-
193
-
194
-
195
-
196
-
197
-
198
-
199
 |
 |
