Brother International DCP 585CW Network Users Manual - English - Page 89
Subnet Mask, For Touchscreen models, Stop/Exit
 |
UPC - 012502620464
View all Brother International DCP 585CW manuals
Add to My Manuals
Save this manual to your list of manuals |
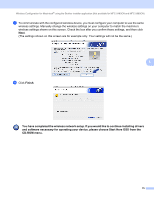
Page 89 highlights
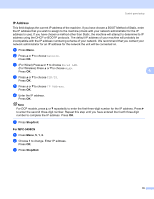
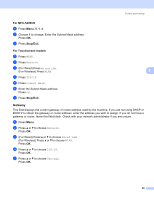
Control panel setup For Touchscreen models a Press MENU. b Press Network. c (For Wired) Press Wired LAN. (For Wireless) Press WLAN. d Press TCP/IP. e Press IP Address. f Enter the IP address. g Press OK. h Press Stop/Exit. 6 6 Subnet Mask 6 This field displays the current subnet mask used by the machine. If you are not using DHCP or BOOTP to obtain the subnet mask, enter the desired subnet mask. Check with your network administrator for the subnet mask to use. a Press Menu. b Press a or b to choose Network. Press OK. c (For Wired) Press a or b to choose Wired LAN. (For Wireless) Press a or b to choose WLAN. Press OK. d Press a or b to choose TCP/IP. Press OK. e Press a or b to choose Subnet Mask. Press OK. f Enter the Subnet Mask address. Press OK. Note For DCP models, press a or b repeatedly to enter the first three-digit number for the Subnet Mask. Press c to enter the second three-digit number. Repeat this step until you have entered the fourth three-digit number to complete the Subnet Mask. Press OK. g Press Stop/Exit. 79
-
 1
1 -
2
-
3
-
4
-
5
-
6
-
7
-
8
-
9
-
10
-
11
-
12
-
13
-
14
-
15
-
16
-
17
-
18
-
19
-
20
-
21
-
22
-
23
-
24
-
25
-
26
-
27
-
28
-
29
-
30
-
31
-
32
-
33
-
34
-
35
-
36
-
37
-
38
-
39
-
40
-
41
-
42
-
43
-
44
-
45
-
46
-
47
-
48
-
49
-
50
-
51
-
52
-
53
-
54
-
55
-
56
-
57
-
58
-
59
-
60
-
61
-
62
-
63
-
64
-
65
-
66
-
67
-
68
-
69
-
70
-
71
-
72
-
73
-
74
-
75
-
76
-
77
-
78
-
79
-
80
-
81
-
82
-
83
-
 84
84 -
 85
85 -
 86
86 -
 87
87 -
 88
88 -
 89
89 -
 90
90 -
 91
91 -
 92
92 -
 93
93 -
 94
94 -
95
-
96
-
97
-
98
-
99
-
100
-
101
-
102
-
103
-
104
-
105
-
106
-
107
-
108
-
109
-
110
-
111
-
112
-
113
-
114
-
115
-
116
-
117
-
118
-
119
-
120
-
121
-
122
-
123
-
124
-
125
-
126
-
127
-
128
-
129
-
130
-
131
-
132
-
133
-
134
-
135
-
136
-
137
-
138
-
139
-
140
-
141
-
142
-
143
-
144
-
145
-
146
-
147
-
148
-
149
-
150
-
151
-
152
-
153
-
154
-
155
-
156
-
157
-
158
-
159
-
160
-
161
-
162
-
163
-
164
-
165
-
166
-
167
-
168
-
169
-
170
-
171
-
172
-
173
-
174
-
175
-
176
-
177
-
178
-
179
-
180
-
181
-
182
-
183
-
184
-
185
-
186
-
187
-
188
-
189
-
190
-
191
-
192
-
193
-
194
-
195
-
196
-
197
-
198
-
199
 |
 |
