Brother International XL-3010 Users Manual - English - Page 19
Conozca Su Maquina De Coser
 |
View all Brother International XL-3010 manuals
Add to My Manuals
Save this manual to your list of manuals |
Page 19 highlights
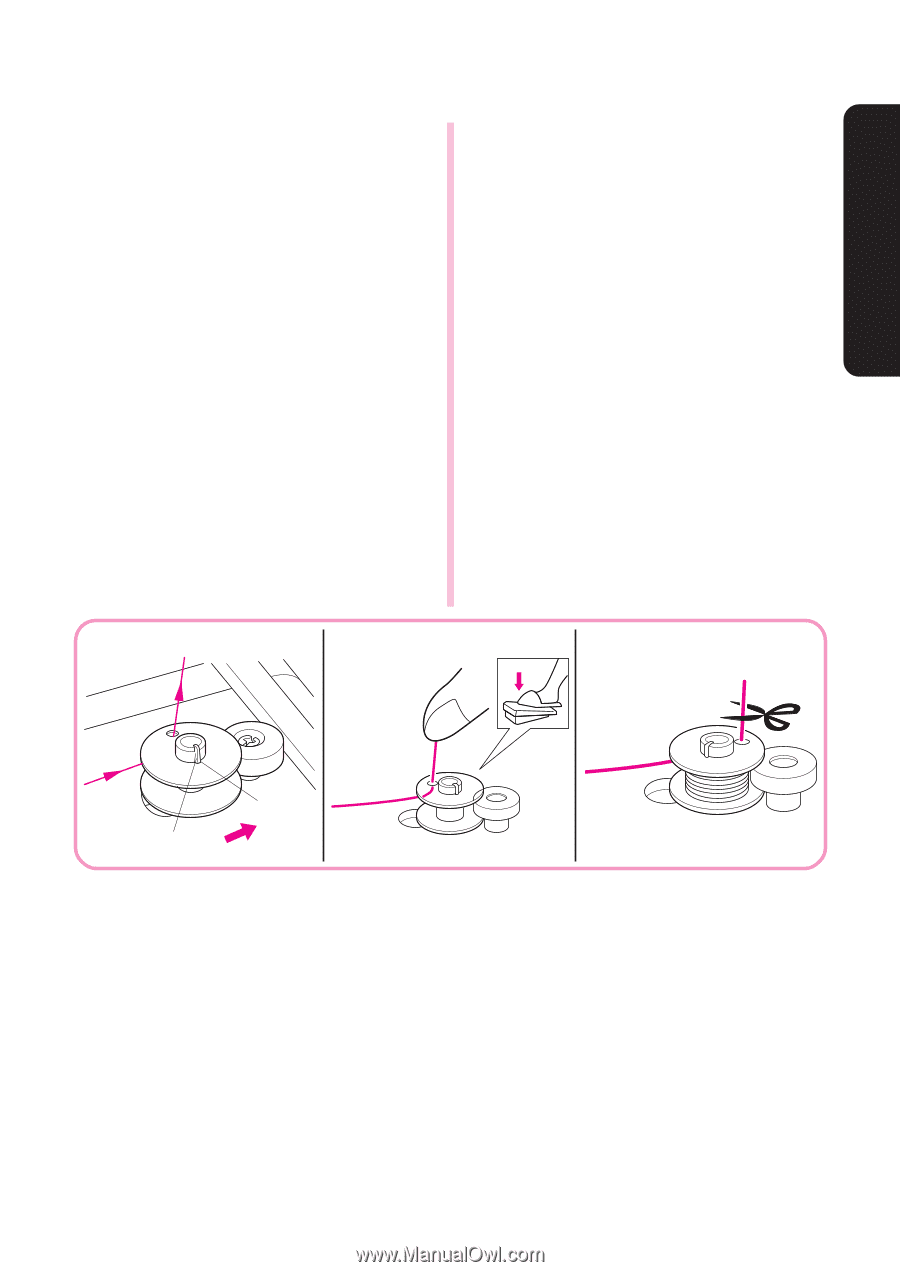
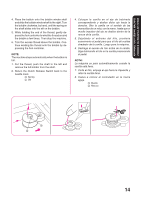
KNOWING YOUR SEWING MACHINE CONOZCA SU MAQUINA DE COSER 4. Place the bobbin onto the bobbin winder shaft and slide the bobbin winder shaft to the right. Turn the bobbin clockwise, by hand, until the spring on the shaft slides into the slit on the bobbin. 5. While holding the end of the thread, gently depress the foot controller to wind the thread around the bobbin a few times. Then stop the machine. 6. Trim the excess thread above the bobbin. Continue winding the thread onto the bobbin by depressing the foot controller. NOTE: The machine stops automatically when the bobbin is full. 7. Cut the thread, push the shaft to the left and remove the full bobbin from the shaft. 8. Return the Clutch Release Switch back to the needle mark. 3 Spring 4 Slit 4. Coloque la canilla en el eje de bobinado correspondiente y deslice dicho eje hacia la derecha. Gire la canilla en el sentido de las manecillas de un reloj, con la mano, hasta que el muelle impulsor del eje se deslice dentro de la ranura de la canilla. 5. Sujetando el extremo del hilo, presione suavemente el pedal para que el hilo dé vueltas alrededor de la canilla. Luego pare la máquina. 6. Deshaga el exceso de hilo arriba de la canilla. Siga bobinando el hilo en la canilla presionando el pedal. NOTA: La máquina se para automáticamente cuando la canilla está llena. 7. Corte el hilo, empuje el eje hacia la izquierda y retire la canilla llena. 8. Vuelva a colocar el conmutador en la marca aguja. 3 Muelle 4 Ranura 4 3 154
-
 1
1 -
2
-
3
-
4
-
5
-
6
-
7
-
8
-
9
-
10
-
11
-
12
-
13
-
 14
14 -
 15
15 -
 16
16 -
 17
17 -
 18
18 -
 19
19 -
 20
20 -
 21
21 -
 22
22 -
 23
23 -
 24
24 -
25
-
26
-
27
-
28
-
29
-
30
-
31
-
32
-
33
-
34
-
35
-
36
-
37
-
38
-
39
-
40
-
41
-
42
-
43
-
44
-
45
-
46
-
47
-
48
-
49
-
50
-
51
-
52
-
53
-
54
-
55
-
56
-
57
-
58
-
59
 |
 |