Brother International XL-3010 Users Manual - English - Page 43
Aplicaciones
 |
View all Brother International XL-3010 manuals
Add to My Manuals
Save this manual to your list of manuals |
Page 43 highlights
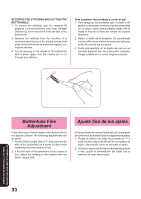
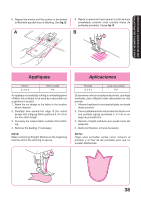
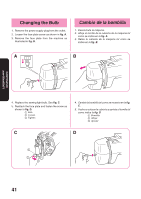
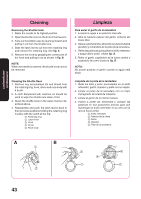
USING ATTACHMENTS AND APPLICATIONS USO DE ACCESORIOS Y APLICACIONES 6. Repeat this motion until the portion to be darned is filled with parallel lines of stitching. See fig. B. A 6. Repita la operación hasta que el zurcido se haya completado creando unas cuantas líneas de puntadas paralelas. Véase fig. B. B Appliques Pattern 3, 4 or 5 Stitch Length F-2 An applique is created by cutting a contrasting piece of fabric into a shape to be used as a decoration on a garment or project. 1. Baste the cut design to the fabric in the location where desired. 2. Carefully sew around the edge of the cutout design with a Zigzag Stitch (patterns 3, 4 or 5) in the fine stitch length. 3. Cut away the surplus fabric outside of the stitching. 4. Remove the basting, if necessary. NOTE: Make reinforcing Straight Stitches at the beginning and the end of the stitching to secure. Aplicaciones Puntada 3, 4 ó 5 Largo de puntada F-2 Si queremos colocar un aplique de piel etc. que haga contraste, para utilizarla como decoración en una prenda. 1. Hilvane la aplicación recortada al tejido, en donde desee ponerla. 2. Cosa cuidadosamente los bordes del diseño con una puntada zigzag (puntadas 3, 4 ó 5) en un largo de puntada fino. 3. Recorte el tejido sobrante que quede fuera del pespunte. 4. Quite los hilvanes, si fuera necesario. NOTA: Haga unas puntadas rectas como refuerzo al principio y al final de las puntadas para que no puedan deshacerse. 389
-
 1
1 -
2
-
3
-
4
-
5
-
6
-
7
-
8
-
9
-
10
-
11
-
12
-
13
-
14
-
15
-
16
-
17
-
18
-
19
-
20
-
21
-
22
-
23
-
24
-
25
-
26
-
27
-
28
-
29
-
30
-
31
-
32
-
33
-
34
-
35
-
36
-
37
-
 38
38 -
 39
39 -
 40
40 -
 41
41 -
 42
42 -
 43
43 -
 44
44 -
 45
45 -
 46
46 -
 47
47 -
 48
48 -
49
-
50
-
51
-
52
-
53
-
54
-
55
-
56
-
57
-
58
-
59
 |
 |
