Brother International XL-3010 Users Manual - English - Page 3
Connecting Plugs and Main Power / Sewing Light Switch - sewing machine
 |
View all Brother International XL-3010 manuals
Add to My Manuals
Save this manual to your list of manuals |
Page 3 highlights
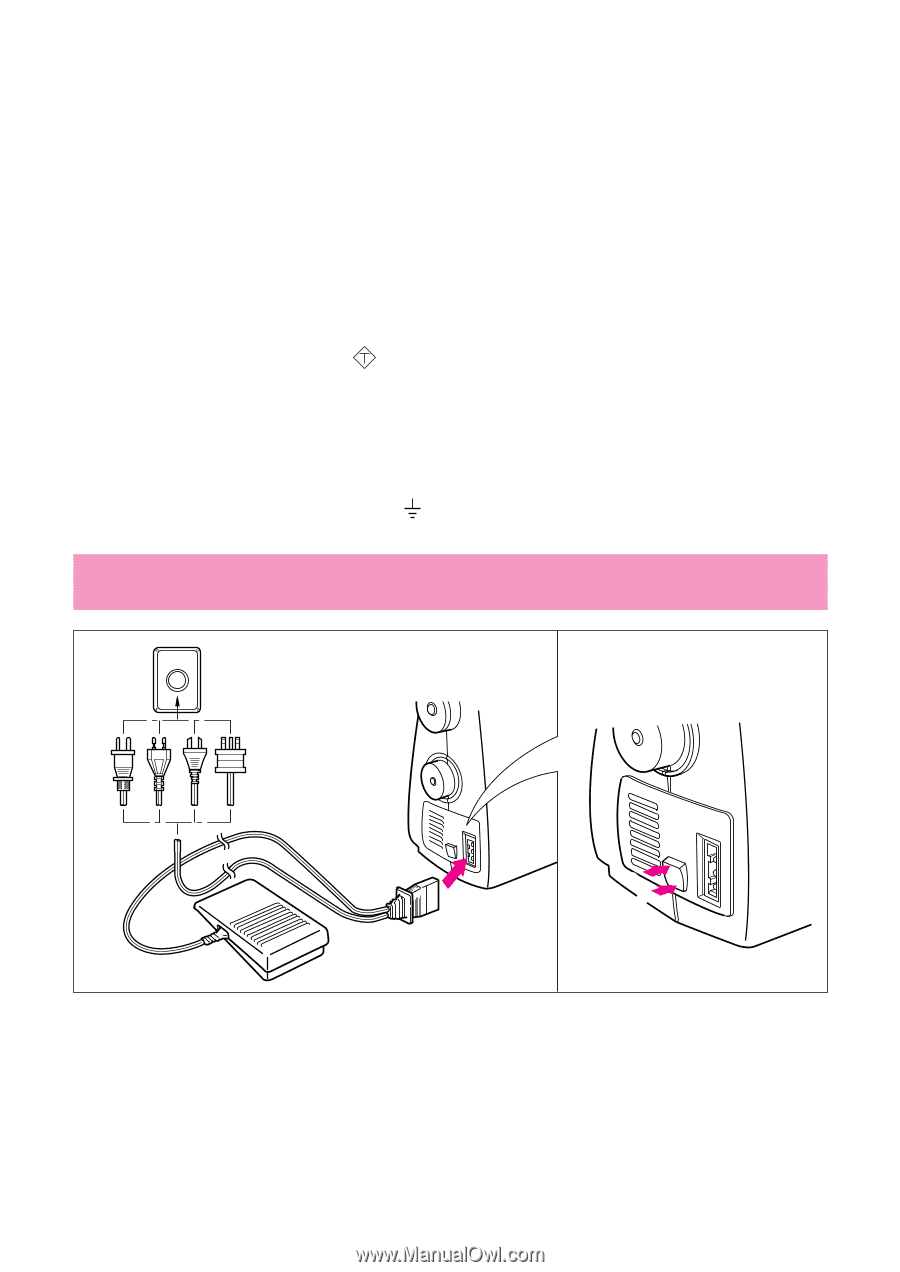
FOR USERS IN THE UK, EIRE, MALTA AND CYPRUS ONLY. If your sewing machine is fitted with a 3 pin non-rewireable BS plug then please read the following. IMPORTANT If the available socket outlet is not suitable for the plug supplied with this equipment, it should be cut off and appropriate three pin plug fitted. With alternative plugs an approved fuse must be fitted in the plug. NOTE: The plug severed from the main leads must be destroyed as a plug with bared flexible cords is hazardous if engaged in a live socket outlet. In the event of replacing the plug fuse, use a fuse approved by ASTA to BS 1362, i.e. carrying the ASA mark, rating as marked on plug. Always replace the fuse cover. Never use plugs with the fuse cover removed. WARNING: DO NOT CONNECT EITHER WIRE TO THE EARTH TERMINAL WHICH IS MARKED WITH THE LETTER 'E', BY THE EARTH SYMBOL OR COLORED GREEN OR YELLOW. The wires in these main leads are colored in accordance with the following code: Blue Brown Neutral Live As the colours of the wiring in the mains lead of this appliance may not correspond with the coloured markings identifying the terminals in your plug, proceed as follows: The wire which is coloured blue must be connected to the terminal which is marked with the letter 'N' or coloured black or blue. The wire which is coloured brown must be connected to the terminal which is marked with the letter 'L' or coloured red or brown. Connecting Plugs and Main Power / Sewing Light Switch 1 2 1. Connect the three-prong plug into the machine. 2. Connect the electrical supply plug into a wall outlet. - When leaving the sewing machine unattended, the main switch of the machine must be switched off or the plug must be removed from the socket outlet. Turn on or off the switch for the main power and sewlight. 1 Turn on 2 Turn off - When servicing the sewing machine, or when removing covers or changing lamps, the machine or the electrical set must be disconnected from the supply by removing the plug from the socket outlet.
-
 1
1 -
 2
2 -
 3
3 -
 4
4 -
 5
5 -
 6
6 -
 7
7 -
 8
8 -
 9
9 -
10
-
11
-
12
-
13
-
14
-
15
-
16
-
17
-
18
-
19
-
20
-
21
-
22
-
23
-
24
-
25
-
26
-
27
-
28
-
29
-
30
-
31
-
32
-
33
-
34
-
35
-
36
-
37
-
38
-
39
-
40
-
41
-
42
-
43
-
44
-
45
-
46
-
47
-
48
-
49
-
50
-
51
-
52
-
53
-
54
-
55
-
56
-
57
-
58
-
59
 |
 |