Canon 1321B002AB User Manual - Page 136
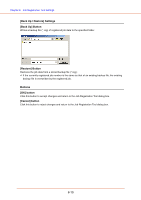
Adjusting the Scan Area, See [Scan Area] Dialog Box
 |
View all Canon 1321B002AB manuals
Add to My Manuals
Save this manual to your list of manuals |
Page 136 highlights
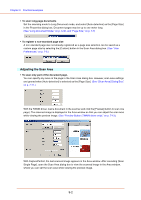
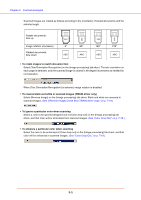
Chapter 9 Practical Examples • To scan long-page documents Set the scanning mode to Long Document mode, and select [Auto-detection] as the [Page Size] in the Properties dialog box. Document pages may be up to one meter long. (See "Long Document Mode," on p. 3-30, and "Page Size," on p. 7-7) • To register a non-standard page size A non-standard page size not already registered as a page size selection can be saved as a custom page size by selecting the [Custom] button in the Scan Area dialog box. (See "User Preferences," on p. 7-5.) Adjusting the Scan Area • To scan only part of the document page. You can specify any area on the page in the Scan Area dialog box. However, scan area settings are ignored when [Auto-detection] is selected as the [Page Size]. (See "[Scan Area] Dialog Box," on p. 7-11.) With the TWAIN driver, load a document in the scanner and click the [Preview] button to scan one page.) The scanned image is displayed in the Area window so that you can adjust the scan area while viewing the preview image. (See "Preview Button (TWAIN driver only)," on p. 7-13.) With CapturePerfect, the last scanned image appears in the Area window. After executing [Scan Single Page], open the Scan Area dialog box to view the scanned image in the Area window, where you can set the scan area while viewing the preview image. 9-2
-
 1
1 -
2
-
3
-
4
-
5
-
6
-
7
-
8
-
9
-
10
-
11
-
12
-
13
-
14
-
15
-
16
-
17
-
18
-
19
-
20
-
21
-
22
-
23
-
24
-
25
-
26
-
27
-
28
-
29
-
30
-
31
-
32
-
33
-
34
-
35
-
36
-
37
-
38
-
39
-
40
-
41
-
42
-
43
-
44
-
45
-
46
-
47
-
48
-
49
-
50
-
51
-
52
-
53
-
54
-
55
-
56
-
57
-
58
-
59
-
60
-
61
-
62
-
63
-
64
-
65
-
66
-
67
-
68
-
69
-
70
-
71
-
72
-
73
-
74
-
75
-
76
-
77
-
78
-
79
-
80
-
81
-
82
-
83
-
84
-
85
-
86
-
87
-
88
-
89
-
90
-
91
-
92
-
93
-
94
-
95
-
96
-
97
-
98
-
99
-
100
-
101
-
102
-
103
-
104
-
105
-
106
-
107
-
108
-
109
-
110
-
111
-
112
-
113
-
114
-
115
-
116
-
117
-
118
-
119
-
120
-
121
-
122
-
123
-
124
-
125
-
126
-
127
-
128
-
129
-
130
-
 131
131 -
 132
132 -
 133
133 -
 134
134 -
 135
135 -
 136
136 -
 137
137 -
 138
138 -
 139
139 -
 140
140 -
 141
141 -
142
 |
 |
