Canon 1321B002AB User Manual - Page 29
Turning the Power ON, Scanner Recognition
 |
View all Canon 1321B002AB manuals
Add to My Manuals
Save this manual to your list of manuals |
Page 29 highlights
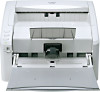
Chapter 2 Setup 2-5 Turning the Power ON When you turn the computer and the scanner ON, the Plug and Play function of Windows recognizes the scanner and automatically installs the required device driver. IMPORTANT • When connecting the scanner to the computer using a SCSI cable, be sure to turn power to the scanner ON first, and then turn power to the computer ON. If you turn power to the computer ON first, the scanner may not be properly recognized by the computer. • If you turn the power OFF, wait at least 10 seconds before turning it ON again. • If you will not be using the scanner for an extended period, you should disconnect the power cord from the AC outlet for safety. Scanner Recognition The scanner will be recognized the first time it is connected to the computer. 1 Make sure that the scanner and computer are connected properly. 2 Press the power switch to turn the scanner ON. The power indicator lights green. Power indicator Power switch ON 3 Turn the computer ON. 4 Log onto Windows with an account that has Administrator privileges. 5 Windows recognizes the DR-4010C automatically, and installation of the device driver begins. Windows 2000 Windows XP 2-14
-
 1
1 -
2
-
3
-
4
-
5
-
6
-
7
-
8
-
9
-
10
-
11
-
12
-
13
-
14
-
15
-
16
-
17
-
18
-
19
-
20
-
21
-
22
-
23
-
 24
24 -
 25
25 -
 26
26 -
 27
27 -
 28
28 -
 29
29 -
 30
30 -
 31
31 -
 32
32 -
 33
33 -
 34
34 -
35
-
36
-
37
-
38
-
39
-
40
-
41
-
42
-
43
-
44
-
45
-
46
-
47
-
48
-
49
-
50
-
51
-
52
-
53
-
54
-
55
-
56
-
57
-
58
-
59
-
60
-
61
-
62
-
63
-
64
-
65
-
66
-
67
-
68
-
69
-
70
-
71
-
72
-
73
-
74
-
75
-
76
-
77
-
78
-
79
-
80
-
81
-
82
-
83
-
84
-
85
-
86
-
87
-
88
-
89
-
90
-
91
-
92
-
93
-
94
-
95
-
96
-
97
-
98
-
99
-
100
-
101
-
102
-
103
-
104
-
105
-
106
-
107
-
108
-
109
-
110
-
111
-
112
-
113
-
114
-
115
-
116
-
117
-
118
-
119
-
120
-
121
-
122
-
123
-
124
-
125
-
126
-
127
-
128
-
129
-
130
-
131
-
132
-
133
-
134
-
135
-
136
-
137
-
138
-
139
-
140
-
141
-
142
 |
 |
