Canon 3624B002 User Manual - Page 148
Configuring Scanner Settings According to the Purpose, Adjusting the margins
 |
View all Canon 3624B002 manuals
Add to My Manuals
Save this manual to your list of manuals |
Page 148 highlights
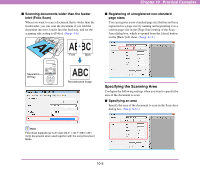
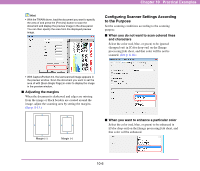
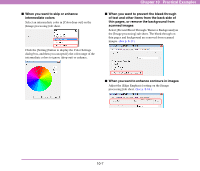
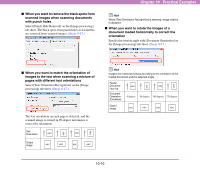
Chapter 10 Practical Examples Hint • With the TWAIN driver, load the document you want to specify the area of and press the [Preview] button to scan the document and display the preview image in the Area panel. You can then specify the area from the displayed preview image. Configuring Scanner Settings According to the Purpose Set the scanning conditions according to the scanning purpose. ■ When you do not want to scan colored lines and characters Select the color (red, blue, or green) to be ignored (dropped out) in [Color drop-out] on the [Image processing] tab sheet, and that color will be not be scanned. (See p. 8-18.) • With CapturePerfect 3.0, the last scanned image appears in the preview window. Scan the document you want to set the area of with [Scan Single Page] in order to display the image in the preview window. ■ Adjusting the margins When the document is deskewed and edges are missing from the image or black borders are created around the image, adjust the scanning area by setting the margins. (See p. 8-13.) Margin (+) Margin (-) ■ When you want to enhance a particular color Select the color (red, blue, or green) to be enhanced in [Color drop-out] on the [Image processing] tab sheet, and that color will be enhanced. 10-6
-
 1
1 -
2
-
3
-
4
-
5
-
6
-
7
-
8
-
9
-
10
-
11
-
12
-
13
-
14
-
15
-
16
-
17
-
18
-
19
-
20
-
21
-
22
-
23
-
24
-
25
-
26
-
27
-
28
-
29
-
30
-
31
-
32
-
33
-
34
-
35
-
36
-
37
-
38
-
39
-
40
-
41
-
42
-
43
-
44
-
45
-
46
-
47
-
48
-
49
-
50
-
51
-
52
-
53
-
54
-
55
-
56
-
57
-
58
-
59
-
60
-
61
-
62
-
63
-
64
-
65
-
66
-
67
-
68
-
69
-
70
-
71
-
72
-
73
-
74
-
75
-
76
-
77
-
78
-
79
-
80
-
81
-
82
-
83
-
84
-
85
-
86
-
87
-
88
-
89
-
90
-
91
-
92
-
93
-
94
-
95
-
96
-
97
-
98
-
99
-
100
-
101
-
102
-
103
-
104
-
105
-
106
-
107
-
108
-
109
-
110
-
111
-
112
-
113
-
114
-
115
-
116
-
117
-
118
-
119
-
120
-
121
-
122
-
123
-
124
-
125
-
126
-
127
-
128
-
129
-
130
-
131
-
132
-
133
-
134
-
135
-
136
-
137
-
138
-
139
-
140
-
141
-
142
-
 143
143 -
 144
144 -
 145
145 -
 146
146 -
 147
147 -
 148
148 -
 149
149 -
 150
150 -
 151
151 -
 152
152 -
 153
153 -
154
 |
 |
