Canon BJC 6100 User Guide - Page 55
Aligning the Print Heads, Routine Maintenance
 |
View all Canon BJC 6100 manuals
Add to My Manuals
Save this manual to your list of manuals |
Page 55 highlights
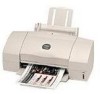
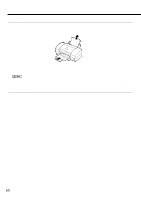
Routine Maintenance Aligning the Print Heads Two BJ Cartridges are always mounted on this printer. Each time you replace a BJ Cartridge or switch BJ Cartridges for a special print job, you must align the print heads to ensure optimum results in printing. 1 Make sure that the printer is switched on and A4- or Letter-size plain paper is loaded in the printer. 2 Select automatic print head alignment in the printer driver. ΠOpen the Printer Properties dialog box, then click the Maintenance tab. Click the print head alignment icon in the Test Prints box. 3 When a confirmation message appears, click the OK button. The printer starts to print the head alignment pattern. 4 When this pattern is printed, the print heads of the two BJ Cartridges have been aligned properly. It takes a few minutes until the print head alignment operation is completed. Note There are two procedures for aligning the print heads. Normally, execute the automatic print head alignment feature of the printer driver. If this does not work for some reason, then align the print heads manually. For more details on manual print head alignment, refer to the "Aligning the Print Heads" section in the Reference Guide. 55
-
 1
1 -
2
-
3
-
4
-
5
-
6
-
7
-
8
-
9
-
10
-
11
-
12
-
13
-
14
-
15
-
16
-
17
-
18
-
19
-
20
-
21
-
22
-
23
-
24
-
25
-
26
-
27
-
28
-
29
-
30
-
31
-
32
-
33
-
34
-
35
-
36
-
37
-
38
-
39
-
40
-
41
-
42
-
43
-
44
-
45
-
46
-
47
-
48
-
49
-
 50
50 -
 51
51 -
 52
52 -
 53
53 -
 54
54 -
 55
55 -
 56
56 -
 57
57 -
 58
58 -
 59
59 -
 60
60 -
61
-
62
-
63
-
64
-
65
-
66
-
67
-
68
-
69
-
70
-
71
-
72
-
73
-
74
-
75
 |
 |
