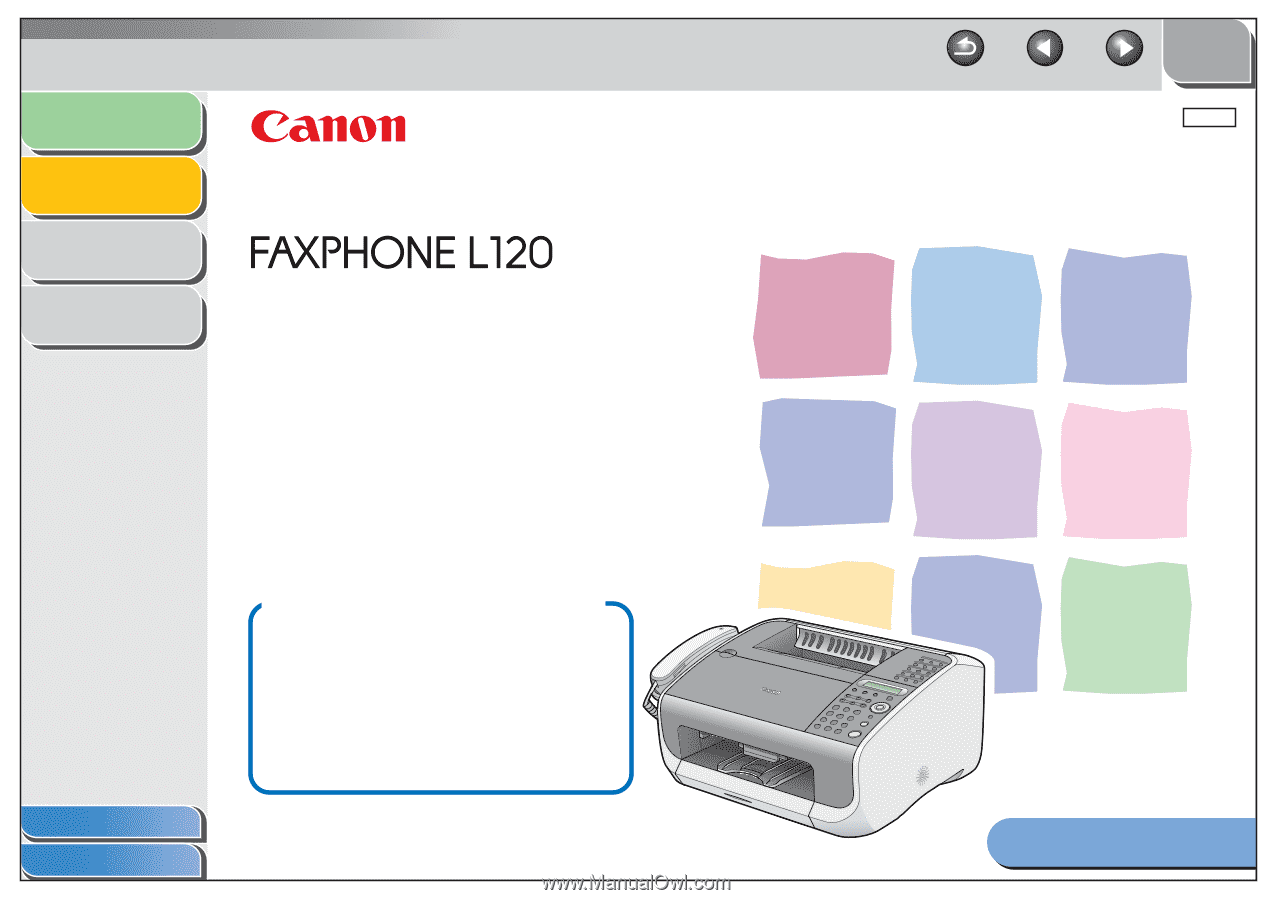
Canon FAXPHONE L120 FAXPHONE L120 Software Guide
Canon FAXPHONE L120 Manual
 |
View all Canon FAXPHONE L120 manuals
Add to My Manuals
Save this manual to your list of manuals |
Canon FAXPHONE L120 manual content summary:
- Canon FAXPHONE L120 | FAXPHONE L120 Software Guide - Page 1
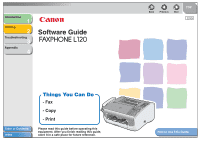
Introduction 1 Printing 2 Troubleshooting 3 Appendix 4 Software Guide Table of Contents Index Things You Can Do - Fax - Copy - Print Please read this guide before operating this equipment. After you finish reading this guide, store it in a safe place for future reference. Back Previous Next - Canon FAXPHONE L120 | FAXPHONE L120 Software Guide - Page 2
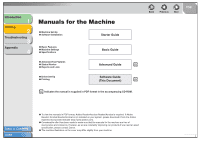
1 Printing 2 Troubleshooting 3 Appendix 4 Manuals for the Machine ● Machine Set-Up ● Software Installation Starter Guide ● Basic Features ● Machine Settings ● Specifications Basic Guide ● Advanced Fax Features ● Status Monitor ● Reports and Lists Advanced Guide CD-ROM ● Driver Set-Up - Canon FAXPHONE L120 | FAXPHONE L120 Software Guide - Page 3
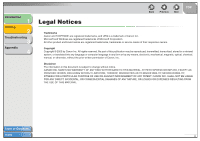
Introduction 1 Printing 2 Troubleshooting 3 Appendix 4 Legal Notices Back Previous Next TOP Trademarks Canon and FAXPHONE are registered trademarks, and UHQ is a trademark of Canon Inc. Microsoft and Windows are registered trademarks of Microsoft Corporation. All other product and brand names - Canon FAXPHONE L120 | FAXPHONE L120 Software Guide - Page 4
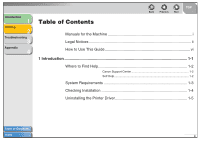
2 Troubleshooting 3 Appendix 4 Table of Contents Back Previous Next TOP Manuals for the Machine i Legal Notices ii How to Use This Guide vi 1 Introduction ...1-1 Where to Find Help 1-2 Canon Support Center 1-2 Self Help 1-2 System Requirements 1-3 Checking Installation 1-4 Uninstalling - Canon FAXPHONE L120 | FAXPHONE L120 Software Guide - Page 5
2-5 Windows 2000/XP Properties and Printing Preferences 2-23 Properties 2-24 Printing Preferences 2-29 Using the Machine on Your Network 2-45 Setting the Machine as a Shared Printer 2-45 Using the Shared Printer on Your Network 2-50 3 Troubleshooting...3-1 Printer Problems 3-2 Driver Problems - Canon FAXPHONE L120 | FAXPHONE L120 Software Guide - Page 6
Introduction 1 Printing 2 Troubleshooting 3 Appendix 4 Back Previous Next TOP 4 Appendix...4-1 Printer Specifications 4-2 Hardware 4-2 Software 4-2 Glossary ...4-3 Index ...4-9 Table of Contents Index v - Canon FAXPHONE L120 | FAXPHONE L120 Software Guide - Page 7
1 Printing 2 Troubleshooting 3 Appendix 4 Software Guide Back Previous Next TOP ENG Back Previous Next TOP Returns to the last page opened. Displays the previous or next page. Returns to the top page. Table of Contents Index Table of Contents Index Things You Can Do - Fax - Copy - Print - Canon FAXPHONE L120 | FAXPHONE L120 Software Guide - Page 8
4 ■ Using the Chapter Topic List Introduction 1 Printing 2 Troubleshooting 3 Appendix 4 1 Introduction Back Previous Next TOP Where to Find Help 1-2 System Requirements 1-3 Checking Installation 1-4 Uninstalling the Printer Driver 1-5 Back Previous Next TOP Returns to the last page - Canon FAXPHONE L120 | FAXPHONE L120 Software Guide - Page 9
Introduction 1 Printing 2 Troubleshooting 3 Appendix 4 Back Previous Next TOP The following symbols are used throughout the manuals for the machine and indicate the warnings, cautions and notes you should keep in mind when using the machine. WARNING Indicates a warning that may lead to death or - Canon FAXPHONE L120 | FAXPHONE L120 Software Guide - Page 10
Introduction 1 Printing 2 Troubleshooting 3 Appendix 4 1 Introduction Back Previous Next TOP Where to Find Help 1-2 System Requirements 1-3 Checking Installation 1-4 Uninstalling the Printer Driver 1-5 Table of Contents Index 1-1 - Canon FAXPHONE L120 | FAXPHONE L120 Software Guide - Page 11
Index Where to Find Help When you encounter a problem during installation of the driver software or while operating your machine, consult the following: In This Manual See Chapter 3, "Troubleshooting." In the Basic Guide See Chapter 3, "Troubleshooting." README. TXT File The hints, limitations, and - Canon FAXPHONE L120 | FAXPHONE L120 Software Guide - Page 12
Disk Space: 295 MB or more Microsoft Windows 2000 Professional CPU: Intel Pentium/133 MHz or faster Memory: 64 MB or more Available Hard Disk Space: 655 MB or more Microsoft Windows XP (32-bit version) CPU: Intel Pentium/Celeron series 300 MHz or faster Memory: 128 MB or more Available Hard Disk - Canon FAXPHONE L120 | FAXPHONE L120 Software Guide - Page 13
Printing 2 Troubleshooting 3 Appendix 4 Checking Installation Check if the driver is installed successfully and the machine is selected as the default printer. NOTE If your machine is selected in the printer box when you open the [Print] dialog box in an application, which means your machine is set - Canon FAXPHONE L120 | FAXPHONE L120 Software Guide - Page 14
uninstall the software in Windows 2000/XP, you must be the user with administrative privileges. 1. Click [start] on the Windows task bar → [(All) Programs] → [Canon Printer Uninstaller] → [CARPS Printer Driver Uninstaller Ver.2.0]. 2. Select the corresponding printer → click [Delete]. 3. Click [Yes - Canon FAXPHONE L120 | FAXPHONE L120 Software Guide - Page 15
Introduction 1 Printing 2 Troubleshooting 3 Appendix 4 4. Click [Exit]. NOTE A message recommending you to restart your computer may appear under some operating systems. In this case, continue after restarting your computer. Back Previous Next TOP Table of Contents Index 1-6 - Canon FAXPHONE L120 | FAXPHONE L120 Software Guide - Page 16
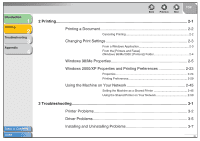
2 Troubleshooting 3 Appendix 4 2 Printing Back Previous Next TOP Printing a Document 2-2 Canceling Printing 2-2 Changing Print Settings 2-3 From a Windows Application 2-3 From the [Printers and Faxes] (Windows 98/Me/2000: [Printers]) Folder 2-4 Windows 98/Me Properties 2-5 Windows 2000/XP - Canon FAXPHONE L120 | FAXPHONE L120 Software Guide - Page 17
■ Canceling Printing 1. Open the [Printers and Faxes] (Windows 98/ Me/2000: [Printers]) folder. Click [start] on the Windows task bar → select [Printers and Faxes] (Windows 98/Me/2000: [Start] → [Settings] → [Printers]). 2. Double-click the corresponding printer driver icon. 3. Right click the print - Canon FAXPHONE L120 | FAXPHONE L120 Software Guide - Page 18
2 Troubleshooting 3 Appendix 4 Changing Print Settings To view or change the print settings, access the properties or printing preferences dialog box of the printer driver. You can access the properties dialog box either from the application's [Print] dialog box or the [Printers and Faxes] (Windows - Canon FAXPHONE L120 | FAXPHONE L120 Software Guide - Page 19
the corresponding printer driver icon and selecting [Properties] from the pop-up menu. The [Canon L120 Properties] dialog box appears. Back Previous Next TOP Opening the Printing Preferences Dialog Box (Windows 2000/XP) 1. Open the [Printers and Faxes] (Windows 2000: [Printers]) folder. Click - Canon FAXPHONE L120 | FAXPHONE L120 Software Guide - Page 20
Introduction 1 Printing 2 Troubleshooting 3 Appendix 4 Windows 98/Me Properties Back Previous Next TOP NOTE - The screens shown below are displayed when you open [Canon L120 Properties] from the [Printers] folder. - The number of tabs displayed in the properties dialog box depends on how you - Canon FAXPHONE L120 | FAXPHONE L120 Software Guide - Page 21
2 Troubleshooting 3 Appendix 4 Spool Settings The installer sets the following defaults. Color Management Tab Associate color profiles with your color printer. Refer to your Windows operating system documentation for more information. Back Previous Next TOP Sharing Tab Specifies the printer - Canon FAXPHONE L120 | FAXPHONE L120 Software Guide - Page 22
Introduction 1 Printing 2 Troubleshooting 3 Appendix 4 Page Setup Tab Specifies the page settings [11 x 17], [B4], or [A3] is selected in the [Page size], the original page size is reduced to fit [Letter] automatically. Selects the output paper size to print on. When this option is set to anything - Canon FAXPHONE L120 | FAXPHONE L120 Software Guide - Page 23
Introduction 1 Printing 2 Troubleshooting 3 Appendix 4 Table of Contents Index [Copies] [Orientation] [ [1 Page per Sheet], [Manual Scaling] disappears and [Page Order] appears in its place. [Manual Scaling] Reduces or enlarges the original page size. Selecting this check box enables the edit box - Canon FAXPHONE L120 | FAXPHONE L120 Software Guide - Page 24
1 Printing 2 Troubleshooting 3 Appendix 4 Table of Contents Index [Watermark] Inserts the selected watermark to be printed on each page. Eight types of pre-defined watermark are available: - CONFIDENTIAL - COPY - DRAFT - FILE COPY - FINAL - PRELIMINARY - PROOF - TOP SECRET Selecting this check box - Canon FAXPHONE L120 | FAXPHONE L120 Software Guide - Page 25
Introduction 1 Printing 2 Troubleshooting 3 Appendix 4 Table of Contents Index [Add] [Delete] Registers a new watermark. Clicking this button adds a blank name field in [ watermark only on the first page of the document. NOTE Some settings are not available for pre-defined watermarks. 2-10 - Canon FAXPHONE L120 | FAXPHONE L120 Software Guide - Page 26
Printing 2 Troubleshooting 3 Appendix 4 Canon L120 Properties] dialog box is opened from a Windows application. [Paper List] Displays the paper sizes actually available. Selects a paper size from which you can create a custom paper size. NOTE You can share the custom paper sizes with all printers - Canon FAXPHONE L120 | FAXPHONE L120 Software Guide - Page 27
Introduction 1 Printing 2 Troubleshooting 3 Appendix 4 Page Options Clicking [Page Options] in the [Page Setup] tab sheet opens on each page or not. Six positions to print the date are available. [Print User Name] Selects if the user name is printed on each page or not. Six positions to print the - Canon FAXPHONE L120 | FAXPHONE L120 Software Guide - Page 28
Introduction 1 Printing 2 Troubleshooting 3 Appendix 4 Finishing Tab Specifies the finishing settings for the printed pages including the collating and binding. For information on [Profile] and [Output Method], refer to " - Canon FAXPHONE L120 | FAXPHONE L120 Software Guide - Page 29
Introduction 1 Printing 2 Troubleshooting 3 Appendix 4 Gutter Settings Clicking [Gutter] in the [Finishing] tab 14). [Grayscale Settings] Click this button after selecting the [Manual Grayscale Settings] check box to manually adjust the grayscale settings. The [Grayscale Settings] dialog box - Canon FAXPHONE L120 | FAXPHONE L120 Software Guide - Page 30
when printing enlarged image files and photographs using a software application. [Toner Save] Modifies print data to print lighter and conserve toner. Printer Default: Prints using the settings in the operation panel of the printer. Off: Prints using normal density. On: Prints text lighter in - Canon FAXPHONE L120 | FAXPHONE L120 Software Guide - Page 31
1 Printing 2 Troubleshooting 3 Appendix 4 Grayscale Settings Clicking [Grayscale Settings] in the [Quality] tab sheet opens the [Grayscale Settings] dialog box. This dialog box enables you to control the brightness and contrast of images. This function is enabled only when [Manual Grayscale Setting - Canon FAXPHONE L120 | FAXPHONE L120 Software Guide - Page 32
Troubleshooting 3 Appendix 4 Matching Tab Table of Contents Index [Matching Mode] You can specify the procedure for Color correction. Driver Matching Mode: Processes color in the printer driver output. Colorimetric: Gives priority to reducing the color difference between the original document - Canon FAXPHONE L120 | FAXPHONE L120 Software Guide - Page 33
Troubleshooting 3 Appendix 4 Table of Contents Index [Monitor Profile] Specifies the setting suitable for your monitor when the [Driver Matching Mode] is selected in the [Matching Mode] box. NOTE - In the case image (for example, a photograph before scanning or graphics displayed on the monitor), - Canon FAXPHONE L120 | FAXPHONE L120 Software Guide - Page 34
Print] and [Edit and Preview]. Print: Executes a normal print job. Edit and Preview: Saves the data in the [Canon PageComposer] dialog box. If you open [Canon L120 Properties] from the [Printers] folder and select the [Edit and Preview] mode, (Lock) button appears on the right side. When you click - Canon FAXPHONE L120 | FAXPHONE L120 Software Guide - Page 35
Introduction 1 Printing 2 Troubleshooting 3 Appendix 4 Add Profile Clicking (Add Profile) opens the [Add Profile] dialog box. This dialog box enables you to register a new profile with the current settings. - Canon FAXPHONE L120 | FAXPHONE L120 Software Guide - Page 36
Introduction 1 Printing 2 Troubleshooting 3 Appendix 4 Table of Contents Index (Move Up) Moves the profile selected in the [Profile List] one position up. (Move Down) Moves the profile selected in - Canon FAXPHONE L120 | FAXPHONE L120 Software Guide - Page 37
Introduction 1 Printing 2 Troubleshooting 3 Appendix 4 View Settings Clicking [View Settings] opens the [View Settings] dialog box. This dialog box displays the current settings in the [Page Setup], [Finishing], and [ - Canon FAXPHONE L120 | FAXPHONE L120 Software Guide - Page 38
1 Printing 2 Troubleshooting 3 Appendix 4 Back Previous Next TOP Windows 2000/XP Properties and Printing Preferences The printer driver for Windows 2000/XP has the following two main dialog boxes: The Properties Dialog Box This dialog box enables you to set up the printer configuration and - Canon FAXPHONE L120 | FAXPHONE L120 Software Guide - Page 39
2 Troubleshooting 3 Appendix 4 ■ Properties The [Canon L120 Properties] dialog box contains several tab sheets that enable you to set up the printer configuration printer sharing settings. This tab sheet is available only when the printer sharing is enabled (see p. 2-45). Refer to your Windows - Canon FAXPHONE L120 | FAXPHONE L120 Software Guide - Page 40
Printing 2 Troubleshooting 3 Appendix 4 Ports Tab Specifies the port to which the printer is attached. Refer to your Windows operating system documentation for more information. Back Previous Next TOP Advanced Tab Specifies the settings for print spooling. Refer to your Windows operating system - Canon FAXPHONE L120 | FAXPHONE L120 Software Guide - Page 41
Introduction 1 Printing 2 Troubleshooting 3 Appendix 4 Color Management Tab Associates color profiles with your color printer. Refer to your Windows operating system documentation for more information. Back Previous Next TOP Security Tab Specifies security settings. Refer to your operating - Canon FAXPHONE L120 | FAXPHONE L120 Software Guide - Page 42
Introduction 1 Printing 2 Troubleshooting 3 Appendix 4 Profile Tab Enables you to add, edit, and select a profile to be applied to print jobs. Back Previous Next TOP [Edit] Opens the [Add/ - Canon FAXPHONE L120 | FAXPHONE L120 Software Guide - Page 43
Introduction 1 Printing 2 Troubleshooting 3 Appendix 4 [Import] [Export] Enables you to import profile information from a file. Enables you to export the selected profile information to a file. NOTE When one of - Canon FAXPHONE L120 | FAXPHONE L120 Software Guide - Page 44
Introduction 1 Printing 2 Troubleshooting 3 Appendix 4 [Icon] Selects an brightness and contrast (see p. 2-37). ■ Printing Preferences The [Canon L120 Printing Preferences] dialog box contains three tab sheets that enable you The screen shots shown are from Windows XP. Table of Contents Index 2-29 - Canon FAXPHONE L120 | FAXPHONE L120 Software Guide - Page 45
Introduction 1 Printing 2 Troubleshooting 3 Appendix 4 Page Setup Tab Specifies the page settings x 17], [B4], or [A3] is selected in the [Page Size], the original page size is automatically reduced to fit [Letter] size. Selects the output paper size to print on. When this option is set to anything - Canon FAXPHONE L120 | FAXPHONE L120 Software Guide - Page 46
] appears. When this option is set to anything other than [1 Page per Sheet], [Manual Scaling] disappears and [Page Order] appears in its place. [Manual Scaling] Reduces or enlarges the original page size. Selecting this check box enables the edit box on the right side to specify the magnification - Canon FAXPHONE L120 | FAXPHONE L120 Software Guide - Page 47
Printers and Faxes] (Windows 2000: [Printers])). You cannot specify the dimensions from the [Document Properties] dialog box (software application). [Page Options] Click this button to select options for printing dates, user ] check box is selected in the [Page Setup] tab sheet. Table of - Canon FAXPHONE L120 | FAXPHONE L120 Software Guide - Page 48
Introduction 1 Printing 2 Troubleshooting 3 Appendix 4 Table of Contents Index [Watermark List] Displays the names of registered watermarks. The preview image in the upper left part of the dialog box - Canon FAXPHONE L120 | FAXPHONE L120 Software Guide - Page 49
Introduction 1 Printing 2 Troubleshooting 3 Appendix 4 Custom Paper Size Settings Clicking [Custom Paper Size is available only when you open the [Canon L120 Printing Preferences] dialog box from the [Printers and Faxes] (Windows 98/Me/ 2000: [Printers]) folder. Table of Contents Index [Paper - Canon FAXPHONE L120 | FAXPHONE L120 Software Guide - Page 50
Introduction 1 Printing 2 Troubleshooting 3 Appendix 4 Page Options Clicking [Page Options] in the [Page Setup] tab sheet on each page or not. Six positions to print the date are available. [Print User Name] Selects if the user name is printed on each page or not. Six positions to print the - Canon FAXPHONE L120 | FAXPHONE L120 Software Guide - Page 51
Introduction 1 Printing 2 Troubleshooting 3 Appendix 4 Finishing Tab Specifies the finishing settings for the printed pages including the collating and binding. For information on [Profile] and [Output Method], refer to " - Canon FAXPHONE L120 | FAXPHONE L120 Software Guide - Page 52
Introduction 1 Printing 2 Troubleshooting 3 Appendix 4 Quality Tab Specifies the settings for print quality and make print quality settings (see p. 2-38). [Manual Grayscale Enables the manual grayscale. Selecting this Settings] check box enables [Grayscale Settings] to access the dialog box - Canon FAXPHONE L120 | FAXPHONE L120 Software Guide - Page 53
enlarged image files and photographs using a software application. Modifies print data to print lighter and conserve toner. Printer Default: Prints using the settings in the operation panel of the printer. Off: Prints using normal density. On: Prints text lighter in printouts for proofreading and - Canon FAXPHONE L120 | FAXPHONE L120 Software Guide - Page 54
Printing 2 Troubleshooting 3 Appendix 4 Grayscale Settings Clicking [Grayscale Settings] in the [Quality] tab sheet opens the [Grayscale Settings] dialog box. This dialog box enables you to control the brightness and contrast of images. This function is enabled only when [Manual Grayscale Settings - Canon FAXPHONE L120 | FAXPHONE L120 Software Guide - Page 55
Troubleshooting 3 Appendix 4 Table of Contents Index [Matching Mode] Specifies the procedure for color correction. Driver Matching Mode: Processes color in the printer driver Driver Matching Mode] is selected in the [Matching Mode] box. Back Previous Next TOP NOTE In the case before scanning or - Canon FAXPHONE L120 | FAXPHONE L120 Software Guide - Page 56
Introduction 1 Printing 2 Troubleshooting 3 Appendix 4 Profiles A registered combination of settings for the [Page reflected in the preview image. Table of Contents Index [Profile] Stores various printer driver settings, each suitable for certain print jobs, as pre-defined Profiles. Selecting - Canon FAXPHONE L120 | FAXPHONE L120 Software Guide - Page 57
2 Troubleshooting 3 Appendix 4 [Output Method] Switches the job mode between [Print] and [Edit and Preview]. Print: Executes a normal print job. Edit and Preview: Saves the data in the [Canon PageComposer] dialog box. If you open [Canon L120 Printing Preferences] from the [Printers and Faxes - Canon FAXPHONE L120 | FAXPHONE L120 Software Guide - Page 58
Introduction 1 Printing 2 Troubleshooting 3 Appendix 4 Edit Profile Clicking (Edit Profile) opens the [Edit Profile] dialog box. This dialog box enables you to edit the profile selected in [Profile List]. - Canon FAXPHONE L120 | FAXPHONE L120 Software Guide - Page 59
Introduction 1 Printing 2 Troubleshooting 3 Appendix 4 NOTE When one of the pre-defined profiles is selected, the comment cannot be changed. [Import] [Export] Enables you to import profile information from a - Canon FAXPHONE L120 | FAXPHONE L120 Software Guide - Page 60
, install the print server locally, then make the following settings. For more information, see your print server system documentation. Windows 2000/XP Server Settings The following is the procedure to make your machine available to your network users, under Windows 2000/XP. Adding Server Service - Canon FAXPHONE L120 | FAXPHONE L120 Software Guide - Page 61
2 Troubleshooting 3 Appendix 4 4. Select [File and Printer Sharing for Microsoft Networks] → click [OK]. Back Previous Next TOP 3. Select [File and Printer Sharing for Microsoft Networks] → click [OK]. Table of Contents Index The server service is added. Adding Server Service (Windows 2000 - Canon FAXPHONE L120 | FAXPHONE L120 Software Guide - Page 62
this printer] (Windows 2000: [Shared as]) in the [Sharing] tab sheet. Back Previous Next TOP Windows 98/Me Server Settings The following is the procedure to make your machine available to your network users, under Windows 98/Me. The screen shots shown are from Windows 98. Adding Server Service - Canon FAXPHONE L120 | FAXPHONE L120 Software Guide - Page 63
Introduction 1 Printing 2 Troubleshooting 3 Appendix 4 3. Click [Add] in the [Configuration] tab sheet. The [Select Network Component Type] dialog box appears. 4. Select [Service] → click [Add]. Back Previous Next TOP 5. Select [File and printer sharing for Microsoft Networks] → click [OK]. - Canon FAXPHONE L120 | FAXPHONE L120 Software Guide - Page 64
] tab → [Share- level access control] or [User-level access control]. The [File and Print Sharing] dialog box appears. 8. Make sure that [I want to be able to allow others to print to my printer(s).] is selected → click [OK]. 10. Click [OK]. The server service is added. If the confirmation message - Canon FAXPHONE L120 | FAXPHONE L120 Software Guide - Page 65
2. Double-click the machine icon, or drag the machine icon to your [Printers and Faxes] (Windows 98/Me/2000: [Printers]) folder. The [Add Printer Wizard] dialog box appears. 3. Follow the instructions on the screen to complete the installation. Add Printer Wizard (Windows 2000/XP) The following is - Canon FAXPHONE L120 | FAXPHONE L120 Software Guide - Page 66
the client cannot to connect the shared printer. - If a suitable driver is not found, it probably means the server is a Windows 98/Me computer. 6. Follow the instructions on the screen to complete the installation. Back Previous Next TOP Add Printer Wizard (Windows 98/Me) The following is the - Canon FAXPHONE L120 | FAXPHONE L120 Software Guide - Page 67
Introduction 1 Printing 2 Troubleshooting 3 Appendix 4 7. Click [Have Disk]. The [Install From Disk] dialog box appears. 8. Select the location containing the printer driver. Back Previous Next TOP 9. Click [OK]. 10. Enter the name of the printer you want to use → click [Next]. If you accept - Canon FAXPHONE L120 | FAXPHONE L120 Software Guide - Page 68
Introduction 1 Printing 2 Troubleshooting 3 Appendix 4 3 Troubleshooting Back Previous Next TOP Printer Problems 3-2 Driver Problems 3-5 Installing and Uninstalling Problems 3-7 Table of Contents Index 3-1 - Canon FAXPHONE L120 | FAXPHONE L120 Software Guide - Page 69
Troubleshooting 3 Appendix 4 Printer Problems Printer does not print. Q Is there some paper in the machine? A Make sure paper is loaded. Q Does the copy job stop due to out of paper? A Load paper. The print job will start automatically when the copy job is completed. Q Is the cartridge - Canon FAXPHONE L120 | FAXPHONE L120 Software Guide - Page 70
[Printers and Faxes] (Windows 98/Me/2000: [Printers]) folder? A Make sure the corresponding printer driver is selected in the [Printers and Faxes] (Windows 98/ Me/2000: [Printers]) folder. Back Previous Next TOP Printer locks up system. Q Does your system setup have a problem? A Make - Canon FAXPHONE L120 | FAXPHONE L120 Software Guide - Page 71
2 Troubleshooting 3 Appendix 4 Computer indicates a device time-out. Q Is the machine off, offline, or not connected to the computer? A Make sure the machine's interface cable is securely connected to both the machine and the computer. A Make sure paper is properly loaded in the machine - Canon FAXPHONE L120 | FAXPHONE L120 Software Guide - Page 72
the L120 printer driver using the USB port. Q Is the USB driver installed properly? Table of Contents Index Back Previous Next TOP A Perform the following steps. 1. Make sure the machine is connected to your computer using a USB cable and the machine is turned on. 2. For Windows XP - Canon FAXPHONE L120 | FAXPHONE L120 Software Guide - Page 73
[Action] menu. For Windows 98/Me, select [Canon L120] → click [Remove]. 5. Close the [Control Panel] folder → unplug the USB cable. 6. Restart your computer. 7. For instructions on installing the printer driver, see "Install the Printer Driver," in the Starter Guide. Strings of garbled characters - Canon FAXPHONE L120 | FAXPHONE L120 Software Guide - Page 74
continue trouble-free. Cannot use the software after upgrading to Windows XP. Q Have you upgraded Windows 98/Me/2000 to Windows XP without removing the software? A Remove the software (see "Uninstalling the Printer Driver," on p. 1-5), then reinstall it. (See "Install the Printer Driver," in - Canon FAXPHONE L120 | FAXPHONE L120 Software Guide - Page 75
Introduction 1 Printing 2 Troubleshooting 3 Appendix 4 4 Appendix Back Previous Next TOP Printer Specifications 4-2 Hardware 4-2 Software 4-2 Glossary 4-3 Index ...4-9 Table of Contents Index 4-1 - Canon FAXPHONE L120 | FAXPHONE L120 Software Guide - Page 76
Introduction 1 Printing 2 Troubleshooting 3 Appendix 4 Printer Specifications ■ Hardware Host Interface USB 1.1 interface ■ Software 15/64" (6 mm) margin at bottom edge Max. 5/32" (4 mm) margin at side edge For Envelope Monarch, Envelope COM10, Envelope DL, and Envelope C5: Max. 25/64" (10 mm) - Canon FAXPHONE L120 | FAXPHONE L120 Software Guide - Page 77
Introduction 1 Printing 2 Troubleshooting 3 Appendix 4 Table printer directly. It interacts with the printer through a server. See also Server. Collate To print multiple copies of a multi-page document in sequential page order. Back Previous Next TOP Command An instruction that tells the machine - Canon FAXPHONE L120 | FAXPHONE L120 Software Guide - Page 78
driver supplies Windows with information such as descriptions of the fonts and features of the installed printer. F Fixing assembly The device used during the print process to fix the toner onto the paper (or other media) through applying heat and pressure. The assembly, located inside the machine - Canon FAXPHONE L120 | FAXPHONE L120 Software Guide - Page 79
of the page. Back Previous Next TOP Local printer A printer that is directly connected to your computer. M Megabyte (MB) A unit of measurement, representing one million bytes, used to describe machine or computer memory size. My Computer The Windows program that you can use to browse through - Canon FAXPHONE L120 | FAXPHONE L120 Software Guide - Page 80
is removed from the print queue. Printer driver A program that controls how the computer and printer interact. The printer driver supplies Windows with information such as descriptions of fonts and features of the installed printer. Printers and Faxes folder (Printers folder) The container in which - Canon FAXPHONE L120 | FAXPHONE L120 Software Guide - Page 81
RAM, Virtual memory. Reinstall To remove installed software and install again. Previous Next TOP Scaling Enlarging or reducing the printed image. Separator page machine. Spooling A process by which an application sends a document to the spooler, rather than directly to the printer, thus freeing - Canon FAXPHONE L120 | FAXPHONE L120 Software Guide - Page 82
2 Troubleshooting 3 Appendix 4 T Title bar The horizontal bar that contains the title of a window or dialog box. On many windows, the title bar contains the [Control] menu box and Maximize and Minimize buttons. Toner A black, resin-coated powder contained in the toner cartridge. The machine applies - Canon FAXPHONE L120 | FAXPHONE L120 Software Guide - Page 83
16 Gutter Settings Windows 2000/XP 2-36 Windows 98/Me 2-14 Back Previous Next TOP I Import 4-5 Installation CARPs drivers 1-4 checking 1-4 installing and uninstalling problems 3-7 Interface 4-5 Interface port 4-5 L Landscape 4-5 Local printer 4-5 M Matching tab Windows 2000/XP 2-39 Windows 98/Me - Canon FAXPHONE L120 | FAXPHONE L120 Software Guide - Page 84
tab Windows 2000/XP 2-26 Shared printer 2-47 Sharing tab Windows 2000/XP 2-24 Windows 98/Me 2-6 Software checking installation 1-4 installing 1-4 Specifications printer 4-2 System Requirements 1-3 Back Previous Next TOP T Toner 4-8 saver 4-8 Transfer roller 4-8 Troubleshooting 3-1 U Uninstall - Canon FAXPHONE L120 | FAXPHONE L120 Software Guide - Page 85
Introduction 1 Printing 2 Troubleshooting 3 Appendix 4 Table of Contents Index CANON INC. 30-2, Shimomaruko 3-chome, Ohta-ku, Tokyo 146-8501, Japan CANON U.S.A., INC. One Canon Plaza, Lake Success, NY 11042, U.S.A. CANON CANADA INC. 6390 Dixie Road Mississauga, Ontario L5T 1P7, Canada CANON EUROPA
-
 1
1 -
 2
2 -
 3
3 -
 4
4 -
 5
5 -
 6
6 -
 7
7 -
8
-
9
-
10
-
11
-
12
-
13
-
14
-
15
-
16
-
17
-
18
-
19
-
20
-
21
-
22
-
23
-
24
-
25
-
26
-
27
-
28
-
29
-
30
-
31
-
32
-
33
-
34
-
35
-
36
-
37
-
38
-
39
-
40
-
41
-
42
-
43
-
44
-
45
-
46
-
47
-
48
-
49
-
50
-
51
-
52
-
53
-
54
-
55
-
56
-
57
-
58
-
59
-
60
-
61
-
62
-
63
-
64
-
65
-
66
-
67
-
68
-
69
-
70
-
71
-
72
-
73
-
74
-
75
-
76
-
77
-
78
-
79
-
80
-
81
-
82
-
83
-
84
-
85
 |
 |
1
2
3
4
ENG
Table of Contents
Index
How to Use This Guide
TOP
Back
Previous
Next
Things You Can Do
Software Guide
- Fax
- Copy
- Print
Introduction
Printing
Troubleshooting
Appendix
Please read this guide before operating this
equipment. After you finish reading this guide,
store it in a safe place for future reference.