Canon FAXPHONE L120 FAXPHONE L120 Software Guide - Page 30
Introduction, Printing, Troubleshooting, Appendix, Detailed Settings - toner
 |
View all Canon FAXPHONE L120 manuals
Add to My Manuals
Save this manual to your list of manuals |
Page 30 highlights
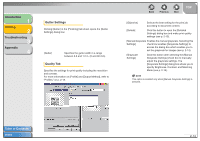
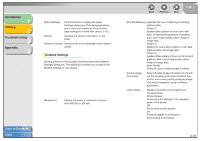
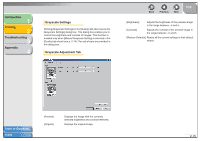
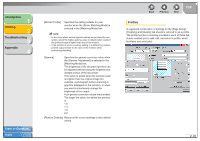
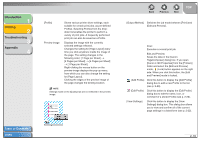
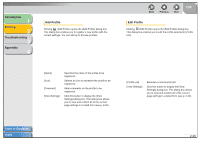
Introduction 1 Printing 2 Troubleshooting 3 Appendix 4 [View Settings] Click this button to display the [View Settings] dialog box. This dialog box allows you to view and confirm all of the current page settings in a listed form (see p. 2-22). [About] Displays the version information on the driver. [Restore Defaults] Resets all the current settings to their default values. Detailed Settings Clicking [Details] in the [Quality] tab sheet opens the [Detailed Settings] dialog box. This dialog box enables you to specify the detailed settings for print quality. [Resolution] Selects the printer's resolution in dot per inch (600 dpi or 300 dpi). Table of Contents Index Back Previous Next TOP [B & W Halftones] Specifies the use of dithering for printing halftone data. Pattern 1: Applies dither pattern of clear-cut to text data, of high-quality gradation to graphics data, and of high-quality nature image to image data. Pattern 2: Applies the same dither pattern to text data, graphics data, and image data. Pattern 3: Applies dither pattern of clear-cut to text and graphics data, and of high-quality nature image to image data. None [Solid]: Prints all colors in black except for white. [Enable Image Correction] Select [Enable Image Correction] to smooth out the streaking and coarse features that tend to occur when printing enlarged image files and photographs using a software application. [Toner Save] Modifies print data to print lighter and conserve toner. Printer Default: Prints using the settings in the operation panel of the printer. Off: Prints using normal density. On: Prints text lighter in printouts for proofreading and choking. 2-15
-
 1
1 -
2
-
3
-
4
-
5
-
6
-
7
-
8
-
9
-
10
-
11
-
12
-
13
-
14
-
15
-
16
-
17
-
18
-
19
-
20
-
21
-
22
-
23
-
24
-
 25
25 -
 26
26 -
 27
27 -
 28
28 -
 29
29 -
 30
30 -
 31
31 -
 32
32 -
 33
33 -
 34
34 -
 35
35 -
36
-
37
-
38
-
39
-
40
-
41
-
42
-
43
-
44
-
45
-
46
-
47
-
48
-
49
-
50
-
51
-
52
-
53
-
54
-
55
-
56
-
57
-
58
-
59
-
60
-
61
-
62
-
63
-
64
-
65
-
66
-
67
-
68
-
69
-
70
-
71
-
72
-
73
-
74
-
75
-
76
-
77
-
78
-
79
-
80
-
81
-
82
-
83
-
84
-
85
 |
 |