Canon PowerShot SD890 IS PowerShot SD890 IS / DIGITAL IXUS 970 IS Camera User - Page 106
Adjusting the Tone White Balance
 |
View all Canon PowerShot SD890 IS manuals
Add to My Manuals
Save this manual to your list of manuals |
Page 106 highlights
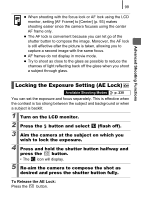
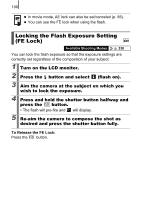
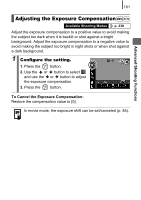
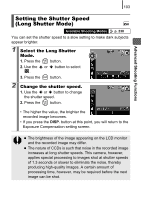
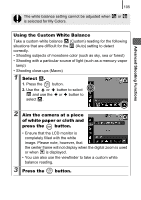
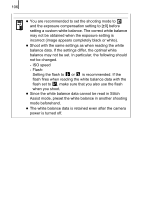
104 z Use the LCD monitor to confirm that the image was recorded at the desired brightness. z Please note that camera shake becomes a factor at low shutter speeds. Shoot with the camera attached to a tripod. z Use of the flash may result in an over-exposed image. If this occurs, shoot with the flash set to . Adjusting the Tone (White Balance) Available Shooting Modes p. 238 Normally, the (Auto) white balance setting selects an optimal white balance. When the setting cannot produce natural looking colors, change the white balance using a setting appropriate for the light source. Auto Settings are automatically set by the camera. Day Light For recording outdoors on a bright day. Cloudy For recording under overcast, shady or twilight skies. Tungsten For recording under tungsten and bulb-type 3wavelength fluorescent lighting. Fluorescent For recording under warm-white, cool-white or warm-white (3-wavelength) fluorescent lighting. Fluorescent H For recording under daylight fluorescent, or daylight fluorescent-type 3-wavelength fluorescent lighting. Custom For recording with the optimal white balance data memorized in the camera from a white-colored object, such as white paper or cloth. 1 Select a white balance setting. 1. Press the button. 2. Use the or and the or the option. button to select button to change 3. Press the button.
-
 1
1 -
2
-
3
-
4
-
5
-
6
-
7
-
8
-
9
-
10
-
11
-
12
-
13
-
14
-
15
-
16
-
17
-
18
-
19
-
20
-
21
-
22
-
23
-
24
-
25
-
26
-
27
-
28
-
29
-
30
-
31
-
32
-
33
-
34
-
35
-
36
-
37
-
38
-
39
-
40
-
41
-
42
-
43
-
44
-
45
-
46
-
47
-
48
-
49
-
50
-
51
-
52
-
53
-
54
-
55
-
56
-
57
-
58
-
59
-
60
-
61
-
62
-
63
-
64
-
65
-
66
-
67
-
68
-
69
-
70
-
71
-
72
-
73
-
74
-
75
-
76
-
77
-
78
-
79
-
80
-
81
-
82
-
83
-
84
-
85
-
86
-
87
-
88
-
89
-
90
-
91
-
92
-
93
-
94
-
95
-
96
-
97
-
98
-
99
-
100
-
 101
101 -
 102
102 -
 103
103 -
 104
104 -
 105
105 -
 106
106 -
 107
107 -
 108
108 -
 109
109 -
 110
110 -
 111
111 -
112
-
113
-
114
-
115
-
116
-
117
-
118
-
119
-
120
-
121
-
122
-
123
-
124
-
125
-
126
-
127
-
128
-
129
-
130
-
131
-
132
-
133
-
134
-
135
-
136
-
137
-
138
-
139
-
140
-
141
-
142
-
143
-
144
-
145
-
146
-
147
-
148
-
149
-
150
-
151
-
152
-
153
-
154
-
155
-
156
-
157
-
158
-
159
-
160
-
161
-
162
-
163
-
164
-
165
-
166
-
167
-
168
-
169
-
170
-
171
-
172
-
173
-
174
-
175
-
176
-
177
-
178
-
179
-
180
-
181
-
182
-
183
-
184
-
185
-
186
-
187
-
188
-
189
-
190
-
191
-
192
-
193
-
194
-
195
-
196
-
197
-
198
-
199
-
200
-
201
-
202
-
203
-
204
-
205
-
206
-
207
-
208
-
209
-
210
-
211
-
212
-
213
-
214
-
215
-
216
-
217
-
218
-
219
-
220
-
221
-
222
-
223
-
224
-
225
-
226
-
227
-
228
-
229
-
230
-
231
-
232
-
233
-
234
-
235
-
236
-
237
-
238
-
239
-
240
-
241
-
242
-
243
-
244
 |
 |