Canon PowerShot SD890 IS PowerShot SD890 IS / DIGITAL IXUS 970 IS Camera User - Page 134
Edit the movie., Select [Save].
 |
View all Canon PowerShot SD890 IS manuals
Add to My Manuals
Save this manual to your list of manuals |
Page 134 highlights
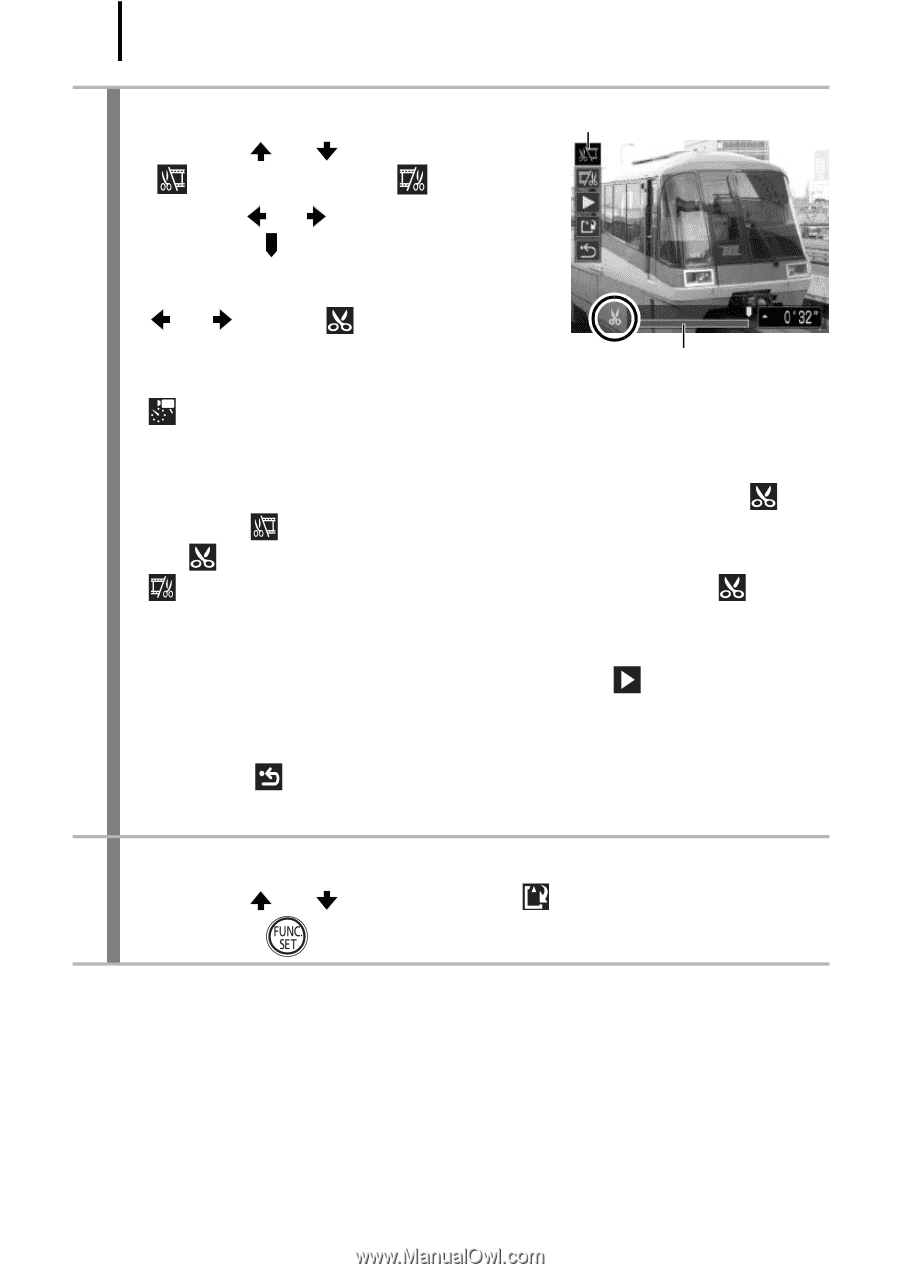
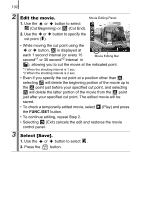
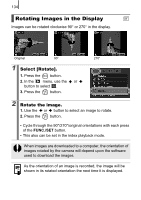
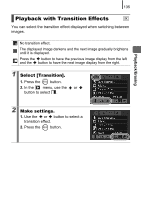
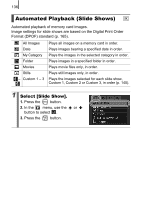
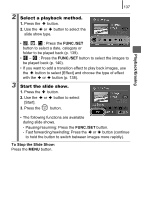
132 2 Edit the movie. Movie Editing Panel 1. Use the or button to select (Cut Beginning) or (Cut End). 2. Use the or button to specify the cut point ( ). • While moving the cut point using the or button, is displayed at each 1 second interval (or every 15 second*1 or 30 second*2 interval in Movie Editing Bar ), allowing you to cut the movie at the indicated point. *1 When the shooting interval is 1 sec. *2 When the shooting interval is 2 sec. • Even if you specify the cut point at a position other than , selecting will delete the beginning portion of the movie up to the point just before your specified cut point, and selecting will delete the latter portion of the movie from the point just after your specified cut point. The edited movie will be saved. • To check a temporarily edited movie, select (Play) and press the FUNC./SET button. • To continue editing, repeat Step 2. • Selecting (Exit) cancels the edit and restores the movie control panel. 3 Select [Save]. 1. Use the or button to select . 2. Press the button.
-
 1
1 -
2
-
3
-
4
-
5
-
6
-
7
-
8
-
9
-
10
-
11
-
12
-
13
-
14
-
15
-
16
-
17
-
18
-
19
-
20
-
21
-
22
-
23
-
24
-
25
-
26
-
27
-
28
-
29
-
30
-
31
-
32
-
33
-
34
-
35
-
36
-
37
-
38
-
39
-
40
-
41
-
42
-
43
-
44
-
45
-
46
-
47
-
48
-
49
-
50
-
51
-
52
-
53
-
54
-
55
-
56
-
57
-
58
-
59
-
60
-
61
-
62
-
63
-
64
-
65
-
66
-
67
-
68
-
69
-
70
-
71
-
72
-
73
-
74
-
75
-
76
-
77
-
78
-
79
-
80
-
81
-
82
-
83
-
84
-
85
-
86
-
87
-
88
-
89
-
90
-
91
-
92
-
93
-
94
-
95
-
96
-
97
-
98
-
99
-
100
-
101
-
102
-
103
-
104
-
105
-
106
-
107
-
108
-
109
-
110
-
111
-
112
-
113
-
114
-
115
-
116
-
117
-
118
-
119
-
120
-
121
-
122
-
123
-
124
-
125
-
126
-
127
-
128
-
 129
129 -
 130
130 -
 131
131 -
 132
132 -
 133
133 -
 134
134 -
 135
135 -
 136
136 -
 137
137 -
 138
138 -
 139
139 -
140
-
141
-
142
-
143
-
144
-
145
-
146
-
147
-
148
-
149
-
150
-
151
-
152
-
153
-
154
-
155
-
156
-
157
-
158
-
159
-
160
-
161
-
162
-
163
-
164
-
165
-
166
-
167
-
168
-
169
-
170
-
171
-
172
-
173
-
174
-
175
-
176
-
177
-
178
-
179
-
180
-
181
-
182
-
183
-
184
-
185
-
186
-
187
-
188
-
189
-
190
-
191
-
192
-
193
-
194
-
195
-
196
-
197
-
198
-
199
-
200
-
201
-
202
-
203
-
204
-
205
-
206
-
207
-
208
-
209
-
210
-
211
-
212
-
213
-
214
-
215
-
216
-
217
-
218
-
219
-
220
-
221
-
222
-
223
-
224
-
225
-
226
-
227
-
228
-
229
-
230
-
231
-
232
-
233
-
234
-
235
-
236
-
237
-
238
-
239
-
240
-
241
-
242
-
243
-
244
 |
 |