Canon VB-S900F User Manual - Page 134
Using Control for Admin, Exiting Viewer PTZ, Differences Between Viewer PTZ and Digital
 |
View all Canon VB-S900F manuals
Add to My Manuals
Save this manual to your list of manuals |
Page 134 highlights
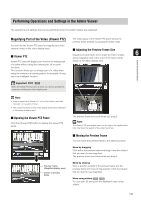
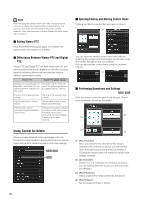
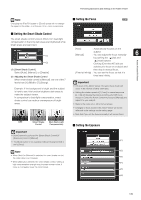
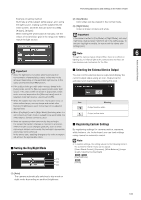
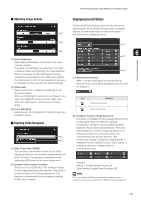
Note After changing the preview frame, the video display area will continue to display the cropped video corresponding to the preview frame even after the Viewer PTZ panel is closed. However, when you reconnect to Admin Viewer, the initial status will be restored. „ Exiting Viewer PTZ Click the [Viewer PTZ] button again. The Viewer PTZ panel closes and Viewer PTZ is exited. „ Differences Between Viewer PTZ and Digital PTZ Viewer PTZ and Digital PTZ are both simple pan, tilt, and zoom functions that use the digital zoom function, but they have the following differences because they employ different operating principles. Viewer PTZ Digital PTZ Enlarges the specified part of the video transmitted from the camera and then displays it in the viewer. Transmits only the trimmed part of the entire area that can be captured by the camera. The size of the received data The size of the received data is large. is small. Can be used only in Admin Viewer. Can be used in both Admin Viewer and VB Viewer. PTZ operation can be performed independently for each viewer. Independent operation cannot be performed for each viewer (if multiple viewers are connected, the same display is applied in the other viewers). „ Opening/Closing and Moving Control Items Clicking the title of a control item will open or close it. ⇔ You can open the various control items even without obtaining the camera control privileges, but all items other than [Video Reception] are not available. You can also reorder control items using the up/down buttons. ⇔ „ Performing Operations and Settings Click the camera control buttons to set the pan, tilt and zoom operations as well as the speed. (3) (1) Using Control for Admin When you have obtained control privileges, click the [Control for Admin] button to display the Control for Admin Panel and perform camera operation and video settings. (2) (4) (1) [Pan/Tilt] button Move pan and tilt in the direction of the arrows. Operation will continue as long as you are holding down the button and will stop when you release it. Clicking the center button will make the camera face straight forwards. (2) [Zoom] buttons Zooms in or out. Operation will continue as long as you are holding down the button and will stop when you release it. (3) [Pan/Tilt] Speed Select a speed from [Fast], [Normal] and [Slow]. (4) [Zoom] Speed Set the speed to [Fast] or [Slow]. 134
-
 1
1 -
2
-
3
-
4
-
5
-
6
-
7
-
8
-
9
-
10
-
11
-
12
-
13
-
14
-
15
-
16
-
17
-
18
-
19
-
20
-
21
-
22
-
23
-
24
-
25
-
26
-
27
-
28
-
29
-
30
-
31
-
32
-
33
-
34
-
35
-
36
-
37
-
38
-
39
-
40
-
41
-
42
-
43
-
44
-
45
-
46
-
47
-
48
-
49
-
50
-
51
-
52
-
53
-
54
-
55
-
56
-
57
-
58
-
59
-
60
-
61
-
62
-
63
-
64
-
65
-
66
-
67
-
68
-
69
-
70
-
71
-
72
-
73
-
74
-
75
-
76
-
77
-
78
-
79
-
80
-
81
-
82
-
83
-
84
-
85
-
86
-
87
-
88
-
89
-
90
-
91
-
92
-
93
-
94
-
95
-
96
-
97
-
98
-
99
-
100
-
101
-
102
-
103
-
104
-
105
-
106
-
107
-
108
-
109
-
110
-
111
-
112
-
113
-
114
-
115
-
116
-
117
-
118
-
119
-
120
-
121
-
122
-
123
-
124
-
125
-
126
-
127
-
128
-
 129
129 -
 130
130 -
 131
131 -
 132
132 -
 133
133 -
 134
134 -
 135
135 -
 136
136 -
 137
137 -
 138
138 -
 139
139 -
140
-
141
-
142
-
143
-
144
-
145
-
146
-
147
-
148
-
149
-
150
-
151
-
152
-
153
-
154
-
155
-
156
-
157
-
158
-
159
-
160
-
161
-
162
-
163
-
164
-
165
-
166
-
167
-
168
-
169
-
170
-
171
-
172
-
173
-
174
-
175
-
176
 |
 |
