Canon imageCLASS MF5770 imageCLASS MF5700 Series Basic Guide - Page 75
Scanning Methods
 |
View all Canon imageCLASS MF5770 manuals
Add to My Manuals
Save this manual to your list of manuals |
Page 75 highlights
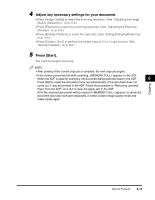
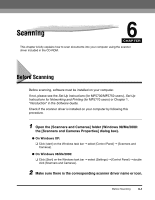
Scanning Methods There are two methods of scanning documents to your computer: • Using a TWAIN- or WIA- (Windows XP) compliant Windows application • Using [SCAN] on the operation panel of the machine IMPORTANT For better scanning quality we recommend that you place documents on the platen glass. If you use the ADF, the scanned image might not be clear. This section explains how to scan using [SCAN] on the operation panel of the machine. By pressing [SCAN] ➞ [Start] on the operation panel of the machine, you can scan documents to your computer. 6 1 Place the document on the platen glass or load it in the ADF. For details on how to place documents, see "Setting Up Documents," on p. 3-3. Scanning 2 Press [SCAN] ➞ [Start] on the machine. If you are asked to select the program to launch, select "MF Toolbox Ver4.7." Scanning starts. The MF Toolbox and the MF Toolbox settings dialog box will open, but the document will be scanned without pressing [Start]. The scanned document will be processed according to your settings. When you use [Start] for the first time, a folder with the scanning date will be created in the [My Pictures] folder in the [My Documents] folder, and your document will be saved in this folder. If there is no [My Pictures] folder, the folder with the scanning date will be created in the [My Documents] folder and your document will be saved in this folder. 6-2 Scanning Methods
-
 1
1 -
2
-
3
-
4
-
5
-
6
-
7
-
8
-
9
-
10
-
11
-
12
-
13
-
14
-
15
-
16
-
17
-
18
-
19
-
20
-
21
-
22
-
23
-
24
-
25
-
26
-
27
-
28
-
29
-
30
-
31
-
32
-
33
-
34
-
35
-
36
-
37
-
38
-
39
-
40
-
41
-
42
-
43
-
44
-
45
-
46
-
47
-
48
-
49
-
50
-
51
-
52
-
53
-
54
-
55
-
56
-
57
-
58
-
59
-
60
-
61
-
62
-
63
-
64
-
65
-
66
-
67
-
68
-
69
-
 70
70 -
 71
71 -
 72
72 -
 73
73 -
 74
74 -
 75
75 -
 76
76 -
 77
77 -
 78
78 -
 79
79 -
 80
80 -
81
-
82
-
83
-
84
-
85
-
86
-
87
-
88
-
89
-
90
-
91
-
92
-
93
-
94
-
95
-
96
-
97
-
98
-
99
-
100
-
101
-
102
-
103
-
104
-
105
-
106
-
107
-
108
-
109
-
110
-
111
-
112
-
113
-
114
-
115
-
116
-
117
-
118
-
119
-
120
-
121
-
122
-
123
-
124
-
125
-
126
-
127
-
128
-
129
-
130
-
131
-
132
-
133
-
134
-
135
-
136
-
137
-
138
-
139
 |
 |