Cisco WAP4410N Administration Guide
Cisco WAP4410N - Small Business Wireless-N Access Point Manual
 |
UPC - 745883583362
View all Cisco WAP4410N manuals
Add to My Manuals
Save this manual to your list of manuals |
Cisco WAP4410N manual content summary:
- Cisco WAP4410N | Administration Guide - Page 1
ADMINISTRATION GUIDE Cisco Small Business WAP4410N Wireless-N Access Point with Power Over Ethernet - Cisco WAP4410N | Administration Guide - Page 2
, the Cisco logo, Cisco Lumin, Cisco Nexus, Cisco Nurse Connect, Cisco Stackpower, Cisco StadiumVision, Cisco TelePresence, Cisco WebEx, DCE, and Welcome to the Human Network are trademarks; Changing the Way We Work, Live, Play, and Learn and Cisco Store are service marks; and Access Registrar - Cisco WAP4410N | Administration Guide - Page 3
Access Point to the Network 11 Using a PoE Switch to Connect the WAP4410N Access Point to the Network 12 Using a Standard Switch to Connect the WAP4410N Access Point to the Net- work 13 Chapter 5: Setting Up the WAP4410N Wireless-N Access Point 14 WAP4410N Wireless-N Access Point with Power - Cisco WAP4410N | Administration Guide - Page 4
Problems 56 Restoring Factory Default Settings 57 Upgrading the Firmware 58 Rebooting the Access Point 59 Managing the Access Point's Configuration 60 Configuring Status Settings 61 Checking Local Network Status 61 Checking the Wireless Status 63 WAP4410N Wireless-N Access Point - Cisco WAP4410N | Administration Guide - Page 5
Security Precautions Protecting Your Network Appendix C: Upgrading Firmware Appendix D: Specifications Appendix E: Where to Go From Here Product Resources Related Documentation Contents 64 66 66 72 72 73 73 74 74 75 77 79 82 82 83 WAP4410N Wireless-N Access Point with Power Over Internet v - Cisco WAP4410N | Administration Guide - Page 6
About This Document Preface This guide describes the concepts and tasks necessary to install, configure, and manage the WAP4410N Access Point. Audience The audience for this document includes wireless network users, administrators, and managers. Organization This table describes the contents - Cisco WAP4410N | Administration Guide - Page 7
Provides solutions to problems that may occur during the installation and operation of the access point. Discusses security considerations when using a wireless network. Provides instructions to upgrade the access point's firmware. Lists the formal specifications of the access point. Provides links - Cisco WAP4410N | Administration Guide - Page 8
stored on your PC or local network. The PDF files do not need to be open. STEP 1 Start Acrobat Professional or Adobe Reader. STEP 2 Choose Edit > Search, or click the arrow next to the Find box and then choose Open Full Acrobat Search. WAP4410N Wireless-N Access Point with Power Over Internet viii - Cisco WAP4410N | Administration Guide - Page 9
find. b. Choose All PDF Documents in. From the drop-down box, choose Browse for Location. Then choose the location on your computer or local network, and click OK. c. If you want to specify functions, see the Adobe Acrobat online help. WAP4410N Wireless-N Access Point with Power Over Internet ix - Cisco WAP4410N | Administration Guide - Page 10
also allowing you to connect the wireless network to a wired environment. The Wi-Fi Protected Setup (WPS) feature is also supported to help you simplify the setting up and configure security on a wireless network. The Cisco WAP4410N Wireless-N Access Point with Power over Ethernet even offers the - Cisco WAP4410N | Administration Guide - Page 11
Introduction 1 Use the instructions in this guide to help you connect the access point, set it up, and configure it to bridge your different networks. These instructions should be all you need to get the most out of the access point. WAP4410N Wireless-N Access Point with Power Over Internet 2 - Cisco WAP4410N | Administration Guide - Page 12
wireless adapter computers. Since an access point is able to forward data within a network, the effective transmission range in an infrastructure network may be more than doubled since access point can transmit signal at higher power to the wireless space. Roaming Infrastructure mode also supports - Cisco WAP4410N | Administration Guide - Page 13
a 802.11n, 802.11g or 802.11b wireless print server (if available). To link your wired network with your wireless network, connect the access point's Ethernet network port to any switch or router with Power over Ethernet (PoE)-or a PoE injector, such as the Cisco WAPPOE or WAPPOE12. Note that the 12 - Cisco WAP4410N | Administration Guide - Page 14
power. Each access point can connect multiple wireless devices to the network. This network provides connectivity among wireless network devices and computers that have a wired connection to the switch. The switch connects to a router that connects to the Internet. WAP4410N Wireless-N Access Point - Cisco WAP4410N | Administration Guide - Page 15
) Lights up when the access point successfully connects to a device through the Ethernet network port. This LED flashes when the access point is actively sending to or receiving data from one of the devices over the Ethernet network port. WAP4410N Wireless-N Access Point with Power Over Internet 6 - Cisco WAP4410N | Administration Guide - Page 16
defaults using the web-based utility of the access point. ETHERNET Port-Connects to Ethernet network devices, such as a switch or router that may or may not support PoE. POWER Port-Connects the access point to power using the supplied 12VDC power adapter. WAP4410N Wireless-N Access Point with Power - Cisco WAP4410N | Administration Guide - Page 17
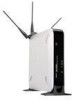
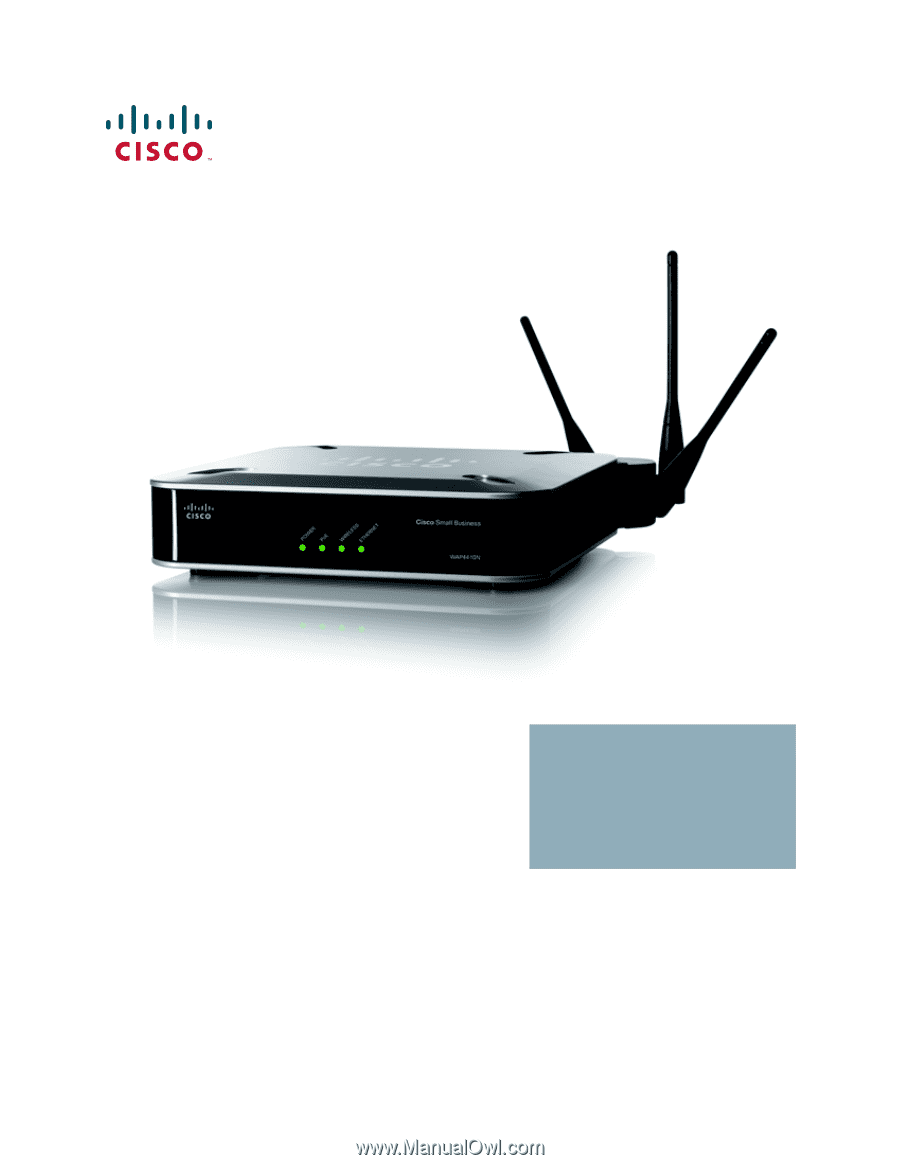
antennas. These antennas are located on the back of the device. The three antennas have a base that can rotate 90 degrees when in the standing position. The three antennas support 3X3 "multiple in, multiple out" (MIMO) diversity in wireless-N mode. WAP4410N Wireless-N Access Point with Power - Cisco WAP4410N | Administration Guide - Page 18
apart (approximately 7.46 cm.). STEP 2 With the back panel pointing up (if installing vertically), line up the WAP4410N Access Point so that the wall-mount crisscross slots on the bottom of the access point line up with the two screws. WAP4410N Wireless-N Access Point with Power Over Internet 9 - Cisco WAP4410N | Administration Guide - Page 19
With the two large prongs of one of the stands facing outward, insert the short prongs into the little slots in the WAP4410N Access Point, and push the stand upward until the stand snaps into place. Repeat this step with the other stand. WAP4410N Wireless-N Access Point with Power Over Internet 10 - Cisco WAP4410N | Administration Guide - Page 20
Access Point Connecting the WAP4410N Access Point to the Network 4 Connecting the WAP4410N Access Point to the Network You can connect the WAP4410N Access Point to your network in one of the following ways: • Using a PoE switch • Using a standard switch WAP4410N Wireless-N Access Point with Power - Cisco WAP4410N | Administration Guide - Page 21
Point to the Network To connect the WAP4410N Access Point to your network using a PoE switch, simply connect the Ethernet port of the access point to a PoE port on the PoE switch. The LEDs on the front panel light up as soon as the WAP4410N Access Point powers on. WAP4410N Wireless-N Access Point - Cisco WAP4410N | Administration Guide - Page 22
WAP4410N Access Point to the Network To connect the WAP4410N Access Point to your network using a standard switch, follow these steps. STEP 1 Use the supplied Ethernet cable to connect the Ethernet port of the access point to an Ethernet port on the switch. STEP 2 Connect the included power adapter - Cisco WAP4410N | Administration Guide - Page 23
network as your computer. STEP 2 Locate the IP address of the WAP4410N Access Point by accessing your DHCP server. Specific instructions on locating the DHCP address given to the WAP4410N Access Point depends upon the type of architecture and operating WAP4410N Wireless-N Access Point with Power - Cisco WAP4410N | Administration Guide - Page 24
the WAP4410N Wireless-N Access Point Navigating the Utility 5 system you are using. Use your computer's local Help and Support functionality and search for "IP Addressing." STEP 3 Launch a web browser, such as Internet Explorer or Mozilla Firefox. STEP 4 In the Address field enter the default DHCP - Cisco WAP4410N | Administration Guide - Page 25
network problems. • Factory Default-Resets the access point to its factory default settings. • Firmware Upgrade-Upgrades the access point's firmware on this screen. • Reboot-Reboots the access point. • Config Management-Saves and restores access point configuration. WAP4410N Wireless-N Access Point - Cisco WAP4410N | Administration Guide - Page 26
Up the WAP4410N Wireless-N Access Point Navigating the Utility 5 Status This screen allows you to view status information about your local network, wireless networks, and network performance. • Local Network-Displays system information, including software and hardware versions, MAC address, and IP - Cisco WAP4410N | Administration Guide - Page 27
Up Your Access Point This section describes how to configure the general settings of the access point: • "Configuring Basic Setup Settings" on page 19 • "Configuring Time Settings" on page 22 • "Configuring Advanced Settings" on page 23 WAP4410N Wireless-N Access Point with Power Over Internet - Cisco WAP4410N | Administration Guide - Page 28
Basic Setup Settings The Setup > Basic Setup page displays the general settings of the access point. You can configure the following basic setup settings: • "Configuring Device Setup Settings" on page 20 • "Configuring Network Setup Settings" on page 20 WAP4410N Wireless-N Access Point with Power - Cisco WAP4410N | Administration Guide - Page 29
The default name is WAP4410N. STEP 3 Click Save. Configuring Network Setup Settings To configure the network setup settings of the access point, follow these steps: STEP 1 Click Setup > Basic Setup. STEP 2 From the IP Settings drop-down menu, select one of the following options: • Static IP Address - Cisco WAP4410N | Administration Guide - Page 30
Configuring the WAP4410N Wireless-N Access Point Setting Up Your Access Point 6 STEP 3 If you select Static IP Address from the IP Settings drop-down menu, enter the following information in the IP4V section of the screen: • IP Address-Enter a unique IP address for your access point. The default - Cisco WAP4410N | Administration Guide - Page 31
the WAP4410N Wireless-N Access Point Setting Up Your Access Point 6 Configuring Time Settings The Time screen displays the time settings of the access point. By setting up the correct time, you can help your network administrator search the system log to identify problems. To configure the - Cisco WAP4410N | Administration Guide - Page 32
if you have set up local NTP server. Default is Disabled. • NTP Server IP-Enter the IP address of user defined NTP Server. STEP 4 Click Save. Configuring Advanced Settings The Setup > Advanced Settings page displays advanced settings. WAP4410N Wireless-N Access Point with Power Over Internet 23 - Cisco WAP4410N | Administration Guide - Page 33
Settings" on page 25 • "Configuring Security" on page 27 • "Configuring Connection Control" on page 39 • "Configuring Wi-Fi Protected Setup" on page 43 • "Configuring VLAN & QoS" on page 44 • "Configuring Advanced Settings" on page 46 WAP4410N Wireless-N Access Point with Power Over Internet 24 - Cisco WAP4410N | Administration Guide - Page 34
both Wireless-B and Wireless-G client devices at their respective data rates. Wireless-N devices can be connected at Wireless-G data rates. • B/G/N-Mixed-(Default) Connects all the wireless client devices at their respective data rates in this mixed mode. WAP4410N Wireless-N Access Point with Power - Cisco WAP4410N | Administration Guide - Page 35
to all wireless devices in range. Select Disabled to increase network security and prevent the SSID from being seen on networked PCs. The default is Enabled in order to help users configure their network before using it. STEP 5 Click Save. WAP4410N Wireless-N Access Point with Power Over Internet - Cisco WAP4410N | Administration Guide - Page 36
select an SSID. b. To isolate wireless clients from each other, click Enabled. Otherwise, click Disabled. STEP 3 To disable wireless security completely, from the Security Modes drop-down, select Disabled. This is the default setting. WAP4410N Wireless-N Access Point with Power Over Internet 27 - Cisco WAP4410N | Administration Guide - Page 37
Configuring the WAP4410N Wireless-N Access Point Wireless 6 STEP 4 To enable wireless security, from the Security Mode drop-down menu, select one of the following security modes and provide the required information, as described in the sections below. • WPA-Personal • WPA2-Personal • WPA2- - Cisco WAP4410N | Administration Guide - Page 38
Pre-Shared Key-Enter a WPA Shared Key of 8-63 characters. • Key Renewal- Enter a key renewal timeout period, which instructs the access point how often it should change the encryption keys. The default is 3600 seconds. STEP 5 Click Save. WAP4410N Wireless-N Access Point with Power Over Internet 29 - Cisco WAP4410N | Administration Guide - Page 39
Configuring the WAP4410N Wireless-N Access Point Wireless Configuring WAP2-Personal Security This security mode supports the WPA2-Personal protocol. 6 To enable wireless WPA2-Personal security, follow these steps: STEP 1 Click Wireless > Security. STEP 2 From the Security Mode drop-down menu, - Cisco WAP4410N | Administration Guide - Page 40
Pre-Shared Key-Enter a WPA Shared Key of 8-63 characters. • Key Renewal- Enter a key renewal timeout period, which instructs the access point how often it should change the encryption keys. The default is 3600 seconds. STEP 5 Click Save. WAP4410N Wireless-N Access Point with Power Over Internet 31 - Cisco WAP4410N | Administration Guide - Page 41
is used only if the primary server is unavailable. • Primary/Backup RADIUS Server Port-Enter the port number used by the RADIUS server. The default is 1812. The backup Radius server is used only if the primary server is unavailable. WAP4410N Wireless-N Access Point with Power Over Internet 32 - Cisco WAP4410N | Administration Guide - Page 42
mode features WPA2 used in coordination with a RADIUS server for client authentication. ! CAUTION Use this mode only when a RADIUS server is connected to the access point. To enable wireless WPA2-Enterprise security, follow these steps: WAP4410N Wireless-N Access Point with Power Over Internet 33 - Cisco WAP4410N | Administration Guide - Page 43
-WPA2 always uses AES for data encryption. • Key Renewal Timeout-Enter a key renewal timeout period, which instructs the access point how often it should change the encryption keys. The default is 3600 seconds. STEP 5 Click Save. WAP4410N Wireless-N Access Point with Power Over Internet 34 - Cisco WAP4410N | Administration Guide - Page 44
Configuring the WAP4410N Wireless-N Access Point Wireless 6 Configuring WPA2-Enterprise Mixed Security This security mode supports the transition from WPA-Enterprise to WPA2Enterprise. You can have client devices that use either WPA-Enterprise or WPA2Enterprise. The access point will automatically - Cisco WAP4410N | Administration Guide - Page 45
one of these algorithms. The default is TKIP. • Key Renewal Timeout-Enter a key renewal timeout period, which instructs the access point how often it should change the encryption keys. The default is 3600 seconds. STEP 5 Click Save. WAP4410N Wireless-N Access Point with Power Over Internet 36 - Cisco WAP4410N | Administration Guide - Page 46
Configuring the WAP4410N Wireless-N Access Point Wireless 6 Configuring RADIUS Security This option features a RADIUS server for client authentication. ! CAUTION Use this mode only when a RADIUS server is connected to the access point. To enable wireless Remote Authentication Dial-In User Service - Cisco WAP4410N | Administration Guide - Page 47
Configuring the WAP4410N Wireless-N Access Point Wireless 6 STEP 4 Provide the following information: • Primary/Backup RADIUS Server-Enter the IP address of the RADIUS server. The Backup Radius server is used only if the primary server is unavailable. • Primary/Backup RADIUS Server Port-Enter the - Cisco WAP4410N | Administration Guide - Page 48
Configuring Connection Control The Wireless > Connection Control Settings page displays the wireless connection settings. • "Disabling Connection Control" on page 40 • "Enabling Local Connection Control" on page 41 • "Enabling RADIUS Connection Control" on page 42 WAP4410N Wireless-N Access Point - Cisco WAP4410N | Administration Guide - Page 49
Configuring the WAP4410N Wireless-N Access Point Wireless 6 Disabling Connection Control You can use the Wireless > Connection Control Settings page to disable connection control. . To disable wireless connection control for your access point, follow these steps: STEP 1 Click Wireless > - Cisco WAP4410N | Administration Guide - Page 50
List. In the window that appears, select a MAC address to add to the connection control list. You can also manually add MAC addresses to the connection control list by entering these addresses in the MAC 01-20 fields. STEP 4 Click Save. WAP4410N Wireless-N Access Point with Power Over Internet 41 - Cisco WAP4410N | Administration Guide - Page 51
Configuring the WAP4410N Wireless-N Access Point Wireless Enabling RADIUS Connection Control 6 To enable RADIUS connection control for your access point, follow these steps: STEP 1 Click Wireless > Connection Control. STEP 2 Click RADIUS. STEP 3 Provide the following information: • Primary/Backup - Cisco WAP4410N | Administration Guide - Page 52
the PIN number of the client device. You can find this number in the utility of the device. Enter the number and click Register. • Option 3-Enter the PIN number shown on the label at the bottom of the access point into the utility of the client device. WAP4410N Wireless-N Access Point with Power - Cisco WAP4410N | Administration Guide - Page 53
Configuring the WAP4410N Wireless-N Access Point Wireless 6 STEP 3 Click Save. Configuring VLAN & QoS This Wireless > VLAN & QoS page allows you to configure the Qos and VLAN settings for the access point. The Quality of Service (QoS) feature allows you to specify priorities for different types - Cisco WAP4410N | Administration Guide - Page 54
the WAP4410N Wireless-N Access Point Wireless 6 To configure the wireless VLAN and QoS settings of the access point, follow these steps: STEP 1 Click Wireless > VLAN & QoS. STEP 2 To configure VLAN settings: NOTE You can enable this feature only if the hubs/switches on your network support the - Cisco WAP4410N | Administration Guide - Page 55
-N) for this access point: • Country/Region-Choose the country for your location from the drop- down list. • Worldwide Mode (802.11d)-Click Enabled to enable this mode. Your wireless stations must support this mode for this setting to work. WAP4410N Wireless-N Access Point with Power Over Internet - Cisco WAP4410N | Administration Guide - Page 56
the access point sends out a DTIM. Lower settings result in more efficient networking, while preventing your computer from dropping into power-saving sleep mode. Higher settings allow your computer to enter the sleep mode, thus saving power, but interferes with wireless transmissions. The default is - Cisco WAP4410N | Administration Guide - Page 57
Configuring the WAP4410N Wireless-N Access Point Wireless 6 STEP 3 In the Load Balancing section, configure the following advanced parameters for this access point: • Load Balancing-Enable this feature to spread work between two or more access points to get optimal resource utilization, throughput - Cisco WAP4410N | Administration Guide - Page 58
Configuring the WAP4410N Wireless-N Access Point Configuring the AP Mode 6 Configuring the AP Mode The AP Mode > AP Mode Settings page displays the AP mode settings for the access point. WAP4410N Wireless-N Access Point with Power Over Internet 49 - Cisco WAP4410N | Administration Guide - Page 59
access point. - Allow wireless stations to associate-Enable or disable this setting. - Remote access point-Enter the MAC address and SSID of the desired access point or click the Site Survey button to choose the access point from the available networks. WAP4410N Wireless-N Access Point with Power - Cisco WAP4410N | Administration Guide - Page 60
• "Configuring Administration Log" on page 54 • "Diagnosing Access Point Problems" on page 56 • "Restoring Factory Default Settings" on page 57 • "Upgrading the Firmware" on page 58 • "Rebooting the Access Point" on page 59 • "Upgrading the Firmware" on page 58 WAP4410N Wireless-N Access Point with - Cisco WAP4410N | Administration Guide - Page 61
Configuring the WAP4410N Wireless-N Access Point Administration 6 Configuring Administration Settings The Administration > Management page allows you to configure the password, Web Access, and SNMP settings. You should change the username/password that controls access to the access point's web- - Cisco WAP4410N | Administration Guide - Page 62
by IP address. Enter the IP address in the field provided. If this field is left blank, then access is permitted from any IP address. - SNMP Trap-Destination-Enter the IP address of the remote host computer that will receive the trap messages. WAP4410N Wireless-N Access Point with Power Over - Cisco WAP4410N | Administration Guide - Page 63
want the access point to send e-mail alerts in the event of certain attacks, click Enabled. The default is Disabled. - SMTP Server-Enter the address or IP address of the Simple Mail Transport Protocol (SMTP) server (incoming mail server). WAP4410N Wireless-N Access Point with Power Over Internet - Cisco WAP4410N | Administration Guide - Page 64
Configuring the WAP4410N Wireless-N Access Point Administration 6 - E-Mail Address for Logs-Enter the e-mail address that will receive logs. - Log Queue Length-Enter the length of the log that will be e-mailed to you. The default is 20 entries. - Log Time Threshold-Enter how often the log will be - Cisco WAP4410N | Administration Guide - Page 65
Configuring the WAP4410N Wireless-N Access Point Administration 6 Diagnosing Access Point Problems The Administration > Diagnostics page allows you to use the access point to perform a ping. The activity can be useful in solving network problems. To perform a ping test to help diagnose problems - Cisco WAP4410N | Administration Guide - Page 66
Configuring the WAP4410N Wireless-N Access Point Administration 6 Restoring Factory Default Settings The Administration > Factory Default page allows you to restore the access point's factory default settings. To restore factory default settings of the access point, follow these steps: STEP 1 - Cisco WAP4410N | Administration Guide - Page 67
CAUTION Upgrading the firmware deletes all custom settings. To upgrade the firmware of the access point, follow these steps: STEP 1 Back up the configuration settings of your access points (see "Managing the Access Point's Configuration" on page 60). WAP4410N Wireless-N Access Point with Power Over - Cisco WAP4410N | Administration Guide - Page 68
to locate the file. e. Click Upgrade and follow the on-screen instructions. STEP 3 Re-enter all of your custom configuration settings. Rebooting the Access Point The Administration > Reboot page allows you to reboot the access point. WAP4410N Wireless-N Access Point with Power Over Internet 59 - Cisco WAP4410N | Administration Guide - Page 69
Reboot field, click Yes. STEP 3 Click Save. Managing the Access Point's Configuration The Administration > Config Management page allows you to create a backup configuration file or upload a configuration file to the access point. WAP4410N Wireless-N Access Point with Power Over Internet 60 - Cisco WAP4410N | Administration Guide - Page 70
WAP4410N Wireless-N Access Point Configuring Status Settings 6 To manage the configuration for the access point, follow these steps: STEP 1 Click Administration > Config Management. STEP 2 To create a backup configuration file, click Save Configuration to File and follow the on-screen instructions - Cisco WAP4410N | Administration Guide - Page 71
time the access point has been running for. • Local Network - IP Address-The access point's IP address as it appears on your local network. - Subnet Mask-The access point's subnet mask. STEP 2 To update the status information, click Refresh. WAP4410N Wireless-N Access Point with Power Over Internet - Cisco WAP4410N | Administration Guide - Page 72
Configuring the WAP4410N Wireless-N Access Point Configuring Status Settings 6 Checking the Wireless Status The Status > Wireless page displays the access point's current status information for the wireless network. To check wireless network status of the access point, follow these steps: STEP 1 - Cisco WAP4410N | Administration Guide - Page 73
- IP Address-The access point's local IP address. - MAC Address-The MAC address of the access point's wired interface. - Connection-The status of the access point's connection for the wired network. - Packets Received-The number of packets received. WAP4410N Wireless-N Access Point with Power Over - Cisco WAP4410N | Administration Guide - Page 74
the wireless network. - Name-The wireless network/SSID the statistics refer to. - IP Address-The access point's local IP address. - MAC Address-The MAC Address of the access point's wireless interface. - Connection-The status of the access point's wireless networks. - Packets Received-The number of - Cisco WAP4410N | Administration Guide - Page 75
com website at www.cisco.com/en/US/support/ tsd_cisco_small_business_support_center_contacts.html. Frequently Asked Questions Q. Can the access point act as my DHCP Server? No. The access point is nothing more than a wireless hub, and as such cannot be configured to handle DHCP capabilities. Q. Can - Cisco WAP4410N | Administration Guide - Page 76
Power Management Q. What IEEE 802.11g features are supported? The WAP4410N Access Point supports the following IEEE 802.11g functions: • CSMA/CA plus Acknowledge protocol • OFDM protocol • Multi-Channel Roaming • Automatic Rate Selection • RTS/CTS feature • Fragmentation WAP4410N Wireless-N Access - Cisco WAP4410N | Administration Guide - Page 77
Troubleshooting and Help A • Power Management Q. What IPv6 features are supported? The WAP4410N Access Point supports the following IPv6 functions: • Path MTU discovery (RFC1981) • Internet Protocol v6 -IPv6 (RFC2460) • IPv6 Neighbor Discovery (ND) (RFC2461) • IPv6 Stateless Address - Cisco WAP4410N | Administration Guide - Page 78
area. To achieve true seamless connectivity, the wireless LAN must incorporate a number of different functions. Each node and access point, for example, must always acknowledge receipt of each message. Each node must maintain contact with the wireless network even when not actually transmitting - Cisco WAP4410N | Administration Guide - Page 79
file and printer sharing? Cisco wireless products perform the same function as LAN products. Therefore, Cisco wireless products can work with NetWare, Windows NT/2000, or other LAN operating systems to support printer or file sharing. WAP4410N Wireless-N Access Point with Power Over Internet 70 - Cisco WAP4410N | Administration Guide - Page 80
see my network. Wireless security, such as WEP or WPA, is probably enabled on the access point, but not on your wireless adapter (or vice versa). Verify that the same wireless security settings are being used on all devices in your wireless network. WAP4410N Wireless-N Access Point with Power Over - Cisco WAP4410N | Administration Guide - Page 81
PCs follow to communicate over a network. This is true for wireless networks as well. Your PCs will not be able to utilize wireless networking without having TCP/IP enabled. Windows Help provides complete instructions on enabling TCP/IP. WAP4410N Wireless-N Access Point with Power Over Internet 72 - Cisco WAP4410N | Administration Guide - Page 82
Network Neighborhood/My Network Places Other PCs on your network will appear under Network Neighborhood or My Network Places (depending upon the version of Windows you're running). Windows Help provides complete instructions on adding PCs to your network. WAP4410N Wireless-N Access Point with Power - Cisco WAP4410N | Administration Guide - Page 83
take to protect your wireless network: • Change the default SSID. • Disable SSID broadcasting. • Change the default password for the Administrator account. the performance of your network. • Change the WEP encryption keys periodically. WAP4410N Wireless-N Access Point with Power Over Internet 74 - Cisco WAP4410N | Administration Guide - Page 84
related to your company or the networking products you use. - Change the SSID often. Change your SSID regularly so that hackers who gain access to your wireless network will have to start from the beginning in trying to break in. WAP4410N Wireless-N Access Point with Power Over Internet 75 - Cisco WAP4410N | Administration Guide - Page 85
data over your network, encryption should be used. CAUTION: Always remember that each device ! in your wireless network must use the same encryption method and encryption key or your wireless network will not function properly. WAP4410N Wireless-N Access Point with Power Over Internet 76 - Cisco WAP4410N | Administration Guide - Page 86
to upgrade the access point's firmware. ! CAUTION Do not upgrade the firmware unless you are experiencing problems with the access point or the new firmware has a feature you want to use. ! CAUTION Upgrading the firmware deletes all custom settings. WAP4410N Wireless-N Access Point with Power Over - Cisco WAP4410N | Administration Guide - Page 87
> Firmware Upgrade. d. In the File field, enter the location of the firmware upgrade file or click the Browse button to locate the file. e. Click Upgrade and follow the on-screen instructions. STEP 3 Re-enter all of your custom configuration settings. WAP4410N Wireless-N Access Point with Power - Cisco WAP4410N | Administration Guide - Page 88
initial user access to an external Web Server to display company logo or network usage policy IPv6 Host Support for management and control of access point over IPv6. Supports RFC2460 (IPv6 protocol) and RFC4294 (IPv6 Node Requirements) WAP4410N Wireless-N Access Point with Power Over Internet - Cisco WAP4410N | Administration Guide - Page 89
itself to the network Radius Server Up to 2 Radius Servers can be configured for redundancy purposes WPS Supports WPS (WiFi Protected Setup), which is a WIFI Alliance specification for simple and secure setup of a wireless network. WAP4410N Wireless-N Access Point with Power Over Internet 80 - Cisco WAP4410N | Administration Guide - Page 90
PoE. Maximum power draw is 10.1 Watts. Certification CC, CE, IC Operating Temperature 32°F to 104°F (0°C to 40°C) Storage Temperature -4°F to 158°F (-20°C to 70°C) Operating Humidity 10% to 85% Non-Condensing Storage Humidity 5% to 90% Non-Condensing WAP4410N Wireless-N Access Point - Cisco WAP4410N | Administration Guide - Page 91
the Cisco WAP4410N Wireless-N Access Point with Power Over Ethernet. Product Resources Resource Location Technical Documentation www.cisco.com/en/US/products/ps10047/ tsd_products_support_series_home.html Firmware Downloads www.cisco.com/en/US/products/ps10052/index.html Customer Support www - Cisco WAP4410N | Administration Guide - Page 92
Where to Go From Here E Related Documentation For hardware setup for the Cisco WAP4410N access point, see the Cisco Small Business Model WAP4410N Wireless-N Access Point with Power Over Ethernet Quick Start Guide. WAP4410N Wireless-N Access Point with Power Over Internet 83
-
 1
1 -
 2
2 -
 3
3 -
 4
4 -
 5
5 -
 6
6 -
 7
7 -
8
-
9
-
10
-
11
-
12
-
13
-
14
-
15
-
16
-
17
-
18
-
19
-
20
-
21
-
22
-
23
-
24
-
25
-
26
-
27
-
28
-
29
-
30
-
31
-
32
-
33
-
34
-
35
-
36
-
37
-
38
-
39
-
40
-
41
-
42
-
43
-
44
-
45
-
46
-
47
-
48
-
49
-
50
-
51
-
52
-
53
-
54
-
55
-
56
-
57
-
58
-
59
-
60
-
61
-
62
-
63
-
64
-
65
-
66
-
67
-
68
-
69
-
70
-
71
-
72
-
73
-
74
-
75
-
76
-
77
-
78
-
79
-
80
-
81
-
82
-
83
-
84
-
85
-
86
-
87
-
88
-
89
-
90
-
91
-
92
 |
 |
Cisco Small Business
WAP4410N Wireless-N Access Point
with Power Over Ethernet
ADMINISTRATION
GUIDE