Cisco WAP4410N Administration Guide - Page 18
Connecting the WAP4410N Access Point, Placement Options, Desktop Option, Wall-Mount Option - power supply
 |
UPC - 745883583362
View all Cisco WAP4410N manuals
Add to My Manuals
Save this manual to your list of manuals |
Page 18 highlights
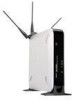
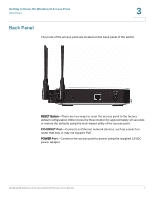
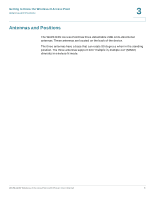
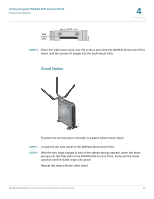
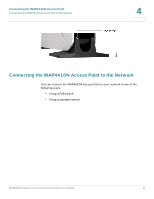
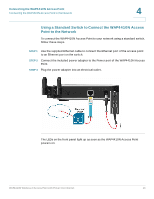
4 Connecting the WAP4410N Access Point This chapter describes how to place and connect the WAP4410N Access Point to your network. Depending on your application, you might want to set up the device first before mounting it. Placement Options You can place the WAP4410N Access Point horizontally on its rubber feet, vertically in a stand, or mount it on the wall. Desktop Option For desktop mounting, place the access point horizontally on a surface so it sits on its four rubber feet. Wall-Mount Option To mount the WAP4410N Access Point on a wall, follow these steps. STEP 1 Determine where you want to mount the WAP4410N Access Point and install two screws (not supplied) that are 2-15/16 inches apart (approximately 7.46 cm.). STEP 2 With the back panel pointing up (if installing vertically), line up the WAP4410N Access Point so that the wall-mount crisscross slots on the bottom of the access point line up with the two screws. WAP4410N Wireless-N Access Point with Power Over Internet 9
-
 1
1 -
2
-
3
-
4
-
5
-
6
-
7
-
8
-
9
-
10
-
11
-
12
-
 13
13 -
 14
14 -
 15
15 -
 16
16 -
 17
17 -
 18
18 -
 19
19 -
 20
20 -
 21
21 -
 22
22 -
 23
23 -
24
-
25
-
26
-
27
-
28
-
29
-
30
-
31
-
32
-
33
-
34
-
35
-
36
-
37
-
38
-
39
-
40
-
41
-
42
-
43
-
44
-
45
-
46
-
47
-
48
-
49
-
50
-
51
-
52
-
53
-
54
-
55
-
56
-
57
-
58
-
59
-
60
-
61
-
62
-
63
-
64
-
65
-
66
-
67
-
68
-
69
-
70
-
71
-
72
-
73
-
74
-
75
-
76
-
77
-
78
-
79
-
80
-
81
-
82
-
83
-
84
-
85
-
86
-
87
-
88
-
89
-
90
-
91
-
92
 |
 |