Cisco WAP4410N Administration Guide - Page 31
Configuring Time Settings - manual
 |
UPC - 745883583362
View all Cisco WAP4410N manuals
Add to My Manuals
Save this manual to your list of manuals |
Page 31 highlights
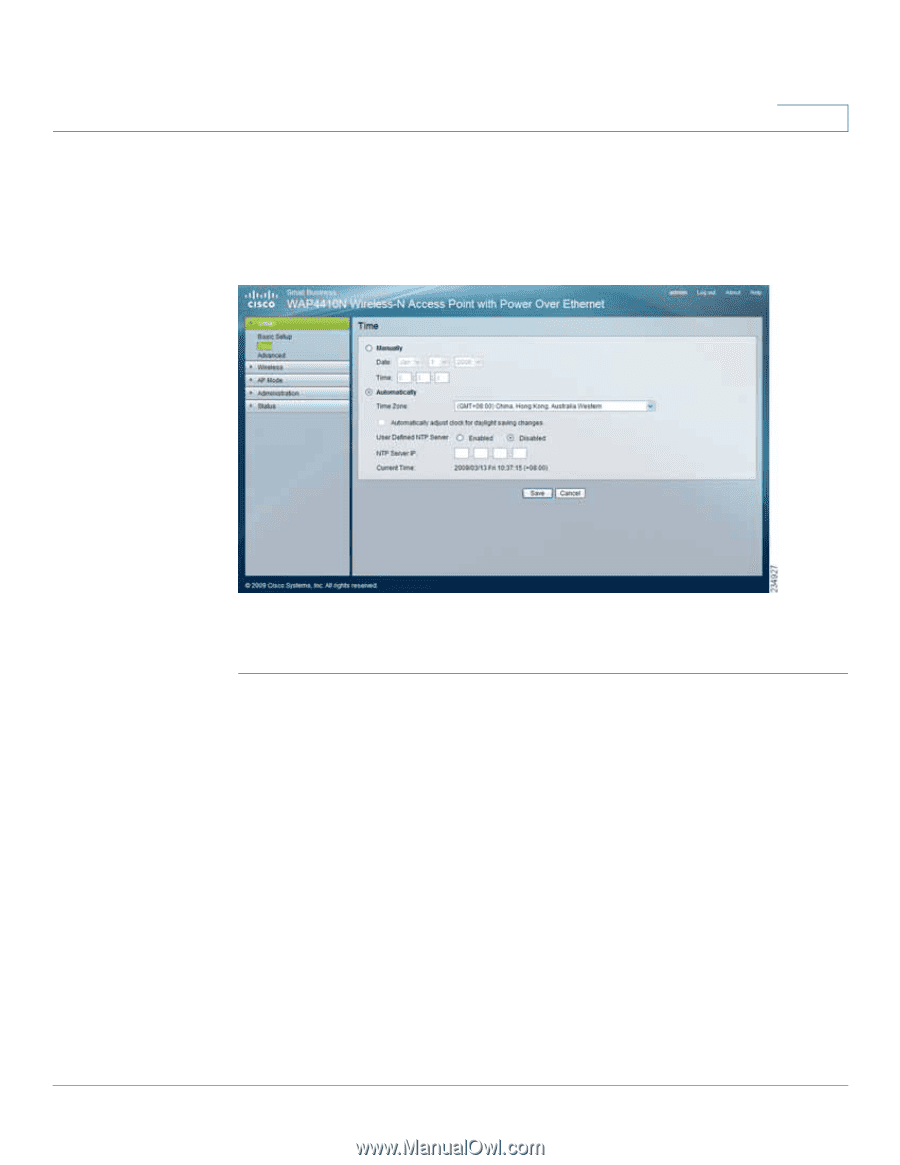
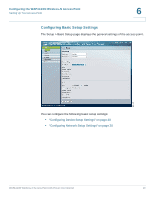
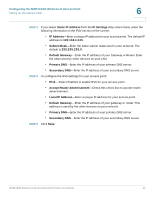
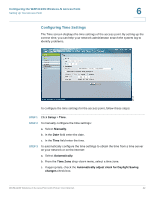
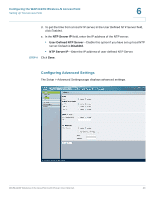
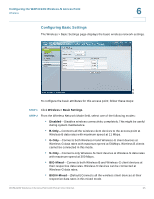
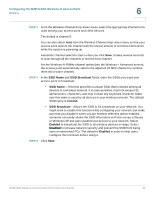
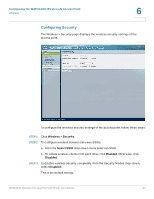
Configuring the WAP4410N Wireless-N Access Point Setting Up Your Access Point 6 Configuring Time Settings The Time screen displays the time settings of the access point. By setting up the correct time, you can help your network administrator search the system log to identify problems. To configure the time settings for the access point, follow these steps: STEP 1 Click Setup > Time. STEP 2 To manually configure the time settings: a. Select Manually. b. In the Date field enter the date. c. In the Time field enter the time. STEP 3 To automatically configure the time settings to obtain the time from a time server on your network or on the Internet: a. Select Automatically. b. From the Time Zone drop-down menu, select a time zone. c. If appropriate, check the Automatically adjust clock for Daylight Saving changes check box. WAP4410N Wireless-N Access Point with Power Over Internet 22
-
 1
1 -
2
-
3
-
4
-
5
-
6
-
7
-
8
-
9
-
10
-
11
-
12
-
13
-
14
-
15
-
16
-
17
-
18
-
19
-
20
-
21
-
22
-
23
-
24
-
25
-
 26
26 -
 27
27 -
 28
28 -
 29
29 -
 30
30 -
 31
31 -
 32
32 -
 33
33 -
 34
34 -
 35
35 -
 36
36 -
37
-
38
-
39
-
40
-
41
-
42
-
43
-
44
-
45
-
46
-
47
-
48
-
49
-
50
-
51
-
52
-
53
-
54
-
55
-
56
-
57
-
58
-
59
-
60
-
61
-
62
-
63
-
64
-
65
-
66
-
67
-
68
-
69
-
70
-
71
-
72
-
73
-
74
-
75
-
76
-
77
-
78
-
79
-
80
-
81
-
82
-
83
-
84
-
85
-
86
-
87
-
88
-
89
-
90
-
91
-
92
 |
 |