D-Link DES 6000 Product Manual
D-Link DES 6000 - Switch Manual
 |
UPC - 790069239328
View all D-Link DES 6000 manuals
Add to My Manuals
Save this manual to your list of manuals |
D-Link DES 6000 manual content summary:
- D-Link DES 6000 | Product Manual - Page 1
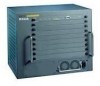
DES-6000 Modular Ethernet Switch User's Guide Second Edition (April 2001) 6DES6000..02 Printed In Taiwan RECYCLABLE - D-Link DES 6000 | Product Manual - Page 2
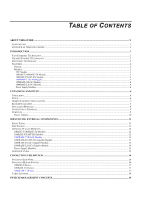
GIGABIT ETHERNET TECHNOLOGY ...1 SWITCHING TECHNOLOGY ...2 FEATURES ...2 Chassis ...2 Modules...3 CPU Module ...3 10BASE-T/100BASE-TX Module...3 100BASE-FX (MT-RJ) Module...4 1000BASE-T (RJ-45) Module ...4 1000BASE-SX (SC) Module ...4 1000BASE-LX (SC) Module ...4 Power Supply Modules ...4 UNPACKING - D-Link DES 6000 | Product Manual - Page 3
and Forwarding Table...49 Configure VLANs & MAC-based Broadcast Domains ...55 Update Firmware and Configuration Files ...65 System Utilities ...66 Ping Test ...66 Save Settings to TFTP Server ...67 Save Switch History to TFTP Server ...68 Clear Address Table...68 Management WEB ...68 Community - D-Link DES 6000 | Product Manual - Page 4
History ...114 Device Status ...115 Maintenance ...115 Firmware and Configuration Update...116 Save Settings to TFTP Server ...117 Save Switch History to TFTP Server ...117 Clear Address Table...118 Save Changes ...118 Factory Reset ...119 Restart System ...119 TECHNICAL SPECIFICATIONS...120 RJ - D-Link DES 6000 | Product Manual - Page 5
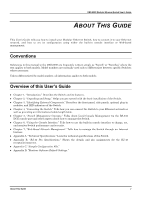
's Guide ABOUT THIS GUIDE This User's Guide tells you how to install your Modular Ethernet Switch, how to connect it to your Ethernet network, and how to set its configuration using either the built-in console interface or Web-based management. Conventions References in this manual to the DES-6000 - D-Link DES 6000 | Product Manual - Page 6
Switch User's Guide 1 INTRODUCTION This section describes the features of the Switch, as well as giving some background information about Ethernet/Fast Ethernet, Gigabit Ethernet, and switching Ethernet utilizing the same packet structure, format, and support for CSMA/CD protocol, full duplex, flow - D-Link DES 6000 | Product Manual - Page 7
problems. Features The DES-6000 Modular switch is designed for easy installation and high performance in an environment where traffic on the network and the number of users increases continuously. Switch features include: Chassis The chassis is the main unit that modules and power supplies - D-Link DES 6000 | Product Manual - Page 8
(Static VLAN). ♦ Proprietary simplified Port-based VLANs ♦ IEEE 802.1d Spanning Tree support. ♦ Address table: 12K MAC address per switch ♦ 96 Static VLAN Entries (in IEEE 802.1Q VLANs mode) ♦ Supports 802.1p priority queuing (2 priority queues) ♦ Port Aggregation (Port-Trunking) Capability ♦ Port - D-Link DES 6000 | Product Manual - Page 9
operation only ♦ IEEE 802.3x-compliant Flow Control support ♦ Per port packet buffer: 2 Mbytes Power Supply Modules ♦ Dual power modules design ♦ Current sharing design ♦ Full redundant feature design to ensure continuous operation ♦ If one power module fails, the other will take over all current - D-Link DES 6000 | Product Manual - Page 10
♦ Input: 90 ~ 264 VAC, 47 ~ 63Hz ♦ Output: 3.3V: 4A ~ 60A ♦ 12V: 0.1A ~ 2A Modular Ethernet Switch User's Guide Introduction 5 - D-Link DES 6000 | Product Manual - Page 11
switch chassis ♦ One management module (pre-installed in uppermost slot) ♦ One power supply module (pre-installed) ♦ One mounting kit: four mounting brackets and screws ♦ Four rubber feet with adhesive backing ♦ One AC power cord ♦ One console cable ♦ One printed copy of the quickstart guide ♦ One - D-Link DES 6000 | Product Manual - Page 12
Modular Ethernet Switch User's Guide Desktop or Shelf Installation When installing the Switch on a desktop or shelf, the rubber feet included with the device must be first attached. Attach these cushioning feet on the bottom at each corner - D-Link DES 6000 | Product Manual - Page 13
Ethernet Switch User's Guide Installing Modules The DES-6000 supports up to 9 modules which can be installed into the module bays. Networking modules are warm-swappable, meaning they can be added and removed while power to the switch is ON. After warmswapping a networking module, the switch will - D-Link DES 6000 | Product Manual - Page 14
of the supplied power cord firmly into the power inlet on the DES-6000's front panel of the redundant power supply. 3. Plug the outlet end of the power cord firmly into a suitable AC outlet. 4. Observe the DES-6000's LED indicators to make sure the Switch is operating correctly. The DES-6000's LED - D-Link DES 6000 | Product Manual - Page 15
Modular Ethernet Switch User's Guide ♦ All indicators blink momentarily to indicate a system reset. ♦ The Power indicator flashes for about 20 seconds while the switch prepares its run-time software and performs a self-test. ♦ The Power indicator begins shining steadily, and the remaining indicators - D-Link DES 6000 | Product Manual - Page 16
's Guide 3 IDENTIFYING EXTERNAL COMPONENTS This chapter describes the front panel, side panels, optional plug-in modules, and LED indicators of the Switch Front Panel The front panel of the Switch consists nine slide-in module slots for networking modules, two slide-in module slots for power supply - D-Link DES 6000 | Product Manual - Page 17
Modular Ethernet Switch User's Guide Optional Plug-in Modules The DES-6000 Modular Ethernet Switch is able to accommodate a range of plug-in modules in order to increase functionality and performance. 10BASE-T/100BASE-TX Module Figure 3-2. 16-port, 10/100BASE- - D-Link DES 6000 | Product Manual - Page 18
Modular Ethernet Switch User's Guide ♦ Fully compliant with IEEE 802.3u 100BASE-FX ♦ Back pressure Flow Control support for Half-duplex mode ♦ IEEE 802.3x compliant Flow Control support for Full duplex ♦ Per port packet buffer: 0.5 Mbytes ♦ Supports multi-mode fiber-optic cable connections of up to - D-Link DES 6000 | Product Manual - Page 19
Modular Ethernet Switch User's Guide ♦ 2 1000BASE-SX (MT-RJ) Gigabit Ethernet ports ♦ Fully compliant with IEEE 802.3z ♦ Supports Full-duplex operation only ♦ IEEE 802.3x-compliant Flow Control support ♦ Per port packet buffer: 2 Mbytes 1000BASE-SX (SC) Gigabit Module Figure 3-6. Two-port, 1000BASE- - D-Link DES 6000 | Product Manual - Page 20
Switch User's Guide Power Supply Modules ♦ Dual power modules design with current sharing design ♦ Full redundant feature design to ensure continuous operation ♦ If one power module failed, the other will take over all current supply automatically. ♦ Hot-swappable/Hot-pluggable capability ♦ Power - D-Link DES 6000 | Product Manual - Page 21
Switch User's Guide 4 CONNECTING THE SWITCH This chapter describes how to connect the Switch to your Ethernet network as well as providing an informational cable length table. Switch 2. The Link/Act indicator lights up upon hooking up a PC that is powered on. Switch to Hub or Switch These connections - D-Link DES 6000 | Product Manual - Page 22
Modular Ethernet Switch User's Guide 10BASE-T Device For a 10BASE-T device, the Switch's LED indicators should display the following: ♦ 100M speed indicator is OFF. ♦ Link/Act indicator is ON. 100BASE-TX Device For a 100BASE-TX device, the Switch's LED indicators should display the following: ♦ 100M - D-Link DES 6000 | Product Manual - Page 23
Modular Ethernet Switch User's Guide Cable Lengths Standard 1000BASE-SX Media Type 50/125µm Multimode Fiber 50/125µm Multimode Fiber 62.5/125µm Multimode Fiber 62.5/125 Meters 5000 Meters 100 Meters 400 Meters 2000 Meters 400 Meters 2000 Meters 100 Meters 100 Meters 18 Connecting The Switch - D-Link DES 6000 | Product Manual - Page 24
monitor the many functions of the Switch. Hardware components in the Switch allow it to be an active part of a manageable network. These components include a CPU, memory for data storage, other related hardware, and SNMP agent firmware. Activities on the Switch can be monitored with these components - D-Link DES 6000 | Product Manual - Page 25
the Switch a list of IP Addresses of the network managers that you allow to manage the Switch. You can also change the default Community Name in the Switch and is different from a factory reset. ♦ Warm Start This trap signifies that the Switch has been rebooted, however the Power-On Self-Test (POST) - D-Link DES 6000 | Product Manual - Page 26
power supply module is removed in the switch. ♦ Bad Power This trap is sent whenever a redundant power supply is receiving AC power but not supplying DC power to the switch. ♦ Power Supply Module Inserted This trap is sent whenever a redundant power supply is installed in the switch. ♦ Power Supply - D-Link DES 6000 | Product Manual - Page 27
Switch User's Guide Packet Forwarding The Switch parts of the network. For intrusion control, whenever a switch manual entry Switch determines that a problem has developed in the primary paths. When a primary path is lost, the switch providing the alternative path will automatically go into service - D-Link DES 6000 | Product Manual - Page 28
Modular Ethernet Switch User's Guide complicated and complex subject and must be fully researched and bridge level and the port level. On the bridge level, STA calculates the Bridge Identifier for each Switch, then sets the Root Bridge and the Designated Bridges. On the port level, STA sets the Root - D-Link DES 6000 | Product Manual - Page 29
Switch User's Guide User-Changeable STA Parameters The factory default setting should cover the majority of installations. However, it is advisable to keep the default settings as set at the factory, unless it is absolutely necessary. The user changeable parameters in the Switch loop problems, STA - D-Link DES 6000 | Product Manual - Page 30
Switch User's Guide Time Compete for Root Avoid low number for Bridge, if BPDU is unnecessary reset of not received Root Bridge High # delays the change in state Max. segment Disable a port for security or problem isolation Increases chance of become Root Port Table 5-1. User-selective - D-Link DES 6000 | Product Manual - Page 31
Modular Ethernet Switch User's Guide Port Trunking Port trunking is used to combine a number of ports together to make a single high-bandwidth data pipeline. The participating parts are called members of a trunk group, with one port designated as the anchor of the group. Since all members of the - D-Link DES 6000 | Product Manual - Page 32
Switch User's Guide MAC-based Broadcast Domains The Switch supports up to 12 MAC-based broadcast domains, which are by their nature, limited to the switch parts Switch and will not reach its destination. If Port 10 is a member of VLAN 2, the packet will go through. This selective forwarding feature - D-Link DES 6000 | Product Manual - Page 33
Modular Ethernet Switch User's Guide Sharing Resources Across 802.1Q VLANs Network resources such ports which are members of VLAN 3 (VID=3). 802.1Q VLANs Spanning Multiple Switches 802.1Q VLANs can span multiple switches as well as your entire network. Two considerations to keep in mind while - D-Link DES 6000 | Product Manual - Page 34
Modular Ethernet Switch User's Guide ♦ Tagging The act of putting 802.1Q VLAN information into the normal Ethernet) packet can be read by the receiving device. VLANs Over 802.1Q-compliant Switches When switches maintaining the same VLANs are 802.1Q-compliant, it is possible to use tagging. Tagging - D-Link DES 6000 | Product Manual - Page 35
Modular Ethernet Switch User's Guide Figure 5-4. Data transmissions between 802.1Q-compliant switches In the above example, step 4 is the key element. Because the packet has 802.1Q VLAN set up VLANs in order to limit the effect of broadcast packets on their network. 30 Switch Management Concepts - D-Link DES 6000 | Product Manual - Page 36
Switch User's Guide For the most secure implementation, make sure that end stations are directly connected to the switch. Attaching a hub, switch a common problem on today's of the same VLAN. Other parts of the network are effectively shielded In the DES-6000 switch, the default rising threshold is - D-Link DES 6000 | Product Manual - Page 37
Switch User's Guide 6 USING THE CONSOLE INTERFACE Your Modular Ethernet Switch supports a console management interface that allows you to set up and control your Switch suitable for the console's serial communications port. 2. Power down the devices, attach the cable (or cable/adapter combination) - D-Link DES 6000 | Product Manual - Page 38
First Time Connecting To The Switch The Switch supports user-based security that can allow you to prevent unauthorized users from accessing the Switch or changing its settings. This section tells how to log onto the Switch. Note: The passwords used to access the Switch are case sensitive; therefore - D-Link DES 6000 | Product Manual - Page 39
Switch User's Guide Figure 6-2. Initial Screen, first time connecting to the Switch Press or in the username and password user for the Switch. User Accounts Management User accounts are accounts setup on the Switch which allow access to the switch management features. From the - D-Link DES 6000 | Product Manual - Page 40
Modular Ethernet Switch User's Guide 5. To see a Monitoring Community Strings and Trap Stations Update Firmware and Configuration Files User Accounts Management Read/ Yes, (Ping Test); read only for rest. Factory Reset Read/Write No Restart System Read/Write No Table 6-1. Administrator - D-Link DES 6000 | Product Manual - Page 41
Switch User's Guide Figure 6-4. Save Changes screen After the settings have been saved to NV-RAM, they will become the default settings for the Switch, and they will be used every time it is powered on, reset or rebooted. The only exception to this is a factory reset your user password: 1. Choose - D-Link DES 6000 | Product Manual - Page 42
Modular Ethernet Switch User's Guide Figure 6-5. User Accounts Management menu 2. Choose Create/Modify User Accounts. The following screen appears: Figure 6-6. Add/Modify User Accounts screen 3. Type in your Username and press . 4. If you are an old user, type in the Old Password and press - D-Link DES 6000 | Product Manual - Page 43
Modular Ethernet Switch User's Guide To view a user account: Choose User Accounts Control Table let the changes take effect. Setting Up The Switch This section will help prepare the Switch user by describing the System Configuration, Update Firmware and Configuration Files, Save Changes, and System - D-Link DES 6000 | Product Manual - Page 44
), a BootP server, or a DHCP server. Manual - When manual is chosen, the switch will use the IP Address, Subnet Mask and Default Gateway settings defined in this screen upon being rebooted. BootP - Sends out a BOOTP broadcast request when it is powered up. The BOOTP protocol allows IP addresses - D-Link DES 6000 | Product Manual - Page 45
Switch User's Guide ♦ Default Gateway IP address that determines where frames with a destination outside the current subnet should be sent. This is usually the address of a router or a host acting as an IP gateway. If your network is not part This is a security feature which measures the time - D-Link DES 6000 | Product Manual - Page 46
the Module, Type, and Hardware Version. Press Switch Module Information on the Switch Module Configuration screen to access the Switch Module Information screen: Figure 6-12. Switch Module Information screen Advanced Settings The Configure Advanced Switch Features screen allows you to set Head Of - D-Link DES 6000 | Product Manual - Page 47
Modular Ethernet Switch User's Guide Figure 6-13. Configure Advanced Switch Features screen The fields you can set are: ♦ Auto-Partition Capability on All Ports When this function is enabled, if too many consecutive collisions occur on - D-Link DES 6000 | Product Manual - Page 48
Ethernet Switch User's Guide ♦ /Full will be displayed in this field. Gigabit ports also support auto-negotiation. ♦ Flow Ctrl Toggles flow control On or Off. port will allow is traffic from machines whose MAC address is manually entered in the Static Forwarding Table. ♦ Broadcast Storm Rising Action - D-Link DES 6000 | Product Manual - Page 49
is discussed in detail in the Port Trunking section of the "Switch Management Concepts" chapter of this manual. The switch supports 2 trunk groups per module, except for the Gigabit Ethernet modules - these modules support multiple trunk groups consisting of ports from each module. Gigabit Trunk - D-Link DES 6000 | Product Manual - Page 50
Switch User's Guide pictured above the first trunk group designates a trunk connection to a switch in the Sales department. ♦ Members Select between 2 to 8 ports to be members first port. This is useful for network monitoring and troubleshooting purposes. Choose Configure Port Mirroring on the System - D-Link DES 6000 | Product Manual - Page 51
Switch User's Guide (or target) port is where you will connect a monitoring/troubleshooting device such as a sniffer or an RMON probe. Note: You 10 Mbps port, this can cause throughput problems. The port you are copying frames to should always support an equal or higher speed than the source - D-Link DES 6000 | Product Manual - Page 52
to access the following screen: Modular Ethernet Switch User's Guide Figure 6-20. STP Parameters Setting screen The activated. ♦ Designated Root Read-only object displays the MAC (Ethernet) address of the bridge/switch on the network that has been chosen as the STP root. ♦ Root Cost Read-only - D-Link DES 6000 | Product Manual - Page 53
Modular Ethernet Switch User's Guide start sending its own BPDU to all other switches for permission to become the Root Bridge. If it turns out that your Switch has the lowest Bridge Identifier, it will become the Root Bridge. ♦ Hello Time(1-10 Sec) Hello Time is a read-write object that can be set - D-Link DES 6000 | Product Manual - Page 54
Modular Ethernet Switch User's Guide same. The higher the port priority, the more chance the port on which its destination lies. Dynamic Filtering and Static Filtering are among the two important features of the Custom Filtering Table. They are defined here briefly as follows. Dynamic Filtering is - D-Link DES 6000 | Product Manual - Page 55
Switch User's Guide Please refer to the Packet Forwarding section of the "Switch Management Concepts" chapter of this manual for more detailed information. Configure Static Forwarding Table The Static Forwarding Table displays a list of manually defined static MAC address entries. When the Switch - D-Link DES 6000 | Product Manual - Page 56
Modular Ethernet Switch User's Guide Configure MAC Address Filtering The Static Filtering Table contains filtering information configured into the Switch by (local or network) management specifying MAC addresses which are not allowed to be forwarded. The Switch will check both the destination and - D-Link DES 6000 | Product Manual - Page 57
the switch in order to obtain forwarding information from them (learn which ports contain Multicast members). The bottom of this screen allows you to configure IGMP for individual VLANs. If 802.1Q or port-based VLANs are enabled on your network, you must specify which VLANs can support multicast - D-Link DES 6000 | Product Manual - Page 58
802.1Q IGMP Modular Ethernet Switch User's Guide Figure 6-27. IEEE 802.1Q IGMP Configuration screen Choose Add/Remove IGMP Entry from the screen above to define up to 24 VLANs on the Switch which can send and receive IGMP packets: Figure 6-28. Add/Remove IGMP Entry screen The above window is used - D-Link DES 6000 | Product Manual - Page 59
Modular Ethernet Switch User's Guide Figure 6-29. IEEE 802.1Q IGMP Configuration screen This and received. ♦ Age-out Time If no IGMP query packet has arrived at the Switch before this timer has expired, the Switch will become the IGMP host for this VLAN. ♦ IGMP Status Activates/deactivates the agent - D-Link DES 6000 | Product Manual - Page 60
Switch User's Guide Configure VLANs & MAC-based Broadcast Domains If you are unsure about your knowledge of VLANs and MAC-based broadcast domains, please review the VLANs & MAC-based Broadcast Domains section in the "Switch Management Concepts" chapter of this manual before configuring the switch - D-Link DES 6000 | Product Manual - Page 61
Modular Ethernet Switch User's Guide Choose Configure MAC-based Broadcast Domain from the bottom of the screen above to access the MACbased Broadcast Domain Configuration menu: Figure 6-32. MAC-Based - D-Link DES 6000 | Product Manual - Page 62
Modular Ethernet Switch User's Guide Figure . Current Broadcast Domains, Number of Members, MAC Address (in the lower part of the screen), and Status reflect the current conditions. They are read "Switch Management Concepts" chapter in this manual before proceeding. Using the Console Interface 57 - D-Link DES 6000 | Product Manual - Page 63
Modular Ethernet Switch User's Guide To configure an IEEE 802.1Q VLANs, you must do three many VLANs. Active VLAN designations are defined by assigning Port VLAN ID numbers (PVIDs) in the Configure Default Port VLAN ID screen. All ports participating in VLANs must have a PVID. 3. Define the VLAN - D-Link DES 6000 | Product Manual - Page 64
Modular Ethernet Switch User's Guide This screen allows you to Enable or Disable Assignment screen This screen allows you to set a Port VLAN ID number (PVID) for each port. VLAN 1 is the default VLAN. All ports are assigned PVID = 1 when VLANs are enabled. Press APPLY to let the changes take effect. - D-Link DES 6000 | Product Manual - Page 65
Switch User's Guide This screen allows you to Enable or Disable Group VLAN Registration Protocol (GVRP) for each port. When GVRP is Enabled, a user attached to the port's Ethernet segment can dynamically join an 802.1Q VLAN that has been previously defined on the switch 1 is the default VLAN. All - D-Link DES 6000 | Product Manual - Page 66
Modular Ethernet Switch User's Guide Figure 6-41. Browse 802.1Q VLANs screen This table to the previous page. Choose GMRP Configuration at the bottom of the VLAN Configuration screen (when the switch is in 802.1Q VLAN mode) to access the following screen: Figure 6-42. GMRP Configuration screen - D-Link DES 6000 | Product Manual - Page 67
Modular Ethernet Switch User's Guide Figure 6-43. Port GMRP Configuration screen This screen allows you ID from 1 to 4094. This is the VLAN that will be defined on this screen. VID 1 is the default VLAN. All ports are designated members of VID 1 when VLANs are enabled. ♦ MAC Address This is the MAC - D-Link DES 6000 | Product Manual - Page 68
Modular Ethernet Switch User's Guide ♦ State can be toggled between Permanent, Delete on Reset, Delete on Timeout, and Invalid. Permanent marks the entry as always being a member of the multicast group. Delete on Reset marks the entry as active until the switch is reset (rebooted), at - D-Link DES 6000 | Product Manual - Page 69
Modular Ethernet Switch User's Guide Choose Configure Port-based VLAN Entry from the Port-based VLAN Configuration menu (when the switch is in Port-based VLAN mode). The following screen appears: Figure 6-47. Port-based VLAN Configuration screen The fields you can set are: ♦ VLAN ID ( - D-Link DES 6000 | Product Manual - Page 70
Firmware and Configuration Files screen to control this feature. Choose Update Firmware and Configuration Files to access the fourth item on the Switch containing IP settings for the switch. Please refer to the Sample Configuration File appendix at the back of this manual for more information on - D-Link DES 6000 | Product Manual - Page 71
network problems. 2. Avoid changing active links and do not make new loops on the network when downloading new firmware. 3. Downloading new firmware may result in the loss of some or all Switch settings. We therefore strongly recommend performing a factory reset and then restarting the Switch after - D-Link DES 6000 | Product Manual - Page 72
The IP address of the device to be Pinged. ♦ No. of Pings Number of times the Switch should send the Ping (1-255). If zero is chosen, the Switch will continue Pinging indefinitely. In the lower part of the Ping Test screen, you can view the Results of the Ping test. Save Settings to - D-Link DES 6000 | Product Manual - Page 73
Switch History to TFTP Server screen Press START to begin the file save. The result will be displayed in the lower part as when the Switch is turned on or when a system reset occurs. The Switch allows traps to used as a "password" to control access to the Switch. If the Switch receives a request with - D-Link DES 6000 | Product Manual - Page 74
Modular Ethernet Switch User's Guide The SNMP allows up to four different community names to be defined. The community name public is defined by default; you can change this name in addition to adding others. You will need to coordinate these names with the community name settings you use in - D-Link DES 6000 | Product Manual - Page 75
Modular Ethernet Switch User's Guide Figure 6-55. Network Monitoring and Device Information menu The first item on this menu permits you to access four different tables that observe the condition - D-Link DES 6000 | Product Manual - Page 76
Modular Ethernet Switch User's Guide Figure 6-57. Port Utilization screen Select the desired device in the Switch field and the desired Interval 5 sec, 15 sec, 30 sec, 1 min, or Suspend. The setting causes the switch to sample the wire at the interval chosen. ♦ TX/sec The number of good bytes sent - D-Link DES 6000 | Product Manual - Page 77
Modular Ethernet Switch User's Guide The statistic counters displayed are defined as follows: ♦ Speed If the link is up, the speed and duplex status will be displayed; if the link is down "-" will be displayed. ♦ % Utilization This shows the percentage of available bandwidth each port is using - D-Link DES 6000 | Product Manual - Page 78
Modular Ethernet Switch User's Guide ♦ Bad Fragment The number of packets less than 64 MAC Errors. ♦ Dropped Frames The number of frames which are dropped by this port since the last Switch reboot. ♦ Undersize Frames The number of frames detected that are less than the minimum permitted frame size - D-Link DES 6000 | Product Manual - Page 79
a trap and event receiver except it only captures trap/events generated by the Switch itself. For example, the switch history includes when the system is rebooted, when a console session has timed-out, when a new link is established, and when configuration is saved to flash memory. To display the - D-Link DES 6000 | Product Manual - Page 80
Modular Ethernet Switch User's Guide Figure 6-62. Switch History screen The switch history entries are listed chronologically from the last time the Switch was rebooted. Device Status Selecting Device Status will display power supply and fan status. From this screen you can activate or deactivate - D-Link DES 6000 | Product Manual - Page 81
Modular Ethernet Switch User's Guide Figure 6-64. Browse GVRP Status screen Browse GMRP Status Selecting to view Multicast groups and settings and Internet Group Management Protocol (IGMP) information. The Switch is able to recognize IGMP queries and reports sent between stations and an IGMP router - D-Link DES 6000 | Product Manual - Page 82
host, signifying that the station is still (or wants to be) part of a multicast group. ♦ Ports The Switch ports supporting the selected multicast group. Resetting the Switch Switch settings may be reset simply by powering the Switch off and on again, or by performing a Restart System or Factory - D-Link DES 6000 | Product Manual - Page 83
Address menu. Then perform a Restart System on the Switch. After these three procedures are performed, your Factory Reset is complete. Choose Factory Reset from the main menu. The following screen appears: Figure 6-67. Factory Reset NV-RAM to Default Value screen Logout To exit the console program - D-Link DES 6000 | Product Manual - Page 84
. In the page that opens, click on the Login to DES-6000 Manager button: Figure 7-1. Logon Icon This opens the main page in the management module. The top-left part of each page contains an interactive view of the Switch's front panel as shown below. The image on your browser may appear slightly - D-Link DES 6000 | Product Manual - Page 85
Modular Ethernet Switch User's Guide Figure 7-2. Switch Icon Clicking on one of the modules causes an interactive view of the front-panel of the chose module at the top of the browser. The default module displayed when you first open the page is the CPU module shown below: Figure 7-3. CPU Icon - D-Link DES 6000 | Product Manual - Page 86
Modular Ethernet Switch User's Guide IP Address Figure 7-4. IP Address window You can change the IP Address, Subnet Mask, and Default Gateway on the Switch. If your are not using BOOTP, enter the IP Address, Subnet Mask, and Default Gateway of the Switch. If you enable BOOTP Service, you do not - D-Link DES 6000 | Product Manual - Page 87
Modular Ethernet Switch User's Guide Figure 7-5. Switch Module window The fields you can set are: ♦ System Name Corresponds to the SNMP MIB II variable system.sysName, and is used to give a name to the Switch for administrative purposes. The Switch's fully qualified domain name is often used, - D-Link DES 6000 | Product Manual - Page 88
Modular Ethernet Switch User's Guide Advanced Settings Figure 7-7. Advanced Settings window The first setting allows you to enable or disable port auto-partitioning by the Auto-Partition Capability on All - D-Link DES 6000 | Product Manual - Page 89
the representation of the entire Switch to the left to make them appear at the top of the window). Follow these instructions: 1. State enables or port is selected, the option is 1000/Full. Gigabit Ports also support Auto-negotiation. 3. Configure the Flow Control setting for the port. Selecting - D-Link DES 6000 | Product Manual - Page 90
You can also set a Falling Threshold in the next field. Otherwise, the default is 250 packets per second. 8. The Port Type, STP State, and Status The Switch supports up to 16 trunk groups. Each module on the Switch supports up to two trunk groups except Gigabit modules which support multiple - D-Link DES 6000 | Product Manual - Page 91
Switch User's Guide ♦ State Allows the trunk group to be Enabled or Disabled. Clear the third choice, deselects all ports and erases the name of the trunk group. Port Mirroring Figure 7-10. Port Mirroring window The Switch problems. The port you are copying frames to should always support - D-Link DES 6000 | Product Manual - Page 92
Modular Ethernet Switch User's Guide STP Switch Settings Figure 7-11. STP Switch Settings window To configure Spanning Tree Protocol functions for the Switch, enter the desired information in the fields on this screen (see the descriptions below for assistance) and then click Apply. The items you - D-Link DES 6000 | Product Manual - Page 93
STP Port Settings Modular Ethernet Switch User's Guide Figure 7-12. STP Port Settings window Enter the 255. The priority is used to determine the designated port if the Path costs of redundant switch to switch connections are the same. The higher the port priority, the more chance the port has of - D-Link DES 6000 | Product Manual - Page 94
Modular Ethernet Switch User's Guide Figure 7-13. Configure Forwarding Table And Filtering Table window ♦ Lock Address Table Mostly used for security purposes, when the forwarding table is locked the Switch will no longer learn the MAC addresses of new hosts. If your network configuration doesn't - D-Link DES 6000 | Product Manual - Page 95
Click New to access the Static Forwarding Table --- Edit window: Modular Ethernet Switch User's Guide Figure 7-15. Static Forwarding Table --- Edit window To use the MAC forwarding function, enter the MAC Address of the device to which the specified port - D-Link DES 6000 | Product Manual - Page 96
Modular Ethernet Switch User's Guide Figure 7-17. Static MAC Address Filtering --- Edit window To add forwards traffic over each port for one multicast group. You can configure each port on the Switch to forward traffic for the specified multicast group. If VLANs are enabled, you must also specify - D-Link DES 6000 | Product Manual - Page 97
Modular Ethernet Switch User's Guide Figure 7-19. Static Multicast Filtering --- Edit window To or Port-based VLANs are enabled. IGMP Internet Group Management Protocol (IGMP) snooping allows the Switch to recognize IGMP queries and reports sent between network stations or devices and an IGMP router - D-Link DES 6000 | Product Manual - Page 98
Modular Ethernet Switch User's Guide IGMP Settings Figure 7-20. Configure IGMP window To configure the IGMP, enter a value between 30 and 9999 seconds in the IP Multicast Filtering Age-out - D-Link DES 6000 | Product Manual - Page 99
Modular Ethernet Switch User's Guide Figure 7-22. Add/Remove IGMP Entries --- Edit window To edit an 802.1Q IGMP entry, enter a value from 1 to 4094 in the VLAN ID field and then click Apply. Figure 7-23. Configure IGMP Entries window 94 Web-Based Network Management - D-Link DES 6000 | Product Manual - Page 100
Modular Ethernet Switch User's Guide This window displays the VLAN ID, Age-out Timer setting, and IGMP status for IGMP entries. To edit an IGMP entry, click the pointer icon - D-Link DES 6000 | Product Manual - Page 101
Modular Ethernet Switch User's Guide VLANs & MAC-based Broadcast Domains IEEE 802.1Q should be the first VLAN you create, otherwise, you may not be able to communicate with the switch except through the console port. This setting can only be configured through the console connection. Web, Telnet - D-Link DES 6000 | Product Manual - Page 102
Modular Ethernet Switch User's Guide Figure 7-27. Create/Remove MAC-based Broadcast Domains window take effect. ♦ Description The name of the MAC-based broadcast domain to be added to the switch. After adding the VLAN, proceed to the Configure MAC-based Broadcast Domain Member screen to add members - D-Link DES 6000 | Product Manual - Page 103
Modular Ethernet Switch User's Guide Figure 7-29. Configure MAC-based Broadcast Domain Member window to. ♦ Status Indicates whether the entry is Active or Inactive. To make entries active, the switch needs to be restarted in the appropriate VLAN or broadcast domain mode. Click the X in the Delete - D-Link DES 6000 | Product Manual - Page 104
Modular Ethernet Switch User's Guide Figure 7-31. Port Ingress Filter window Use this window to PVID) window This screen allows you to set a Port VLAN ID number (PVID) for each port. VLAN 1 is the default VLAN. All ports are assigned PVID = 1 when VLANs are enabled. Note: If a port is a member of a - D-Link DES 6000 | Product Manual - Page 105
to access the following window: Modular Ethernet Switch User's Guide Figure 7-35. Switch GVRP window This window allows you to Enable or Disable Group VLAN Registration Protocol (GVRP) globally for entire switch. When GVRP is Enabled, a user attached to the switch can dynamically join a VLAN. When - D-Link DES 6000 | Product Manual - Page 106
Switch User's Guide Click on the 802.1Q Static VLANs icon to access the following window: Figure 7-37. 802.1Q Static VLANs window To configure an 802.1Q VLAN entry, enter a VLAN ID (VID) number and VLAN Name in the first two fields. If the VLAN is not previously defined on the switch the default - D-Link DES 6000 | Product Manual - Page 107
Modular Ethernet Switch User's Guide ♦ Egress/Forbidden/Non-Member Position the cursor over the dash "-" and deselects any Egress or Forbidden settings. Click on the Switch GMRP icon to access the following window: Figure 7-39. Switch GMRP window This screen allows you to Enable or Disable - D-Link DES 6000 | Product Manual - Page 108
Switch User's Guide is the VLAN that will be defined on this screen. VID 1 is the default VLAN. All ports are designated members of VID 1 when VLANs are enabled. ♦ member of the multicast group. Delete on Reset marks the entry as active until the switch is reset (rebooted), at which time, the entry - D-Link DES 6000 | Product Manual - Page 109
Modular Ethernet Switch User's Guide Figure 7-42. Port-based VLAN window The above window lists all port-based VLANs currently setup on the Switch. Click the pointer icon in the Edit column to access the Port Based VLAN Entry window: Figure 7-43. Port Based VLAN Entry window The above - D-Link DES 6000 | Product Manual - Page 110
Modular Ethernet Switch User's Guide Community Strings and Trap Receivers Figure 7-44. Community Strings and Trap Receivers or Disabled. User Accounts Management User accounts are accounts set up on the Switch which allow access to the switch management features. Web-Based Network Management 105 - D-Link DES 6000 | Product Manual - Page 111
Modular Ethernet Switch User's Guide Figure 7-45. User Accounts Control Table window Click a User Account, fill in the appropriate information in the User Name, Old Password, New Password, and Confirm New Password fields. Then select the desired access, Normal User or Administrator in the Access - D-Link DES 6000 | Product Manual - Page 112
Switch User's Guide Figure 7-47. Configure Console window Items in the window are described as follows: ♦ Console Timeout This is a security feature , or 38400. Click Apply and then reboot the Switch for console port settings to take effect. The default serial port settings are: ♦ Baud Rate=9600 ♦ - D-Link DES 6000 | Product Manual - Page 113
Overview Modular Ethernet Switch User's Guide Figure 7-48. Switch Statistics window The information is described as follows: ♦ Update Interval Choose the desired setting: 5 seconds, 15 seconds, 30 seconds, 60 seconds or Suspend. The switch will be sampled for 1 second each update interval. ♦ TX - D-Link DES 6000 | Product Manual - Page 114
Modular Ethernet Switch User's Guide Port Utilization Figure 7-49. Port Utilization window The information is window The port statistics shown by default are those for the port you last configured. Once in the individual window, you can click any port on the Switch graphic at the top of the - D-Link DES 6000 | Product Manual - Page 115
Modular Ethernet Switch User's Guide The information is described as follows: ♦ Update Interval Choose the desired setting: 5 seconds, 15 seconds, 30 seconds, 60 seconds or Suspend. ♦ Clear button Clicking on this button resets all counters in the tables on this page to the value zero. ♦ Link Status - D-Link DES 6000 | Product Manual - Page 116
Switch User's Guide ♦ Clear button Clicking on this button resets all counters in the tables on this page to the value zero. ♦ Link Status Indicates the current link number of frames which are dropped by this port since the last Switch reboot. ♦ Undersize Frames The number of frames detected that are - D-Link DES 6000 | Product Manual - Page 117
Modular Ethernet Switch User's Guide The information is described as follows: ♦ Update Interval Choose the desired setting: 5 seconds, 15 seconds, 30 seconds, 60 seconds or Suspend. ♦ Clear button Clicking on this button resets all counters in the tables on this page to the value zero. ♦ 64 The - D-Link DES 6000 | Product Manual - Page 118
Switch User's Guide Browse Address Table Figure 7-53. Browse Address Table window The Switch allows you to display a table containing Switch that the VID field will only be shown when VLANs are enabled on the Switch. IP Multicast & IGMP Information Figure 7-54. IP Multicast & IGMP Information - D-Link DES 6000 | Product Manual - Page 119
GVRP Status Modular Ethernet Switch User's Guide Figure 7-55. Browse GVRP Status window The Switch allows you to display a table containing Switch ports, Egress status, and current untagging status of each port. Browse GMRP Status Figure 7-56. Browse GVRP Status window The Switch allows you to - D-Link DES 6000 | Product Manual - Page 120
System Fans and Power Supply Modules. Maintenance The fourth and last main category of the Switch Web-based management program includes: Firmware and Configuration Update, Save Settings To TFTP Server, Save Switch History To TFTP Server, Clear Address Table, Save Changes, Factory Reset, and Restart - D-Link DES 6000 | Product Manual - Page 121
not the Switch should download its new firmware code the next time it is restarted. ♦ File Name The path and the name on the TFTP server which holds the new firmware image file. Change Configuration File: ♦ Use Config File Toggle to Enabled to use a configuration text file when the Switch is reset - D-Link DES 6000 | Product Manual - Page 122
Modular Ethernet Switch User's Guide Save Settings to TFTP Server Figure 7-60. Save Settings to not by displaying either "Success" or "Fail." Save Switch History to TFTP Server Figure 7-61. Save Switch History to TFTP Server window To save the switch logs to your TFTP server, fill in the fields - D-Link DES 6000 | Product Manual - Page 123
Modular Ethernet Switch User's Guide The information is described as follows: ♦ Server IP Address session to the Switch's flash memory, click the Save Configuration button. Once in the NV-RAM, they become the default settings for the Switch and are impervious to System Restarts or power downs. 118 - D-Link DES 6000 | Product Manual - Page 124
Guide Factory Reset Figure 7-64. Factory Reset to Default Value window Doing a factory reset will return all settings to their original values at the time of purchase. After performing a factory reset, the Switch will need to be entirely reconfigured from scratch. Click the Reset to Factory Default - D-Link DES 6000 | Product Manual - Page 125
Modular Ethernet Switch User's Guide A TECHNICAL SPECIFICATIONS Standards Protocol Data Transfer Rate Ethernet Fast Ethernet: Gigabit Ethernet: Topology Network Cables 10BASE-T: 100BASE-TX: 1000BASE-T General IEEE 802.3 10BASE-T Ethernet IEEE - D-Link DES 6000 | Product Manual - Page 126
Modular Ethernet Switch User's Guide Physical and Environmental AC Input DC Fans Temperature Relative Humidity Dimensions EMI Safety 90 to 264 VAC, 47-63 Hz (auto-adjusting internal power supply) Two built-in 60 x 60 mm fans per power supply unit Operating: 0° to 40° C (32° to 104° F) Storage: - - D-Link DES 6000 | Product Manual - Page 127
Modular Ethernet Switch User's Guide B RJ-45 PIN SPECIFICATION When connecting the Switch to another switch, a bridge or a hub, a modified crossover cable is necessary. Please review these products for matching cable pin assignment. The following diagram and table show the standard - D-Link DES 6000 | Product Manual - Page 128
Modular Ethernet Switch User's Guide RJ-45 Connector pin assignment Contact Media Direct Interface Signal 1 Tx + (transmit) 2 Tx - (transmit) 3 Rx + (receive) 4 Not used 5 Not used 6 Rx - (receive) 7 Not used 8 Not - D-Link DES 6000 | Product Manual - Page 129
for the file to be loaded into the switch. For example, "e:\6000\6000prom.tfp". Make sure double-quotes are used as in the example file below. ♦ Ip_addr - This is the IP address that will be assigned to the switch. This command is included for downloading a configuration settings file to another - D-Link DES 6000 | Product Manual - Page 130
Modular Ethernet Switch User's Guide Each command can only appear once in the configuration file. If both the Firmware Update and Use Config File options are enabled, the Firmware Update command will take precedence and only the firmware file will be uploaded to the switch. The Config image file, - D-Link DES 6000 | Product Manual - Page 131
Modular Ethernet Switch User's Guide D RUNTIME SOFTWARE DEFAULT SETTINGS Load Mode Configuration update Firmware update Out-of-band baud rate Rs232 mode Ip address Subnet mask Default router Bootp service TFTP server IP address IGMP time out IGMP snooping state Partition mode Address table lock - D-Link DES 6000 | Product Manual - Page 132
Switch User's Guide INDEX 1 100BASE-TX networks 2 100Mbps Fast Ethernet 1 1024-1518 Octs 71 128-255 Octs 71 2 256-511 Octs 71 5 512-1023 Octs 71 6 64 Octs 71 65-127 Octs 71 A AC power data packet 48 Default Gateway 41 communication 40 F Factory Reset 75 Fast Ethernet Technology - D-Link DES 6000 | Product Manual - Page 133
41 Overview of this User's Guide v P Packet Forwarding 23 Performing a factory reset 75 Port Configuration menu 43 Power Failure 10 Prevent Unauthorized Users 34 R Rack Installation 7 Read-only MIBs, Definition of 22 Read-write MIBs, Definition of 22 128 Modular Ethernet Switch User's Guide - D-Link DES 6000 | Product Manual - Page 134
Modular Ethernet Switch User's Guide Trap Type Authentication Failure 21 Cold Start 21 Link Change Event 22 New Root 21 Topology Change 21 Warm Start 21 Traps 21 Traps, 75 utilization 44, 45 V ventilation 6 VLAN 27 VLAN Segmentation 28 VLANs Spanning Multiple Switches 29 Index 129 - D-Link DES 6000 | Product Manual - Page 135
.dlink-me.com E-MAIL: [email protected] & [email protected] D-LINK FRANCE Le Florilege #2, Allee de dlink-india.com E-MAIL: [email protected] D-LINK ITALY Via Nino Bonnet n. 6/b, 20154, Milano, Italy TEL: 39-02-2900-0676 FAX: 39-02-2900-1723 URL: www.dlink.it E-MAIL: [email protected] D-LINK - D-Link DES 6000 | Product Manual - Page 136
over the Telephone: (800) 361-5265 Monday to Friday 7:30am to 12:00am EST D-Link Technical Support over the Internet: http://support.dlink.ca email:[email protected] When contacting technical support, please provide the following information: · Serial number of the unit · Model number or product - D-Link DES 6000 | Product Manual - Page 137
act of God, failures due to power surge, and cosmetic damage; Any hardware, software, firmware or other products or services provided by anyone other than D-Link; and Products that have been purchased from inventory clearance or liquidation sales or other sales in which D-Link, the sellers, or the - D-Link DES 6000 | Product Manual - Page 138
LINK FOR WARRANTY SERVICE) RESULTING FROM THE USE OF THE PRODUCT, RELATING TO WARRANTY SERVICE, OR ARISING OUT OF ANY BREACH OF THIS LIMITED WARRANTY, EVEN IF D-LINK LINK UNDER THIS WARRANTY IS LIMITED TO THE PURCHASE PRICE device, pursuant to part 15 of the FCC with the instructions, may cause - D-Link DES 6000 | Product Manual - Page 139
Registration Product registration is entirely voluntary and failure to complete or return this form will not diminish your warranty rights. D-Link Systems, Inc. 020905
-
 1
1 -
 2
2 -
 3
3 -
 4
4 -
 5
5 -
 6
6 -
 7
7 -
8
-
9
-
10
-
11
-
12
-
13
-
14
-
15
-
16
-
17
-
18
-
19
-
20
-
21
-
22
-
23
-
24
-
25
-
26
-
27
-
28
-
29
-
30
-
31
-
32
-
33
-
34
-
35
-
36
-
37
-
38
-
39
-
40
-
41
-
42
-
43
-
44
-
45
-
46
-
47
-
48
-
49
-
50
-
51
-
52
-
53
-
54
-
55
-
56
-
57
-
58
-
59
-
60
-
61
-
62
-
63
-
64
-
65
-
66
-
67
-
68
-
69
-
70
-
71
-
72
-
73
-
74
-
75
-
76
-
77
-
78
-
79
-
80
-
81
-
82
-
83
-
84
-
85
-
86
-
87
-
88
-
89
-
90
-
91
-
92
-
93
-
94
-
95
-
96
-
97
-
98
-
99
-
100
-
101
-
102
-
103
-
104
-
105
-
106
-
107
-
108
-
109
-
110
-
111
-
112
-
113
-
114
-
115
-
116
-
117
-
118
-
119
-
120
-
121
-
122
-
123
-
124
-
125
-
126
-
127
-
128
-
129
-
130
-
131
-
132
-
133
-
134
-
135
-
136
-
137
-
138
-
139
 |
 |

DES-6000
Modular Ethernet Switch
User’s Guide
Second Edition (April 2001)
6DES6000..02
Printed In Taiwan
RECYCLABLE