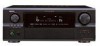
Denon AVR 2807 Owners Manual - English
Denon AVR 2807 - AV Receiver Manual
 |
UPC - 081757507059
View all Denon AVR 2807 manuals
Add to My Manuals
Save this manual to your list of manuals |
Denon AVR 2807 manual content summary:
- Denon AVR 2807 | Owners Manual - English - Page 1
AV SURROUND RECEIVER AVR-2807 OPERATING INSTRUCTIONS - Denon AVR 2807 | Owners Manual - English - Page 2
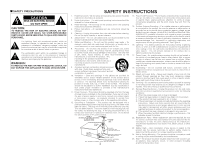
BACK). NO USER-SERVICEABLE PARTS INSIDE. REFER SERVICING TO QUALIFIED SERVICE user to the presence of important operating and maintenance (servicing) instructions an outside antenna or cable system is connected to the product, be sure the grounding of the mast and supporting structure, grounding of the - Denon AVR 2807 | Owners Manual - English - Page 3
any interference received, including interference that may cause undesired operation. 2. IMPORTANT NOTICE: DO NOT MODIFY THIS PRODUCT This product, when installed as indicated in the instructions contained in this manual, meets FCC requirements. Modification not expressly approved by DENON may void - Denon AVR 2807 | Owners Manual - English - Page 4
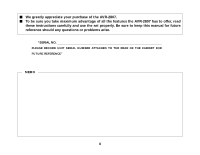
To be sure you take maximum advantage of all the features the AVR-2807 has to offer, read these instructions carefully and use the set properly. Be sure to keep this manual for future reference should any questions or problems arise. "SERIAL NO. PLEASE RECORD UNIT SERIAL NUMBER ATTACHED TO THE REAR - Denon AVR 2807 | Owners Manual - English - Page 5
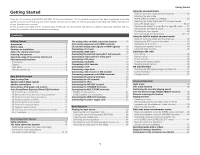
the batteries 3 Operating range of the remote control unit 3 Part names and functions Front panel 4 Display 4 Rear panel 5 Remote control unit 5 Easy Setup Procedure Easy to setup flow 6 Speaker layout [Basic layout 6 Speaker connections 7 Connecting a DVD player and monitor 8 Auto - Denon AVR 2807 | Owners Manual - English - Page 6
through function 65 Resetting the remote control unit Resetting the learning function 65 Resetting the punch through setting 65 Additional Information 66 ~ 68 Troubleshooting 69, 70 Specifications 70 List of preset codes End of this manual Advanced Setup - Part 2 Speaker Setup Setting the - Denon AVR 2807 | Owners Manual - English - Page 7
in these instructions may differ from the actual unit for explanation purposes. About the remote control unit In addition to controlling the AVR-2807, the attached remote control unit (RC-1030) can also be used to control the following products: q DENON component products w Component products other - Denon AVR 2807 | Owners Manual - English - Page 8
24) #1 SURROUND BACK button 26) #2 Cursor (D, H, F, G) buttons 10) #3 SYSTEM SETUP button 10) #4 EXT. IN button 23) #5 ANALOG button 23) #6 INPUT MODE button 23) qw e rt q Input signal indicator w Input signal channel indicator • The audio channel(s) included in the input signal light - Denon AVR 2807 | Owners Manual - English - Page 9
!0 VIDEO/S-VIDEO terminals 8) !1 REMOTE CONTROL jacks 21) !2 RS-232C terminal 21) !3 EXT. IN terminals 17) !4 HDMI MONITOR terminals 19) !5 ANTENNA terminals 20) !6 DOCK CONTROL jack 21) !7 XM terminal 20) Remote control unit Getting Started To operate the AVR-2807, use the mode selector - Denon AVR 2807 | Owners Manual - English - Page 10
the sound field manually, see pages 56 ~59. Easy to setup flow Speaker layout [Basic layout] Example of basic layout with 8 speakers and a monitor. Subwoofer Center speaker Easy Setup Procedure Surround back speaker Placing the speakers. Auto setup flow Connecting a microphone. Connecting - Denon AVR 2807 | Owners Manual - English - Page 11
a DENON service center. Turn clockwise to tighten, then insert the banana plug. Easy Setup Procedure 2 Connections • With the AVR-2807, up to 10 speakers can be connected for surround playback. • When making connections, also refer to the operating instructions of the other components. Subwoofer - Denon AVR 2807 | Owners Manual - English - Page 12
used simultaneously. • Audio signals are only output from the HDMI monitor out terminal when audio signals are input to the HDMI input terminal. • When connecting the AVR-2807 and DVD player using an HDMI cable, also connect the AVR2807 and monitor using an HDMI cable ( page 19). Audio signal flow - Denon AVR 2807 | Owners Manual - English - Page 13
Buttons on the main unit [ ] : Buttons on the remote control unit Button name only : Buttons on the main unit and remote control unit Easy Setup Procedure Auto Setup/Room Equalizer (Room EQ) Functions • The AVR-2807's auto setup and room equalizer functions use the attached microphone to measure - Denon AVR 2807 | Owners Manual - English - Page 14
B") speakers with biamp connections. ZONE2: Assign to use as "ZONE2" speakers. When assigned to "Front", skip the surround back channel measurement. During the auto setup procedure, test tones are not output to "ZONE2". • "System Setup Menu" is not displayed when using headphones. t Switching the - Denon AVR 2807 | Owners Manual - English - Page 15
speakers and setup microphone. • To avoid influencing the measurements, turn off the power of air-conditioners or any other equipment producing sound Speaker measurements With these measurements, the "Speaker Configuration", "Distance", "Channel change the speaker connections or subwoofer volume after - Denon AVR 2807 | Owners Manual - English - Page 16
r The sound level that is output from the speakers and/or • Check the placement and orientation of the subwoofer is too low. loudspeakers. • Adjust the subwoofer's output level. 2 t The measurement microphone is not connected, or all • Connect the attached setup microphone to of speakers have - Denon AVR 2807 | Owners Manual - English - Page 17
have been completed. • When making connections, also refer to the operating instructions of the other components. • Be sure to connect the left and right channels properly (left with left, right with right). • Do not bundle power cords together with speaker cables. Doing so could result in - Denon AVR 2807 | Owners Manual - English - Page 18
signal, the signal up-converted to HDMI is output with that resolution. • When the input signal is a video, S-Video or component 480i or 576i signals, the signal up-converted to HDMI is output according to the setting made at "i/p Convert" under "HDMI Out Setup" ( page 51). • Signals up-converted to - Denon AVR 2807 | Owners Manual - English - Page 19
screen display is displayed on the monitor when the "System Setup" operations are performed and when the remote control unit's ON SCREEN button is operated. • When only component video signals are input to the AVR-2807, the characters of the on screen display are not displayed over the picture. 15 - Denon AVR 2807 | Owners Manual - English - Page 20
Setting the HDMI Out Setup", use a monitor compatible with input resolutions of 480i/576i. • If your monitor is not equipped with an HDMI terminal, connect the AVR-2807 to the monitor using the component video, S-Video, or composite video terminals. Connecting a DBS tuner • For best picture quality - Denon AVR 2807 | Owners Manual - English - Page 21
multi-channel output to the AVR-2807's EXT. IN terminals for playback. Also refer to your DVD player's operating instructions. A L AUDIO OUT R GND Connecting a video camera or video game F A L R D G Video camera / Video game VIDEO OUT AUDIO OUT L L R R • The phono input can accept - Denon AVR 2807 | Owners Manual - English - Page 22
IN → Video cable : VCR-2 OUT → Video cable Connecting a tape deck Tape deck A AUDIO OUT L L L R R R A AUDIO IN L L L R R R NOTE: • Do not connect the output of the component connected to the OPTICAL 3 OUT terminal on the AVR-2807's rear panel to any terminal other than the OPTICAL - Denon AVR 2807 | Owners Manual - English - Page 23
the multi-channel sound of DVD-Audio and DVD-Video. • To provide audio output from AVR-2807's audio output terminal, select "Amp" at the "HDMI In Assign". To provide audio output from the TV, select "TV" at the "HDMI In Assign" ( page 49, 50). Monitor I HDMI IN DVD player I HDMI OUT Input signals - Denon AVR 2807 | Owners Manual - English - Page 24
) Connecting Other Sources Connecting the XM terminal • AVR-2807 is the XM Ready® receiver. You can receive XM Satellite Radio® by connecting to the XM Connect-and-PlayTM (sold separately) and subscribing the XM service. • Plug the XM Connect-and-Play antenna into XM connector on the rear panel - Denon AVR 2807 | Owners Manual - English - Page 25
, you must connect the DENON original Control Dock for iPod and the DOCK CONTROL jack on the AVR-2807 with a mini-jack and assign the iPod to any AUDIO and/or SVIDEO terminal(s). The diagram below shows an example of connections for when the iPod is assigned to the VDP terminal. For instructions on - Denon AVR 2807 | Owners Manual - English - Page 26
the front, center, surround and surround back sound channels, or for connection to powered loudspeakers. • When using only one surround back speaker, connect it to the left channel. Power amplifier B CENTER A SURROUND BACK L L L R R R A SURROUND L L L R R R B SUBWOOFER A FRONT - Denon AVR 2807 | Owners Manual - English - Page 27
playback level of the SW channel may seen strong. If so, set to "ON". • Canceling the EXT. IN mode: Press INPUT MODE or to switch to the desired input mode. • To use the EXT. IN mode together with a picture, select the input source to which the video signal is connected first, then set the - Denon AVR 2807 | Owners Manual - English - Page 28
and remote control unit Selecting the room equalizer mode The room equalizer function offers 3 correction curves: "Audyssey", "Front" and "Flat". These modes can be selected after performing the auto setup procedure. Press ROOM EQ. OFF Audyssey Front Flat Manual Switching the front speakers Basic - Denon AVR 2807 | Owners Manual - English - Page 29
one surround back speaker is being used. • The system setup function cannot be used when the PURE DIRECT mode is set. To use the system setup function, cancel the PURE DIRECT mode. • If the HDMI input terminal is selected, video outputs are output in the PURE DIRECT mode. • The channel level and - Denon AVR 2807 | Owners Manual - English - Page 30
on the source. 5 Press SURROUND PARAMETER. The surround back channel can be switched on and off using . 6 Press D H to select the item, then press F G to set. CINEMA EQ.: Use this if movie dialogues sound harsh to lower the treble sound. Effective source / mode Dolby Pro Logic IIx - Denon AVR 2807 | Owners Manual - English - Page 31
, manually set "SB CH OUT" to "PLIIx Cinema" or "MTRX ON". 7 Press ENTER or SURROUND PARAMETER. • Select "Default Yes" and press F to reset all the settings. Selecting the Dolby Pro Logic IIx (Pro Logic II) mode It is possible to play analog input signals and digital input signals (2-channels - Denon AVR 2807 | Owners Manual - English - Page 32
signal. • OSD-2: The monitor's resolution is displayed when an HDMI monitor is connected to the AVR-2807. • OSD-4: This is displayed when the auto surround mode is set to "ON" ( page 23) and the input mode is set to "AUTO". It is not displayed when the input mode is set to "ANALOG" or "EXT. IN". - Denon AVR 2807 | Owners Manual - English - Page 33
Channel output Surround Mode FRONT L/R CENTER SURROUND L/R SURROUND BACK L/R SUBWOOFER D. COMP *1 LFE AFDM SB CH *2 *1 OUT Signals and adjustability in the different modes Parameter (default values are shown in parentheses) TONE CONTROL on or off by speaker configuration setting C : - Denon AVR 2807 | Owners Manual - English - Page 34
E E E E E E E DTS 96/24 Input signals DOLBY DIGITAL DOLBY DIGITAL EX (With Flag) DOLBY E E E E E E E E E DOLBY DIGITAL (2ch) DVD-AUDIO DVD-Audio (multi ch) DVDAudio (2ch) 176.4/ 192kHz Back speaker setup is set to "None". *2: This mode is not available when the Surround Back speaker setup - Denon AVR 2807 | Owners Manual - English - Page 35
MATRIX VIRTUAL STEREO STEREO Basic Operation Input signals DTS DOLBY DIGITAL DVD-AUDIO Note ANALOG LINEAR PCM DTS ES Back speaker setup is set to "None". *2: This mode is not available when the Surround Back speaker setup is set to "1spkr" or "None". *3: If the Surround Back speaker setup - Denon AVR 2807 | Owners Manual - English - Page 36
, the sound will be one-sided if signals are only input to one channel (left or right), so input signals to both channels. If you have a source component with only one audio output (monophonic camcorder, etc.) obtain a "Y" adapter cable to split the mono output to two outputs, and connect to the - Denon AVR 2807 | Owners Manual - English - Page 37
on the remote control unit Button name only : Buttons on the main unit and remote control unit 3 Press D H to select the item, then press F G to set. EFFECT: (WIDE SCREEN mode only) Effect signals with the multi-surround speaker effects are played. When set to "OFF", the SL/ SR channels are played - Denon AVR 2807 | Owners Manual - English - Page 38
[SHIFT] [TUNING] [CHANNEL] SURROUND PARAMETER CH SEL/ENTER Setting the tone control Adjust the bass and speaker volume 1 Press CH SEL/ENTER. "SB" when surround back speaker set to "1spkr". Not displayed when "None" set. 2 Press D H or CH SEL/ENTER to select the speaker. The settable speaker switches - Denon AVR 2807 | Owners Manual - English - Page 39
attenuate the volume of all the rear side speakers. The fader function does not affect the subwoofer. It is possible to adjust so that the volume of the speaker whose volume is the lowest is -12 dB. 2 3 Listening to the radio Check that the remote control unit is set to "AMP". Auto tuning 1 Either - Denon AVR 2807 | Owners Manual - English - Page 40
OSD. Basic Operation XM Satellite Radio AVR-2807 is the XM Ready® receiver. You can receive XM Satellite Radio® by connecting to the XM Connect-and-PlayTM (sold separately) and subscribing the XM service. 2 Introducing XM Satellite Radio There's a world of audio listening pleasure beyond AM and FM - Denon AVR 2807 | Owners Manual - English - Page 41
When the artist name and song title are received, they are displayed. Basic Operation • "LOADING" is displayed while receiving the channel or information. • "UPDATING" is displayed while updating encryption code. • When the selected channel is not available, "XM- - -" is displayed. • Information on - Denon AVR 2807 | Owners Manual - English - Page 42
signals, the analog video signal of another function cannot be selected for the HDMI video output. User mode function The AVR-2807 is equipped with a function for storing the selected input source, the auto surround mode and input mode in the memory and selecting these settings when you want to use - Denon AVR 2807 | Owners Manual - English - Page 43
by individuals for their personal use. Violating copyrights is prohibited by law. 1 Connect the AVR-2807 and iPod using the DENON original Control Dock for iPod ( page 21). 2 Assign the input terminal at "Setting the iPod Assignment" ( page 47). 3 Use FUNCTION to select the function assigned in step - Denon AVR 2807 | Owners Manual - English - Page 44
"System Setup Menu", the surround back speaker terminals can be used as the ZONE2 speaker out terminals ( page 54). [System configuration and connections example] • Using this AVR-2807 internal amplifier as the ZONE2. MAIN ZONE 5.1-channel systems Monitor ZONE2 Monitor FL FR • For instructions - Denon AVR 2807 | Owners Manual - English - Page 45
the zone power. 3 Select the input source you wish to output. When the function is set to TUNER, the preset channel can be selected using [CHANNEL]. 3 Start playing the source to be output. For operating instructions, refer to the manuals of the respective components. • The signals of the source - Denon AVR 2807 | Owners Manual - English - Page 46
video signals). For operations, see the operating instructions of the device from which you are recording (audio or video signals). Advanced Operation About the memory functions 2 Last function memory The various settings set when the AVR-2807's power is switched to standby are stored in the memory - Denon AVR 2807 | Owners Manual - English - Page 47
Mic Page 9 ~ 12 60 60 61 2. Speaker Setup 1 Speaker Config. 2 Subwoofer Setup 3 Distance 4 Channel Level 5 Crossover Frequency Items Automatically set the output component and properties for the various channels according to the combination of speakers to be actually used for surround - Denon AVR 2807 | Owners Manual - English - Page 48
subwoofer terminal. Default settings TV DBS VCR-1 OFF OPT 2 OPT 3 Advanced Setup - Part 1 VCR-2 OFF CDR / TAPE OPT 4 V.AUX OPT 5 Page 47 SW Level = +15 dB 47 It is possible to assign the DENON original Dock's audio 3 iPod Assign and/or video signals to any input terminals on the AVR-2807 - Denon AVR 2807 | Owners Manual - English - Page 49
store the surround mode last played for the input signal. 4 Manual EQ Setup Adjust the tone of the various speakers while listening to the playback signals. Default settings Basic OFF Auto Surround Mode = ON Advanced Setup - Part 1 Page 52 53 53 All Channels and Frequency = 0 dB 53, 54 Items - Denon AVR 2807 | Owners Manual - English - Page 50
then press F G to change the setting. Select "Default Yes", then press F to reset to the default setting. Advanced Setup - Part 1 About the display In addition to the easily understandable on screen display, the AVR-2807 is also equipped with displays for checking the settings. Use this when making - Denon AVR 2807 | Owners Manual - English - Page 51
signals to any input terminals on the AVR-2807 and play them. 1 Press D H to select "iPod Assign", then press ENTER. 2 Press F G to set. OFF: This is the factory default setting. CD, CDR/TAPE: When using a DENON original Dock, it is possible to connect with the audio input terminal of the assigned - Denon AVR 2807 | Owners Manual - English - Page 52
name back to how it was: q Press F G to highlight the input function name, then press D H. w Press D H to select "Default Yes", then press F. 5 Once all the characters have been input, press ENTER. 1 2 • If an FM station cannot be preset automatically due to poor reception, use the "Manual tuning - Denon AVR 2807 | Owners Manual - English - Page 53
AMP: Output the speakers connected to the AVR-2807. TV: Output the TV connected to the AVR-2807. 5 If no audio signal is included in the input signal: Press D H to select the input source, then press F G to set. EXT. IN, ANALOG: If there is no HDMI audio signal, the signal automatically switches to - Denon AVR 2807 | Owners Manual - English - Page 54
Advanced Setup - Part 1 1 2 3 4 5 Compatible with HDMI1 and HDMI2. • If a monitor is connected with an HDMI cable but the monitor is not compatible with HDMI audio signal playback, only the video signals are output to the monitor from the AVR-2807. • Audio signals input from the analog and digital - Denon AVR 2807 | Owners Manual - English - Page 55
on screen display off, then check that the timing of the component video and audio match. • The audio delay setting does not apply when playing in the EXT. IN mode or in the analog input direct mode or stereo mode (Front speaker setting "Large", TONE DEFEAT "ON" and Room EQ "OFF"). 3 Press ENTER - Denon AVR 2807 | Owners Manual - English - Page 56
in "Mode1". Small: Select this when using small speakers without ample low frequency reproduction capabilities. 3 Press ENTER. Yes, No: Select "Yes" when a subwoofer is connected, "No" when no subwoofer is connected. 1 2 LFE: For any channel(s) that are set to "Large", low frequencies in - Denon AVR 2807 | Owners Manual - English - Page 57
in this mode. 3 Press ENTER. 1 2 • When a center speaker or surround speakers are not connected, the sounds in those channels are directed to the front speakers. Setting the Auto Surround Mode Set whether or not to store the surround mode last played for the input signal. The surround mode used at - Denon AVR 2807 | Owners Manual - English - Page 58
surround back amplifier channels to provide ZONE2 speaker-level outputs from the surround back speaker terminals. 4 Press ENTER. 1 2 Front Bi-Amp connections Dynamic sound with a range wider than that of full range systems can be played by connecting bi-amp compatible speakers to the AVR-2807. Be - Denon AVR 2807 | Owners Manual - English - Page 59
power supplied from the trigger out jack turns off. 6 Press ENTER. Setting the Trigger Out 1 Use the DC12V output of the AVR-2807's 2 trigger out jacks in association with the various input sources and surround modes. 2 3 If "ZONE = MAIN" is selected, settings can be made for the individual - Denon AVR 2807 | Owners Manual - English - Page 60
settings for your speaker systems manually. ENTER Setting the Speaker Configuration Automatically set the output component and properties for the various channels according to the combination of speakers to be actually used for surround playback. 1 Press D H to select "Speaker Setup", then press - Denon AVR 2807 | Owners Manual - English - Page 61
Advanced Setup - Part 2 1 2 3 h Center Speaker Front Speaker Subwoofer Surround Speaker Surround back Speaker • Select "Large" or "Small" not according to the actual size of the speaker but according to the speaker's capacity for playing low frequency (bass sound below the frequency set for the - Denon AVR 2807 | Owners Manual - English - Page 62
Setup - Part 2 Setting the Channel Level 1 Set the volume of the various speakers so that the sound output from the speakers and the subwoofer speaker. Test tones are automatically emitted from each speaker. Manual: Adjust with the speaker from which the test tone is output switched manually - Denon AVR 2807 | Owners Manual - English - Page 63
which the bass sound of the various speakers is to be output from the subwoofer. For speakers that are set to "Small", frequencies under the crossover frequency are cut before the signal is output, and the low frequency component that was cut is output from the subwoofer or the speakers that are set - Denon AVR 2807 | Owners Manual - English - Page 64
characteristics of the front channel speakers. Flat: Adjusts the frequency response of all speakers to the flattest response. This mode is suitable for multi-channel music surround sound sources. Manual: Selects the setting value that was set in the "Setting the Manual Equalizer Setup" ( page 53, 54 - Denon AVR 2807 | Owners Manual - English - Page 65
the type of equalizer, then press ENTER. 5 Press F G to select the speaker. The display is only an approximate picture of the response and that correction is happening at all frequencies. 1 2 3 Advanced Setup - Part 2 • To reset: Press D H to select "Restore" at the "Parameter Check" screen, then - Denon AVR 2807 | Owners Manual - English - Page 66
/VDP ZONE2 TV DBS/CABLE VCR 2 Operate the component. For details, refer to the component's operating instructions. • There may be several preset codes for some brands. If the remote control unit does not work properly with one code, try inputting another code. • Buttons that have been learned have - Denon AVR 2807 | Owners Manual - English - Page 67
component. For details, refer to the component's operating instructions. 2 Functions of buttons for the different devices Operating the remote control - - - Auto/Manual switching - - - - [MODE SELECTOR] 0 ~ 9, +10 TV/VCR 1, 2, VCR CHANNEL + -, 8 9, A/B, 6 7, 3, 0, DISC SKIP+ SETUP D H F G - Denon AVR 2807 | Owners Manual - English - Page 68
on the AVR-2807's remote control unit. Other remote control unit Operating the remote control unit Using the system call function • A series of operations can be registered at a single button. • This function makes it possible to for example turn the amplifier's power on, select the input source - Denon AVR 2807 | Owners Manual - English - Page 69
SELECTOR] for the device to be punched through (CD, CDR/MD, TAPE, DVD/ VDP or VCR). • [MODE SELECTOR] that was set will lights. Resetting the remote control unit Resetting the learning function 1 Press [USE/LEARN] with the tip of a pen etc., to set the learn mode. • [MODE SELECTOR] and the "LEARNED - Denon AVR 2807 | Owners Manual - English - Page 70
[2] When not using surround back speakers [ As seen from above ] Front speakers Center speaker Monitor Subwoofer 60° [ As seen from the side ] Surround speaker Front speaker 2 to 3 feet 120° Surround speakers In addition to sources recorded in 6.1-channels, the surround effect of conventional - Denon AVR 2807 | Owners Manual - English - Page 71
Pro Logic IIx is a further improved version of the Dolby Pro Logic II matrix decoding technology. Audio signals recorded in 2 channels are decoded to achieve a natural sound with up to 7.1-channels. There are 3 modes: "Music" suited for playing music, "Cinema" suited for playing movies, and "Game - Denon AVR 2807 | Owners Manual - English - Page 72
sound quality for the entire listening area is performed. Audyssey MultEQ XT not only corrects frequency response problems in large listening areas, it also fully automates the surround system setup video and multi-channel audio signals are transmitted with a single connection. HDMI is also - Denon AVR 2807 | Owners Manual - English - Page 73
to on. in reverse. • AVR-2807's HDMI output • Check the HDMI connection. terminals and monitor's input terminals are not properly Display lit but sound not produced. • Speaker cables not securely • Connect securely. 7 connected. • FUNCTION knob position is not • Switch to the proper position - Denon AVR 2807 | Owners Manual - English - Page 74
Troubleshooting Symptom Cause Measures Page "NO SIGNAL" is • The signal cannot be received. displayed in the XM mode. • Reposition your XM Connect-and- 37 Play antenna. "OFF AIR" is displayed in the XM mode. • The selected channel currently broadcasting. is not • Select the another channel - Denon AVR 2807 | Owners Manual - English - Page 75
0017 Cyrus 0023 DAK 0039 DBX 0040 DKK DMX Electronics Denon Dual Dynamic Bass EEC Eclipse Elektra Emerson Fisher GE 0008, 0009, 0033 Parasound 0042 Philips 0023 Pink Triangle 0004 Pioneer 0044 Polk Audio 0023 Poppy 0015 Proton 0006, 0010 QED 0048, 0059 Quad 1 PRESET CODE - Denon AVR 2807 | Owners Manual - English - Page 76
Wards Watson Yamaha Yorx Zenith MD BSR Condor Denon Denver JVC Kenwood Luxman Onkyo Optimus Orion Pioneer Schneider Sharp Sherwood Sony Technics Universum Yamaha DBS ABsat AGS ASLF Akai Akena Alba Allsat Alltech Alpha - Denon AVR 2807 | Owners Manual - English - Page 77
Neuhaus Neusat Next Level Nikko Nokia Nordmende Okano Orbit Oxford Pace Palladium Panasat Panasonic Panda Patriot Philips Pioneer Prima Profile Promax Prosat Proscan Pye Quadral Quelle RCA RFT Radio Shack Radiola Roadstar Rover SEG SKR SKY 3533 3533 3555 3533 3516, 3536, 3541, 3557, 3563, 3573 3516 - Denon AVR 2807 | Owners Manual - English - Page 78
Crown Curtis Mathes Cybernex Cyrus Daewoo Dansai De Graaf Decca Denon Diamant Domland Dual Dumont Dynatech ESC Elbe Elcatech Electrohome Electrophonic Elin Elsay Elta Emerex Emerson Ferguson Fidelity Finlandia Finlux Firstline Fisher Flint Fuji Fujitsu Funai - Denon AVR 2807 | Owners Manual - English - Page 79
Penney Pentax Perdio Philco Philips Phonola Pilot Pioneer Polk Audio Portland Pro Vision Profitronic Proline Proscan Prosonic Protec 3017 Yokan 3017 Yoko 3029 Zenith 3000, 3004, 3008, 3026, 3037 CDR Denon HHB Kenwood Marantz NAD Philips Pioneer RCA 0000, 0001 0500 0501 0501 0503 0501 - Denon AVR 2807 | Owners Manual - English - Page 80
Bell South 4030 Birmingham Cable Communications 4012 British Telecom 4001 Cable & Wireless 4034 Cabletime 4018, 4024 Daeryung 4002 Filmnet 4017 France Telecom 4019, 4028, 4029 Galaxi 4002 General Instrument 4020, 4025 GoldStar 4008 Hamlin 4003, 4011 Jerrold 4001, 4004, 4005, - Denon AVR 2807 | Owners Manual - English - Page 81
Cosmel Craig Crosley Crown Curtis Mathes Cybertron DER Daewoo Dainichi Dansai Dayton Daytron De Graaf Decca Denko Denon Denver Desmet Diamant Dixi Dual Dual Tec Dumont Dwin ECE Elbe Electroband Electa Elin Elite Elta 4514 4553 4521 4502, 4514, 4515, 4553, 4578, 4582 - Denon AVR 2807 | Owners Manual - English - Page 82
Isukai JBL JCB JVC Janeil KB Aristocrat KEC KTV Kaisui Kamp Kapsch Karcher Kasui Kathrein Kawasho Kaypani Kendo Kennedy Kenwood Kingsley Kloss Kneissel Kolster Konka Korpel Kosmos Koyoda Kyoshu Kyoto LG LXI Leyco Liesenk & Tter 4565 4521 4500 4513, 4520, 4532, 4557, 4579, 4606 4516 4545 4553 4512, - Denon AVR 2807 | Owners Manual - English - Page 83
, 4512, 4514, Sonitron 4515, 4523, 4524, 4529, Sonoko 4551, 4564, 4569, 4578, Sonolor 4593, 4595 Sontec 4515 Sony 4563 4583 Sound & Vision 4585 Soundesign 4503, 4513, 4526, 4542, Soundwave 4544, 4562 Spectricon 4514, 4565, 4579, 4607 Squareview 4508 Ssangyong 4551 Standard - Denon AVR 2807 | Owners Manual - English - Page 84
Zonda 4501 Apex Bush LD Denon Aiwa 2507 Emerson Carver 2502, 2505, 2510 Fisher Cyrus 2511 GE Denon 1111, 1112, 1113 Go Video Philips 2502, 2505, 2511 Marantz Pioneer 2500, 2501 Microsoft Polk Audio 2505 Mitsubishi Quasar 2508 NAD 10 PRESET CODE 2511 2507 2510 2502 - Denon AVR 2807 | Owners Manual - English - Page 85
Carver Denon Fisher Garrard Grundig Harman/Kardon Inkel JVC Kenwood Magnavox Marantz Memorex Mitsubishi Myryad Onkyo Optimus Panasonic Philips Phonotrend Pioneer Polk Audio RCA Revox Sansui Sanyo Sherwood Sony Tae Kwang Teac Technics Thorens Victor Wards Yamaha 1502 0000 1505 1527, 1529 1502 1502, - Denon AVR 2807 | Owners Manual - English - Page 86
- Denon AVR 2807 | Owners Manual - English - Page 87
- Denon AVR 2807 | Owners Manual - English - Page 88
TOKYO, JAPAN www.denon.com Denon Brand Company, D&M Holdings Inc. Printed in Japan 00D 511 4435 100
-
 1
1 -
 2
2 -
 3
3 -
 4
4 -
 5
5 -
 6
6 -
 7
7 -
8
-
9
-
10
-
11
-
12
-
13
-
14
-
15
-
16
-
17
-
18
-
19
-
20
-
21
-
22
-
23
-
24
-
25
-
26
-
27
-
28
-
29
-
30
-
31
-
32
-
33
-
34
-
35
-
36
-
37
-
38
-
39
-
40
-
41
-
42
-
43
-
44
-
45
-
46
-
47
-
48
-
49
-
50
-
51
-
52
-
53
-
54
-
55
-
56
-
57
-
58
-
59
-
60
-
61
-
62
-
63
-
64
-
65
-
66
-
67
-
68
-
69
-
70
-
71
-
72
-
73
-
74
-
75
-
76
-
77
-
78
-
79
-
80
-
81
-
82
-
83
-
84
-
85
-
86
-
87
-
88
 |
 |

AV SURROUND RECEIVER
AVR-2807
OPERATING INSTRUCTIONS