Epson C82N Printer Basics - Page 21
Set the Mode option to, to print a color document or black and white
 |
UPC - 010343845039
View all Epson C82N manuals
Add to My Manuals
Save this manual to your list of manuals |
Page 21 highlights
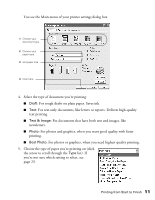
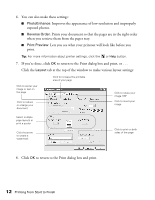
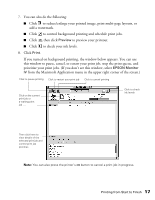
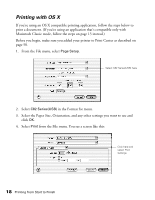
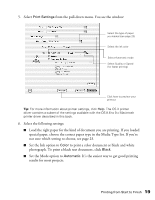
■ Printable Area: Lets you center the text or image on the page, or increase the printable area of the page. Note: Print quality may decline at the edges of the printout when Maximum is selected. Before printing a large document, print a single page to test print quality. 4. Click OK to close the Page Setup window. 5. From the File menu, select Print. You see this dialog box: Select the type of paper you loaded Select the ink color Select Automatic mode Select higher quality or faster printing 6. Make the following settings: ■ Choose the paper you're printing on (click the arrow to scroll through the Media Type list). If you're not sure which setting to select, see page 23. ■ Set the Ink option to Color to print a color document or black and white photograph. To print a black text document, click Black. ■ Set the Mode option to Automatic. It's the easiest way to get good printing results on all types of paper. ■ Set the slider in the Mode box to Quality or Speed to select high-quality printing, fast printing, or an in-between setting. Tip: For more information about printer settings, click the button. 16 Printing from Start to Finish
-
 1
1 -
2
-
3
-
4
-
5
-
6
-
7
-
8
-
9
-
10
-
11
-
12
-
13
-
14
-
15
-
 16
16 -
 17
17 -
 18
18 -
 19
19 -
 20
20 -
 21
21 -
 22
22 -
 23
23 -
 24
24 -
 25
25 -
 26
26 -
27
-
28
-
29
-
30
-
31
-
32
-
33
-
34
-
35
-
36
-
37
-
38
-
39
-
40
-
41
-
42
-
43
-
44
-
45
-
46
-
47
-
48
-
49
-
50
-
51
-
52
-
53
-
54
-
55
-
56
-
57
-
58
-
59
-
60
-
61
-
62
-
63
-
64
-
65
-
66
-
67
-
68
-
69
-
70
-
71
-
72
-
73
-
74
-
75
-
76
-
77
 |
 |
