Epson C82N Printer Basics - Page 52
You see wrong or missing colors., Your printout is grainy., a higher Quality Type Windows
 |
UPC - 010343845039
View all Epson C82N manuals
Add to My Manuals
Save this manual to your list of manuals |
Page 52 highlights
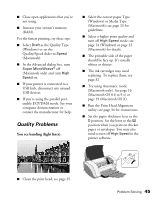
■ Make sure your paper isn't damaged, old, dirty, or loaded face down. If it is, load new paper face up. For best results, use genuine EPSON paper. You see wrong or missing colors. ■ Make sure Black Ink Only is off (Windows) or Color ink is selected (Macintosh), even when printing black and white photographs. ■ Clean the print head; see page 25 for instructions. ■ The ink cartridges may be old or low on ink; see page 27. ■ For best results, use genuine EPSON ink cartridges. ■ Try turning off PhotoEnhance™ . Also check if you're using a special effect that alters image colors, like Sepia. ■ Try using Automatic mode (Macintosh only); see page 16 (OS 8.6 to 9.x) or page 19 (OS X). ■ The color profiles built into your printer software automatically reference your monitor profile. Make sure that your monitor is calibrated correctly. ■ Try experimenting with the Gamma setting on the Advanced dialog box; see page 14 (Windows) or page 21 (Macintosh). ■ The colors produced by DuraBrite inks may look slightly different than those produced by ordinary dye-based ink. ■ Due to the nature of pigment inks, lighting conditions can affect the appearance of printer output. For example, a print viewed in daylight may appear to have a slightly different color balance when viewed under tungsten lighting. Your printer software was designed to represent color accurately when prints are illuminated with a D50 (daylight) light source. ■ Your printed colors can never exactly match your on-screen colors. However, you can use a color management system to get as close as possible. Your printout is grainy. ■ Use a higher quality paper, or select a higher Quality Type (Windows; page 11) or Print Quality (Macintosh; page 21). ■ Align the print head; see page 34 for instructions. ■ Increase the image resolution or print it in a smaller size; see your software documentation. Problem Solving 47
-
 1
1 -
2
-
3
-
4
-
5
-
6
-
7
-
8
-
9
-
10
-
11
-
12
-
13
-
14
-
15
-
16
-
17
-
18
-
19
-
20
-
21
-
22
-
23
-
24
-
25
-
26
-
27
-
28
-
29
-
30
-
31
-
32
-
33
-
34
-
35
-
36
-
37
-
38
-
39
-
40
-
41
-
42
-
43
-
44
-
45
-
46
-
 47
47 -
 48
48 -
 49
49 -
 50
50 -
 51
51 -
 52
52 -
 53
53 -
 54
54 -
 55
55 -
 56
56 -
 57
57 -
58
-
59
-
60
-
61
-
62
-
63
-
64
-
65
-
66
-
67
-
68
-
69
-
70
-
71
-
72
-
73
-
74
-
75
-
76
-
77
 |
 |
