Epson EPL-N2000 User Manual - Network Administration
Epson EPL-N2000 Manual
 |
View all Epson EPL-N2000 manuals
Add to My Manuals
Save this manual to your list of manuals |
Epson EPL-N2000 manual content summary:
- Epson EPL-N2000 | User Manual - Network Administration - Page 1
® Laser Printer Network Administrator's Guide Printed on recycled paper with at least 10% post-consumer content - Epson EPL-N2000 | User Manual - Network Administration - Page 2
this EPSON printer. EPSON is not responsible for any use of this information as applied to other printers. Neither Seiko Epson Corporation nor with Seiko Epson Corporation's operating and maintenance instructions. Seiko Epson Corporation shall not be liable for any damages or problems arising from - Epson EPL-N2000 | User Manual - Network Administration - Page 3
comply with the limits for a class B digital device, pursuant to Part 15 of the FCC Rules. These limits are designed to provide reasonable energy and, if not installed and used in accordance with the instructions, may cause harmful interference to radio and television reception. However, there - Epson EPL-N2000 | User Manual - Network Administration - Page 4
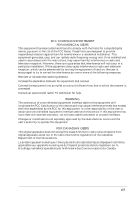
Network Utility Software 2 How This Manual Is Organized 3 Terms and Concepts 4 Chapter 1 Getting Started Connecting the Ethernet Interface Card to the Network 1-2 Reading the Indicator Lights 1-5 Resetting the Ethernet Card 1-6 Chapter 2 Configuring the EPL-N2000 for NetWare Installing EPSON - Epson EPL-N2000 | User Manual - Network Administration - Page 5
/IP 4-4 Installing EPSON Net! for Windows NT 4-4 Setting the IP Address 4-4 Creating the Printer on the Windows NT Server 4-6 Chapter 5 Configuring the EPL-N2000 for UNIX Setting Up the EPL-N2000 as a Network Device 5-2 Setting Up the EPL-N2000 as a Remote Printer 5-4 Printing to the EPL-N2000 - Epson EPL-N2000 | User Manual - Network Administration - Page 6
Changing Serial Settings 7-7 Working with Printer Configuration Files 7-9 vii - Epson EPL-N2000 | User Manual - Network Administration - Page 7
than going through a print server. The network administrator can monitor printer status and change printer settings from the EPSON Status Monitor, which operates on a Microsoft® Windows 95® or Windows NT® 3.5x system. Because the EPL-N2000 supports multiple protocols and automatically detects the - Epson EPL-N2000 | User Manual - Network Administration - Page 8
, whether or not the printer is on a network. See the EPL-N2000 User's Guide for information about installing and configuring the Windows printer driver software. Network Utility Software The EPL-N2000 network utility software consists of the following programs: t EPSON Net! for NetWare DOS - Epson EPL-N2000 | User Manual - Network Administration - Page 9
95 or Windows NT 3.5x. How This Manual Is Organized This manual describes how to connect the EPL-N2000 to the network and configure it in each of the supported network environments. Chapter 1, "Getting Started," explains how to connect the printer to the network. It also explains how to read the - Epson EPL-N2000 | User Manual - Network Administration - Page 10
as arp and ping to set up and use the printer on a network running TCP/IP. No special network utility is needed. Chapter 6, "Configuring the EPL-N2000 for OS/2," describes how to use EPSON Net! for OS/2 to send print files to the EPL-N2000 through either redirection or piping. Chapter 7, "Using the - Epson EPL-N2000 | User Manual - Network Administration - Page 11
tasks. ftp is a UNIX command for file transfer on a TCP/IP network. lpr is a UNIX command for remote printing on a TCP/IP network. Resetting the EPL-N2000 causes it to initialize. You can reset the printer in the following ways: t Switching the printer off and back on again t Pressing the reset key - Epson EPL-N2000 | User Manual - Network Administration - Page 12
Chapter 1 Getting Started Connecting the Ethernet Interface Card to the Network 1-2 Reading the Indicator Lights 1-5 Resetting the Ethernet Card 1-6 1 1 Getting Started 1-1 - Epson EPL-N2000 | User Manual - Network Administration - Page 13
the card. Connecting the Ethernet Interface Card to the Network Your EPL-N2000 comes with a preinstalled Ethernet interface card that you can connect to your network using either a 10BASE-T or 10BASE2 network cable. (Your printer includes a coaxial Y-connector for a 10BASE2 connection.) Follow these - Epson EPL-N2000 | User Manual - Network Administration - Page 14
2. Locate the Ethernet card plate on the back of the printer. card plate 3. Attach the network cable to the appropriate connector. Twisted Pair 10BASE-T) Thin Coaxial 10BASE2) status sheet button Note: You can attach the Ethernet interface card to only one - Epson EPL-N2000 | User Manual - Network Administration - Page 15
sheet provides information you need to configure your printer for the network, such as the IP address for the Ethernet interface card, and the printer's serial number and current configuration. If the printer fails to print a status sheet, make sure that the printer is online and that no jobs are - Epson EPL-N2000 | User Manual - Network Administration - Page 16
to obtaining detailed information by printing a status sheet, you can obtain basic printer status by reading the indicator lights on the Ethernet card plate. red status card is initializing Ethernet card recognizes the network connection. Normal ready status Error status Getting Started 1-5 - Epson EPL-N2000 | User Manual - Network Administration - Page 17
off and on again, or by pressing the Reset key sequence (Alt-Continue) on the printer control panel. Paper Source Page Size Manual Feed Orientation RITech Copies MP Tray Size Toner Save Mode Menu Item Value Enter SelecType Alt Status Sheet Continue Form Feed On Line Reset If you turn - Epson EPL-N2000 | User Manual - Network Administration - Page 18
Chapter 2 Configuring the EPL-N2000 for NetWare Installing EPSON Net! for NetWare 2-3 For Windows 2-3 For DOS 2-3 Configuring the EPL-N2000 as a Print Server Time Interval 2-12 2 Configuring the EPL-N2000 as a Remote Printer 2-13 Defining the EPL-N2000 on a NetWare Print Server 2-13 - Epson EPL-N2000 | User Manual - Network Administration - Page 19
Novell NetWare is set up to use print services on the network. See your Novell NetWare documentation for details about setup. c Caution: Once you make changes to the EPL-N2000, you must wait at least five minutes before turning off or rebooting your printer. 2-2 Configuring the EPL-N2000 for NetWare - Epson EPL-N2000 | User Manual - Network Administration - Page 20
in the EPSON Net! group. For DOS 1. Insert the EPSON Net! for NetWare DOS diskette. Note: Your workstation must have a high density diskette drive. 2. Use the COPY command to copy the following files to a network directory or to your hard drive: EPNWDE.EXE EPNWDE.DAT Configuring the EPL-N2000 for - Epson EPL-N2000 | User Manual - Network Administration - Page 21
, the EPL-N2000 sends the job to the printer. Like any NetWare print server, the EPL-N2000 services the assigned queues in round robin fashion, and services higher priority queues before those of lower priority. For added security, the EPL-N2000 supports encrypted passwords. Since the EPL-N2000 is - Epson EPL-N2000 | User Manual - Network Administration - Page 22
: 1. Run EPSON Net! for NetWare. After a few seconds, the following dialog box appears. This dialog displays printer status and identifies each printer on the network by serial number and name. 2. Highlight the printer you want to configure from the list and click Open. Configuring the EPL-N2000 for - Epson EPL-N2000 | User Manual - Network Administration - Page 23
The NetWare Status dialog box appears. 3. Click Edit to configure the printer. The NetWare Config dialog box appears. 2-6 Configuring the EPL-N2000 for NetWare - Epson EPL-N2000 | User Manual - Network Administration - Page 24
a name that's easy for other users to remember, such as a department name, or the name of the printer's owner. A period is allowed if it is not the first character. However, you cannot use a space or 8. Click OK. The NetWare Config dialog box appears again. Configuring the EPL-N2000 for NetWare 2-7 - Epson EPL-N2000 | User Manual - Network Administration - Page 25
Multiple NetWare File Servers You can assign queues on multiple file servers to an EPL-N2000 configured as a print server. You must have supervisor privileges and the correct the file server you want to attach to the printer from the File Server list box. 2-8 Configuring the EPL-N2000 for NetWare - Epson EPL-N2000 | User Manual - Network Administration - Page 26
must have supervisor privileges.) You return to the NetWare Config dialog box. 4. Click Add to assign a print queue from this file server to the EPL-N2000. The Add Queue dialog box appears. The Queue drop-down list indicates which queues are available on this NetWare file server. 5. Select a print - Epson EPL-N2000 | User Manual - Network Administration - Page 27
servers to the printer. Repeat steps 4 through 6 if you want to add additional print queues to any file server. 8. Click Save in the NetWare Config dialog box to save your settings and exit EPSON Net! for NetWare Config dialog box to save your settings. 2-10 Configuring the EPL-N2000 for NetWare - Epson EPL-N2000 | User Manual - Network Administration - Page 28
name or the name of the printer's owner. A period (.) is allowed if it is not the first character. However, you cannot use a space or any of the following characters 3. Click Save. Assigning a Password If you've assigned print queues on a restricted file server to the EPL-N2000, you need to assign - Epson EPL-N2000 | User Manual - Network Administration - Page 29
Interval You can change the interval at which the printer checks queues for waiting print jobs. Although the factory network traffic. Follow these steps: 1. Access the NetWare Config dialog box. 2. Enter a value from 1 to 90 in the Poll Time text box. 3. Click Save. 2-12 Configuring the EPL-N2000 - Epson EPL-N2000 | User Manual - Network Administration - Page 30
remote printer, you must use PCONSOLE to define it on a NetWare print server. The print server can be either a dedicated workstation running PSERVER, or a file server. You then use EPSON Net! for NetWare to configure the operating mode and make other configuration changes. Defining the EPL-N2000 on - Epson EPL-N2000 | User Manual - Network Administration - Page 31
Serviced by Printer from the Print Server Configuration menu and assign a queue to the print server port from the Available Queues list. 10. Press Esc to exit. Configuring the Operating Mode and Making Other Changes After you define the EPL-N2000 on a NetWare print server, you are ready to use EPSON - Epson EPL-N2000 | User Manual - Network Administration - Page 32
Follow these steps to complete configuration of your card as a remote printer and to make other optional changes: 1. Run EPSON Net! for NetWare. 2. In the EPSON Net! for NetWare summary dialog box, highlight the EPL-N2000, then click Open. 3. Click Edit in the NetWare Status dialog box. Configuring - Epson EPL-N2000 | User Manual - Network Administration - Page 33
4. In the NetWare Config dialog box, make sure Remote Printer is selected as the operating mode. 5. If you don't want to make other configuration changes, go to step 8. To make additional changes, select the print server that services the EPL-N2000 in the Print Server name drop-down list, or enter a - Epson EPL-N2000 | User Manual - Network Administration - Page 34
to Switch Modes You can configure the EPL-N2000 to switch automatically between print server and remote printer modes, depending on network conditions. If your NetWare print server is available, the EPL-N2000 detects its presence and operates as a remote printer. However, if the NetWare print server - Epson EPL-N2000 | User Manual - Network Administration - Page 35
5. Click Edit in the NetWare Status dialog box. 6. In the NetWare Config dialog box, make sure Auto PrintServer/Remote is selected as the operating mode. 2-18 Configuring the EPL-N2000 for NetWare - Epson EPL-N2000 | User Manual - Network Administration - Page 36
name of the NetWare print server in the Print Server name text box. 9. Make any additional configuration changes for either Print Server mode or Remote Printer mode. See the appropriate sections earlier in this chapter. 10. Click Save to save your settings. Configuring the EPL-N2000 for NetWare 2-19 - Epson EPL-N2000 | User Manual - Network Administration - Page 37
Chapter 3 Configuring the EPL-N2000 for AppleTalk Installing EPSON Net! for Macintosh 3-3 Using EPSON Namer to Rename Your Printer 3-3 Using EPSON Zoner to Assign a Zone to Your Printer 3-7 3 Configuring the EPL-N2000 for AppleTalk 3-1 - Epson EPL-N2000 | User Manual - Network Administration - Page 38
the EPL-N2000 from a Macintosh computer using EPSON Net! for Macintosh. Before configuring the EPL-N2000 on an AppleTalk network, do the following: t Install the optional EPSONScript Level 2 ROM module (C832261). (See the instructions that came with your module.) t Install the EPSONScript driver for - Epson EPL-N2000 | User Manual - Network Administration - Page 39
Printer Because your EPL-N2000 has a default name, you need to rename it to avoid having multiple EPL-N2000 printers on the same network with the same name. The EPSON Namer utility lets you rename printers in any zone on the network, including the local zone. Note: If your printer will be serviced - Epson EPL-N2000 | User Manual - Network Administration - Page 40
2. Double-click on EPSON Namer to start the utility. After EPSON Namer searches your network, the following screen appears: 3. Select the name of the printer's installed driver from the Device Types list. 3-4 Configuring the EPL-N2000 for AppleTalk - Epson EPL-N2000 | User Manual - Network Administration - Page 41
of zones to find the one that contains your printer. 5. Select the printer you want to rename from the Select Printer list. If the zone has only one EPL-N2000, that printer is selected automatically. Note: If you have more than one EPL-N2000 on the network, they all have the same name in the Select - Epson EPL-N2000 | User Manual - Network Administration - Page 42
is not the first character. However, you cannot use a space or any of the following characters 7. Click Rename. The new name appears in the Select Printer list. 3-6 Configuring the EPL-N2000 for AppleTalk - Epson EPL-N2000 | User Manual - Network Administration - Page 43
Namer. If you should ever want to return the EPL-N2000 to its default name, click Reset. Using EPSON Zoner to Assign a Zone to Your Printer Follow these steps to assign a zone to the EPL-N2000 on an AppleTalk Phase II network: 1. Double-click on EPSON Zoner to start the utility. After searching your - Epson EPL-N2000 | User Manual - Network Administration - Page 44
30 seconds after clicking Set before rebooting your printer. Your EPL-N2000 will remain in the assigned zone as long as the zone is available. When you finish configuring your EPL-N2000, be sure to notify all network users of your printer's name and zone. 3-8 Configuring the EPL-N2000 for AppleTalk - Epson EPL-N2000 | User Manual - Network Administration - Page 45
the EPL-N2000 for Windows NT Configuring on a Windows NT Server Using DLC 4-2 Configuring on a Windows NT Server Using TCP/IP 4-4 Installing EPSON Net! for Windows NT 4-4 Setting the IP Address 4-4 Creating the Printer on the Windows NT Server 4-6 4 Configuring the EPL-N2000 for Windows - Epson EPL-N2000 | User Manual - Network Administration - Page 46
printer on a Windows NT server running either DLC or TCP/IP. Before configuring the EPL-N2000 for Windows NT, do the following: t Make sure the EPL-N2000 is connected to the network and turned on. See Chapter 1 for more information. t If you're using DLC, make sure that the DLC protocol and driver - Epson EPL-N2000 | User Manual - Network Administration - Page 47
Number on the printer status sheet.) 9. Click the Timer button and select the Job Oriented option. If you want to share the printer, click the Share the Printer on the Network box. Note: The share name defaults to the printer name. You can change it if you want. Configuring the EPL-N2000 for Windows - Epson EPL-N2000 | User Manual - Network Administration - Page 48
EPL-N2000 driver appears. 11. Set any printer options you want. See Chapter 2 in the EPSON EPL-N2000 User's Guide for more information. Configuring on a Windows NT Server Using TCP/IP To configure the EPL-N2000 on a Windows NT server running TCP/IP protocol, you first set the printer's IP address - Epson EPL-N2000 | User Manual - Network Administration - Page 49
button on the Ethernet card plate to print a network adapter status sheet for the EPL-N2000. (This sheet provides important information about the printer's node address and serial number.) See Chapter 1 for more information. 2. Find out what the IP addresses are for several devices in use on the - Epson EPL-N2000 | User Manual - Network Administration - Page 50
and exit the dialog box. It takes a few seconds to register the IP address change, so there may be a short delay before it is displayed. Creating the Printer on the Windows NT Server Follow these steps to create the printer on the Windows NT server: 1. Click Print Manager in the Main program - Epson EPL-N2000 | User Manual - Network Administration - Page 51
text box, enter the IP address for the EPL-N2000. 8. Click the Printer Name of the Computer text box and enter the name assigned in step 3. Click OK. The Create Printer dialog box appears. 9. Make sure all your settings are correct, then click OK. You can change the printer driver settings from the - Epson EPL-N2000 | User Manual - Network Administration - Page 52
Chapter 5 Configuring the EPL-N2000 for UNIX Setting Up the EPL-N2000 as a Network Device 5-2 5 Setting Up the EPL-N2000 as a Remote Printer 5-4 Printing to the EPL-N2000 5-6 Using ftp to Print 5-7 Using lpr to Print 5-8 Setting Up the EPL-N2000 with Other UNIX Systems 5-9 Setting Up for - Epson EPL-N2000 | User Manual - Network Administration - Page 53
name and IP address in its directory. Before you configure the EPL-N2000 for UNIX, make sure the printer is connected to the network. See Chapter 1 for details. Setting Up the EPL-N2000 as a Network Device Follow these steps to set up the EPL-N2000 as a network device: 1. Turn on the EPL-N2000 and - Epson EPL-N2000 | User Manual - Network Administration - Page 54
used to identify the printer when sending print files. A department name or the computer owner's name are good choices. 6. Use ping to make sure that the EPL-N2000 is responding. You can use either of the following formats: ping or ping Configuring the EPL-N2000 for UNIX 5-3 - Epson EPL-N2000 | User Manual - Network Administration - Page 55
make sure that it corresponds to the IP address entered in the /etc/hosts file. If you used the IP address to test the connection, make sure that you entered it correctly with ping. Setting Up the EPL-N2000 as a Remote Printer After you set up the EPL-N2000 as a network device, you need to set it up - Epson EPL-N2000 | User Manual - Network Administration - Page 56
line in the /etc/printcap file, enter a name for the local printer being redirected to the EPL-N2000, followed by the host name, then the path to the EPL-N2000. If you plan to set up the printer to support different lpr filters, enter the first printer option too. The format is as follows: : - Epson EPL-N2000 | User Manual - Network Administration - Page 57
are setting up the EPL-N2000 to support different lpr filters, repeat steps 1 and 2 for each remote printer option that you want to add. Make sure to enter a new remote printer name and local printer name for every option. Printing to the EPL-N2000 After setting up the printer, you can use either - Epson EPL-N2000 | User Manual - Network Administration - Page 58
of a print job by giving the destination file the name FEED or feed. Follow these steps to print using ftp: 1. Type ftp, then open the EPL-N2000. The format is as follows: ftp open 2. Use the send command to send the print job. If you want to specify a particular output - Epson EPL-N2000 | User Manual - Network Administration - Page 59
sending it, so lpr may be unsuitable for bit-image and font download files. You can use the -l filter on the lpr command line to try to avoid this problem. You can also use the lpr filters listed in "Setting Up the EPL-N2000 as a Remote Printer" to specify a particular kind of output, such as an - Epson EPL-N2000 | User Manual - Network Administration - Page 60
up the EPL-N2000 with different types of UNIX. Setting Up for SCO UNIX Systems Some UNIX systems, such as SCO, do not support lpr. The supported on most systems using TCP/IP. Both scripts have been tested for SCO UNIX, but may require modification for other systems. In SCO UNIX, the original printer - Epson EPL-N2000 | User Manual - Network Administration - Page 61
/ftp.$$ echo quit >> /tmp/ftp.$$ /usr/bin/ftp -n $NETPRINTER < /tmp/ftp.$$ /bin/rm /tmp/ftp.$$ done i='expr $i+ 1' done exit 0" *end of script*" 5-10 Configuring the EPL-N2000 for UNIX - Epson EPL-N2000 | User Manual - Network Administration - Page 62
Script 2 The following script should have the same name as the host name for the EPL-N2000: TEMPFILE=/tmp/ftpprint.$$ printer='epsonprt' /usr/spool/lp/model/standard "$@" >$TEMPFILE ftp -n $printer - Epson EPL-N2000 | User Manual - Network Administration - Page 63
is set up using the SMIT utility. Follow these steps to set up the EPL-N2000 for IBM AIX systems: 1. Complete the steps in "Setting Up the EPL-N2000 as a Network Device" and "Setting Up the EPL-N2000 as a Remote Printer" earlier in this chapter. 2. Invoke SMIT as the superuser and go to the Add - Epson EPL-N2000 | User Manual - Network Administration - Page 64
of printer options. Setting Up for HP-UX Systems You can use either ftp or rlp (lpr) to print from an HP-UX system. You use SAM to set up both. Before starting SAM, enter a unique IP address and host name in the /etc/hosts file. (See "Setting Up the EPL-N2000 as a Network Device" earlier - Epson EPL-N2000 | User Manual - Network Administration - Page 65
the following settings: Printer Name: Remote System Name: Remote Printer Name: Remote Council Model: Remote Status Model: Make System Default: Printer Class: Restrict Council: Remote Printer on BSD system: a model script: vi/usr/spool/lp/model/lan.model 5-14 Configuring the EPL-N2000 for UNIX - Epson EPL-N2000 | User Manual - Network Administration - Page 66
temporary file ( echo user xx echo binary echo put $TMPPATH echo bye ) ftp -i -n $PERIPH ERRSTAT=$? /bin/rm $TMPPATH exit $ERRSTAT *End of Script* Configuring the EPL-N2000 for UNIX 5-15 - Epson EPL-N2000 | User Manual - Network Administration - Page 67
EPL-N2000 for OS/2 Protocol Support 6-2 Setting Up Redirection to the EPL-N2000 6-3 Obtaining Printer Status for Redirected Ports 6-5 Setting Up Piping to the EPL-N2000 6-5 Copying the Piping Software 6-6 Configuring Printers for Use with Remote Print Service . . . . 6-7 Obtaining Printer - Epson EPL-N2000 | User Manual - Network Administration - Page 68
the network and turned on. See Chapter 1 for information on connecting the Ethernet interface card. t Make sure you have supervisor privileges for the OS/2 workstation on which you set up redirection or piping. Protocol Support The EPL-N2000 supports both NetBIOS over TCP/IP and NetBEUI. EPSON Net - Epson EPL-N2000 | User Manual - Network Administration - Page 69
's ports to one or more EPL-N2000 printers, copy the EPL-N2000 redirection software to your root directory. Then edit STARTUP.CMD to include the RPRINT command. Follow these steps: 1. If you're unsure of the serial number for the EPL-N2000, print a network adapter status sheet. See Chapter - Epson EPL-N2000 | User Manual - Network Administration - Page 70
. 7. Repeat step 6 for each port that you want to redirect. 8. Reboot the workstation. All printed output spooled to this workstation will be redirected to the EPL-N2000 printer(s) specified in the STARTUP.CMD entry. 6-4 Configuring the - Epson EPL-N2000 | User Manual - Network Administration - Page 71
Remote Print Servers active for LPT3-Printer Ready Setting Up Piping to the EPL-N2000 To set up piping to one or more EPL-N2000 printers, first create a remote print service directory (EPNET) on your workstation's root directory and copy the EPL-N2000 piping software to it. Then configure the new - Epson EPL-N2000 | User Manual - Network Administration - Page 72
Follow these steps to create a remote print service directory and copy the EPL-N2000 piping software: 1. If you're unsure of the printer's serial number, print a network adapter status sheet. See Chapter 1 for details. 2. Insert the diskette labeled EPSON Net! for NetWare DOS and OS/2 in your - Epson EPL-N2000 | User Manual - Network Administration - Page 73
driver Printer status program Configuring Printers for Use with Remote Print Service After you finish copying the piping software, follow these steps to complete setup of remote print service: 1. From the remote print service directory, use the ADDPORT command to define a port for the first EPL - Epson EPL-N2000 | User Manual - Network Administration - Page 74
other workstations, install either the IBMNULL or MSNULL printer driver. For the device to connect to, choose one of the port names entered in step 2. 3. Create an initialization file in the remote print service directory. t If your network protocol is TCP/IP, the format of the file is as follows - Epson EPL-N2000 | User Manual - Network Administration - Page 75
. Obtaining Printer Status for Piped Ports You can obtain printer status for each piped port on your workstation by typing the REMSTAT command appropriate to your network protocol at the OS/2 command prompt. t For TCP/IP, type REMSTAT. t For NetBEUI, type REMSTAT3. Configuring the EPL-N2000 for OS - Epson EPL-N2000 | User Manual - Network Administration - Page 76
running Warp Connect to share an EPL-N2000, you use piping to configure a unique port name for each workstation instead of each printer. Follow these steps: 1. Complete the steps in "Copying the Piping Software." 2. From your workstation's remote print service directory, use the ADDPORT command to - Epson EPL-N2000 | User Manual - Network Administration - Page 77
network protocol is NetBEUI, the format is as follows: REMPRT3 Note: The remote print service uses this file at startup to assign the printer to the workstations' portnames. The file identifies the shared EPL-N2000 printer - Epson EPL-N2000 | User Manual - Network Administration - Page 78
remote print service is initialized each time you start the workstation. 6. If necessary, use the LAN Server Administration facility (NET ADMIN) to add the newly configured printer to the list of shared resources. See your OS/2 documentation for more information. 6-12 Configuring the EPL-N2000 for - Epson EPL-N2000 | User Manual - Network Administration - Page 79
Accessing the Status Monitor Utility 7-3 From Windows 95 7-3 From Windows NT 3.51 7-3 Using the Status Monitor Utility 7-4 Checking Printer Status 7-4 Changing Printer Settings 7-5 Changing Serial Settings 7-7 Working with Printer Configuration Files 7-9 7 Using the EPSON Status Monitor 7-1 - Epson EPL-N2000 | User Manual - Network Administration - Page 80
, make sure that Microsoft DLC is not installed and that the ODI driver is not selected as the network card driver. Installing the Status Monitor Utility Follow these steps to install the Status Monitor utility: 1. Insert the EPSON Status Monitor diskette. 2. If you are using Windows 95, click Start - Epson EPL-N2000 | User Manual - Network Administration - Page 81
Monitor Utility: From Windows 95 1. Click Start, then point to Programs. 2. Select EPSON Status Monitor. The Status Monitor Connect menu appears. From Windows NT 3.51 1. From the Program Manager, double-click the EPSON Status Monitor folder. 2. Double-click the Status Monitor icon inside the folder - Epson EPL-N2000 | User Manual - Network Administration - Page 82
to check whether the selected printer is busy, idle, or in standby mode, as well as to check the paper source, paper size, the amount of paper left in each paper tray, the amount of toner remaining, and the amount of printer RAM. The Status menu is read-only. 7-4 Using the EPSON Status Monitor - Epson EPL-N2000 | User Manual - Network Administration - Page 83
density, print offset margins, and the interval of time between jobs before the printer goes into power-saving mode. When you finish changing settings, click the OK lighter, as necessary. Period of time between jobs before the printer goes into power-saving mode. Using the EPSON Status Monitor 7-5 - Epson EPL-N2000 | User Manual - Network Administration - Page 84
you can turn on Auto Continue mode. Power On Down Off Sets the printer to power down automatically after the interval between jobs specified in Job Time Out. Image Auto Optimum On Off Sets the printer to use Image Optimum mode so you can print complex, memory-intensive graphics. It is best - Epson EPL-N2000 | User Manual - Network Administration - Page 85
Changing Serial Settings Use the Serial menu to change serial settings, such as parity and baud rate. Using the EPSON Status Monitor 7-7 - Epson EPL-N2000 | User Manual - Network Administration - Page 86
an 8-bit or 7-bit word length. See your computer manual and software documentation for the correct setting. Sets the number of stop bits on each character of information sent to the printer. Stop bits signal the end of a character. Turns the printer's ready communications protocol ON or OFF. You can - Epson EPL-N2000 | User Manual - Network Administration - Page 87
, and Delete buttons to open additional dialog boxes for performing these tasks. (You usually save files as EPSON Printer Setting Files, with the extension .stm.) The Default button loads the printer's default settings. When you finish with the Setting menu, click OK to return to the Connect menu - Epson EPL-N2000 | User Manual - Network Administration - Page 88
7-10 Using the EPSON Status Monitor - Epson EPL-N2000 | User Manual - Network Administration - Page 89
13 I IBM AIX systems, configuring the printer for, 5-12 Image Optimum, 7-6 Installing EPSON Net! for Macintosh, 3-3 EPSON Net! for NetWare DOS, 2-3 EPSON Net! for NetWare Windows, 2-3 EPSON Net! for Windows NT, 4-4 Status Monitor utility, 7-2 IP address assigning for UNIX, 5-2 assigning for Windows - Epson EPL-N2000 | User Manual - Network Administration - Page 90
queues from a print server, 2-10 installing EPSON Net! for NetWare, 2-3 renaming a print server, 2-11 setting the queue polling time interval, 2-12 switch between print server and remote printer, 2-17 Network protocols supported, 1 Node address, definition, 4 P Parity, 7-8 Password, assigning, 2-11 - Epson EPL-N2000 | User Manual - Network Administration - Page 91
sheet, printing, 4, 1-3 to 1-4 T TCP/IP configuring printer for Windows NT, 4-4 to 4-7 programs used by EPSON Net! for OS/2, 6-2 U Utility software, description, 2 W Windows NT configuring printer for DLC, 4-2 to 4-4 configuring printer for TCP/IP, 4-4 to 4-7 installing EPSON Net! for Windows NT
-
 1
1 -
 2
2 -
 3
3 -
 4
4 -
 5
5 -
 6
6 -
 7
7 -
8
-
9
-
10
-
11
-
12
-
13
-
14
-
15
-
16
-
17
-
18
-
19
-
20
-
21
-
22
-
23
-
24
-
25
-
26
-
27
-
28
-
29
-
30
-
31
-
32
-
33
-
34
-
35
-
36
-
37
-
38
-
39
-
40
-
41
-
42
-
43
-
44
-
45
-
46
-
47
-
48
-
49
-
50
-
51
-
52
-
53
-
54
-
55
-
56
-
57
-
58
-
59
-
60
-
61
-
62
-
63
-
64
-
65
-
66
-
67
-
68
-
69
-
70
-
71
-
72
-
73
-
74
-
75
-
76
-
77
-
78
-
79
-
80
-
81
-
82
-
83
-
84
-
85
-
86
-
87
-
88
-
89
-
90
-
91
 |
 |

Laser Printer
Network Administrator’s
Guide
Printed on recycled paper with at least 10% post-consumer content
®