GE 21098GE3 User Guide - Page 48
Inserting a Pause in the Dialing Sequence of a, Stored Number, Reviewing Records Stored in Memory
 |
UPC - 044319401028
View all GE 21098GE3 manuals
Add to My Manuals
Save this manual to your list of manuals |
Page 48 highlights
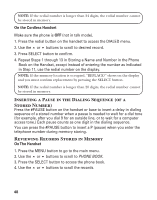
NOTE: If the redial number is longer than 24 digits, the redial number cannot be stored in memory. On the Cordless Handset Make sure the phone is OFF (not in talk mode). 1. Press the redial button on the handset to access the DIALED menu. 2. Use the or buttons to scroll to desired record. 3. Press SELECT button to confirm. 4. Repeat Steps 1 through 13 in Storing a Name and Number in the Phone Book on the Handset, except instead of entering the number as indicated in Step 11, use the redial number on the display. NOTE: If the memory location is occupied, "REPLACE?" shows on the display and you must confirm replacement by pressing the SELECT button. NOTE: If the redial number is longer than 20 digits, the redial number cannot be stored in memory. Inserting a Pause in the Dialing Sequence (of a Stored Number) Press the #PAUSE button on the handset or base to insert a delay in dialing sequence of a stored number when a pause is needed to wait for a dial tone (for example, after you dial 9 for an outside line, or to wait for a computer access tone.) Each pause counts as one digit in the dialing sequence. You can press the #PAUSE button to insert a P (pause) when you enter the telephone number during memory storing. Reviewing Records Stored in Memory On The Handset 1. Press the MENU button to go to the main menu. 2. Use the or buttons to scroll to PHONE BOOK. 3. Press the SELECT button to access the phone book. 4. Use the or buttons to scroll the records. 48
-
 1
1 -
2
-
3
-
4
-
5
-
6
-
7
-
8
-
9
-
10
-
11
-
12
-
13
-
14
-
15
-
16
-
17
-
18
-
19
-
20
-
21
-
22
-
23
-
24
-
25
-
26
-
27
-
28
-
29
-
30
-
31
-
32
-
33
-
34
-
35
-
36
-
37
-
38
-
39
-
40
-
41
-
42
-
 43
43 -
 44
44 -
 45
45 -
 46
46 -
 47
47 -
 48
48 -
 49
49 -
 50
50 -
 51
51 -
 52
52 -
 53
53 -
54
-
55
-
56
-
57
-
58
-
59
-
60
-
61
-
62
-
63
-
64
-
65
-
66
-
67
-
68
-
69
-
70
-
71
-
72
-
73
-
74
-
75
-
76
-
77
-
78
-
79
-
80
-
81
-
82
-
83
-
84
-
85
-
86
-
87
-
88
-
89
-
90
-
91
-
92
-
93
-
94
-
95
-
96
-
97
-
98
-
99
-
100
-
101
-
102
-
103
-
104
-
105
-
106
-
107
-
108
-
109
-
110
-
111
-
112
-
113
-
114
-
115
-
116
-
117
-
118
-
119
-
120
-
121
-
122
-
123
-
124
-
125
-
126
-
127
-
128
-
129
-
130
-
131
-
132
-
133
-
134
-
135
-
136
-
137
-
138
-
139
-
140
-
141
-
142
-
143
-
144
-
145
-
146
-
147
-
148
-
149
-
150
-
151
-
152
 |
 |