GE 60-806-95R-16Z Installation Instructions - Page 36
Touchpad Options Menu, Entry Delay 0310, Exit Delay 0311, Extended Delay 0312, Siren Timeout 0313,
 |
UPC - 046188090938
View all GE 60-806-95R-16Z manuals
Add to My Manuals
Save this manual to your list of manuals |
Page 36 highlights
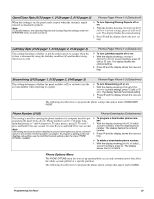
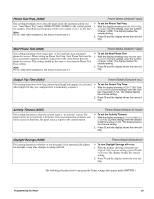
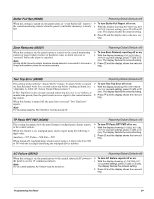
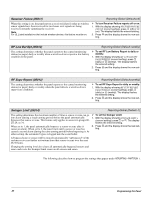
Entry Delay (0310) Timers-Partition 1 (Default=30 sec.) This setting determines how much time (30-240 seconds) users have to disarm the system (after entering the armed premises through a designated delay door) to avoid causing an alarm. Note For UL Listed residential installations, the Entry Delay must be set to 45 seconds or less. The combined time for the Entry Delay and Dialer Abort Delay (02006) must not exceed 60 seconds. ¾ To set the Entry Delay: 1. With the display showing ENTRY DELAY nnn SECONDS (current setting), enter the desired time value (30-240 using 8-second intervals). The display flashes the entered setting. 2. Press ƒ and the display shows the new setting. Exit Delay (0311) Timers-Partition 1 (Default=60 sec.) This setting determines how much time (45-184 seconds) the user has to leave the premises through a designated delay door (after arming the system) without causing an alarm. Note For UL Listed residential installations, the Exit Delay must be set to 60 seconds or less. ¾ To set the Exit Delay: 1. With the display showing EXIT DELAY nnn SECONDS (current setting), enter the desired time value (45-184 using 8-second intervals). The display flashes the entered setting. 2. Press ƒ and the display shows the new setting. Extended Delay (0312) This setting determines how much time (1-8 minutes) the user has to enter or exit the premises through a designated extended delay door without causing an alarm. Note For UL Listed systems, Extended Delay shall not be used. Timers-Partition 1 (Default=4 min.) ¾ To set the Extended Delay: 1. With the display showing EXTENDED DELAY nn MINUTES (current setting), enter the desired time value (1-8). The display flashes the entered setting. 2. Press ƒ and the display shows the new setting. Siren Timeout (0313) This setting determines how long sirens sound (1-30 minutes) if no one is present to disarm the system. Note For UL Listed systems, Siren Timeout must be set to 4 minutes or more. Timers-Partition 1 (Default=4 min.) ¾ To set the Siren Timeout: 1. With the display showing SIREN TIMEOUT nn MINUTES (current setting), enter the desired time value (1-30). The display flashes the entered setting. 2. Press ƒ and the display shows the new setting. Touchpad Options Menu The TOUCHPAD OPTIONS menu lets you set up touchpad panic and arming operation. The following describes how to program the touchpad option settings that appear under PARTITION 1. Fire Panic (0400) This setting determines whether touchpad fire panic buttons are enabled (on) or disabled (off). Touchpad Options-Partition 1 (Default=on) ¾ To change the Fire Panic setting: 1. With the display showing FIRE PANIC OFF/ ON (current setting), press 1 (off) or 2 (on). The display flashes the entered setting. 2. Press ƒ and the display shows the new setting. 31 Programming the Panel
-
 1
1 -
2
-
3
-
4
-
5
-
6
-
7
-
8
-
9
-
10
-
11
-
12
-
13
-
14
-
15
-
16
-
17
-
18
-
19
-
20
-
21
-
22
-
23
-
24
-
25
-
26
-
27
-
28
-
29
-
30
-
 31
31 -
 32
32 -
 33
33 -
 34
34 -
 35
35 -
 36
36 -
 37
37 -
 38
38 -
 39
39 -
 40
40 -
 41
41 -
42
-
43
-
44
-
45
-
46
-
47
-
48
-
49
-
50
-
51
-
52
-
53
-
54
-
55
-
56
-
57
-
58
-
59
-
60
-
61
-
62
-
63
-
64
-
65
-
66
-
67
-
68
-
69
-
70
-
71
-
72
-
73
-
74
-
75
-
76
 |
 |
