HP 4700 HP Color LaserJet 4700 - User Guide - Page 154
Storing a print job, Quick-copying a job, Mopier Mode, Enabled, Device Settings, Stored Job, MENUS - formatter board
 |
View all HP 4700 manuals
Add to My Manuals
Save this manual to your list of manuals |
Page 154 highlights
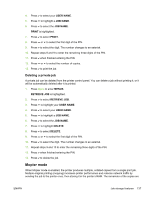
printed at the printer's fastest speed. Documents can be created, controlled, managed, and finished from the desktop, which eliminates the extra step of using a photocopier. The HP Color LaserJet 4700 series printers support mopying provided they have enough total memory (160 MB DDR plus 32 MB on the formatter board). The mopying feature is enabled by default if the Mopier Mode setting is Enabled in the Device Settings tab. Storing a print job You can download a print job to the printer without printing it. You can then print the job at any time through the printer control panel. For example, you might want to download a personnel form, calendar, time sheet, or accounting form that other users can access and print. To store a print job permanently, select the Stored Job option in the driver when printing the job. 1. Press Menu to enter MENUS. 2. RETRIEVE JOB is highlighted. 3. Press to select RETRIEVE JOB. 4. Press to highlight your USER NAME. 5. Press to select your USER NAME. 6. Press to highlight a JOB NAME. 7. Press to select the JOB NAME. PRINT is highlighted. 8. Press to select PRINT. 9. Press or to select the number of copies needed. 10. Press to print the job. Quick-copying a job Quick Copy stores a copy of a printed job on the hard disk, and allows you to print additional copies of a print job using the control panel. The number of quick-copy print jobs that can be stored in the printer is set from the printer control panel. This feature can be turned on or off from the driver. 1. Press Menu to enter MENUS. 2. RETRIEVE JOB is highlighted. 3. Press to select RETRIEVE JOB. 4. Press to highlight your USER NAME. 5. Press to select your USER NAME. 6. Press to highlight a JOB NAME. 7. Press to select the JOB NAME. PRINT is highlighted. 138 Chapter 4 Printing tasks ENWW
-
 1
1 -
2
-
3
-
4
-
5
-
6
-
7
-
8
-
9
-
10
-
11
-
12
-
13
-
14
-
15
-
16
-
17
-
18
-
19
-
20
-
21
-
22
-
23
-
24
-
25
-
26
-
27
-
28
-
29
-
30
-
31
-
32
-
33
-
34
-
35
-
36
-
37
-
38
-
39
-
40
-
41
-
42
-
43
-
44
-
45
-
46
-
47
-
48
-
49
-
50
-
51
-
52
-
53
-
54
-
55
-
56
-
57
-
58
-
59
-
60
-
61
-
62
-
63
-
64
-
65
-
66
-
67
-
68
-
69
-
70
-
71
-
72
-
73
-
74
-
75
-
76
-
77
-
78
-
79
-
80
-
81
-
82
-
83
-
84
-
85
-
86
-
87
-
88
-
89
-
90
-
91
-
92
-
93
-
94
-
95
-
96
-
97
-
98
-
99
-
100
-
101
-
102
-
103
-
104
-
105
-
106
-
107
-
108
-
109
-
110
-
111
-
112
-
113
-
114
-
115
-
116
-
117
-
118
-
119
-
120
-
121
-
122
-
123
-
124
-
125
-
126
-
127
-
128
-
129
-
130
-
131
-
132
-
133
-
134
-
135
-
136
-
137
-
138
-
139
-
140
-
141
-
142
-
143
-
144
-
145
-
146
-
147
-
148
-
 149
149 -
 150
150 -
 151
151 -
 152
152 -
 153
153 -
 154
154 -
 155
155 -
 156
156 -
 157
157 -
 158
158 -
 159
159 -
160
-
161
-
162
-
163
-
164
-
165
-
166
-
167
-
168
-
169
-
170
-
171
-
172
-
173
-
174
-
175
-
176
-
177
-
178
-
179
-
180
-
181
-
182
-
183
-
184
-
185
-
186
-
187
-
188
-
189
-
190
-
191
-
192
-
193
-
194
-
195
-
196
-
197
-
198
-
199
-
200
-
201
-
202
-
203
-
204
-
205
-
206
-
207
-
208
-
209
-
210
-
211
-
212
-
213
-
214
-
215
-
216
-
217
-
218
-
219
-
220
-
221
-
222
-
223
-
224
-
225
-
226
-
227
-
228
-
229
-
230
-
231
-
232
-
233
-
234
-
235
-
236
-
237
-
238
-
239
-
240
-
241
-
242
-
243
-
244
-
245
-
246
-
247
-
248
-
249
-
250
-
251
-
252
-
253
-
254
-
255
-
256
-
257
-
258
-
259
-
260
-
261
-
262
-
263
-
264
-
265
-
266
-
267
-
268
-
269
-
270
-
271
-
272
-
273
-
274
-
275
-
276
-
277
-
278
-
279
-
280
-
281
-
282
-
283
-
284
-
285
-
286
-
287
-
288
-
289
-
290
-
291
-
292
-
293
-
294
-
295
-
296
-
297
-
298
-
299
-
300
-
301
-
302
-
303
-
304
-
305
-
306
-
307
-
308
-
309
-
310
-
311
-
312
-
313
-
314
-
315
-
316
-
317
-
318
-
319
-
320
-
321
-
322
-
323
-
324
-
325
-
326
-
327
-
328
-
329
-
330
 |
 |