HP Scitex LX850 HP Scitex LX850 & LX820 Printers: Maintenance and troubles - Page 16
Troubleshoot printhead alignment, Printhead alignment diagnostic plot - service manual
 |
View all HP Scitex LX850 manuals
Add to My Manuals
Save this manual to your list of manuals |
Page 16 highlights
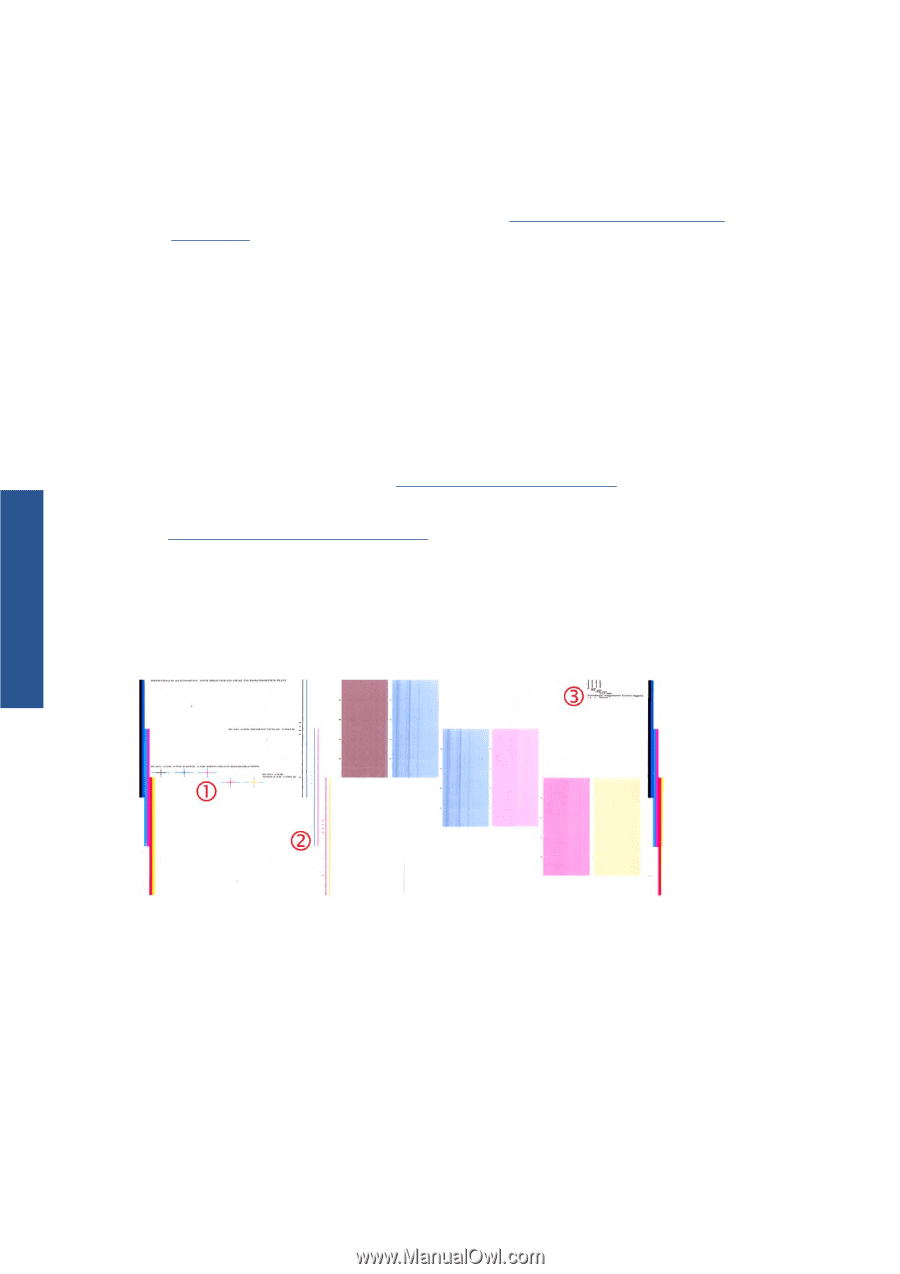
Troubleshoot printhead alignment Automatic printhead alignment may fail occasionally. In some cases, you may see the front panel error message "Automatic Printhead Alignment is cancelled because of scanning errors". In other cases, there is no error message but the print quality is not satisfactory. Here are some possible explanations. ● There is some problem with substrate advance (see Substrate-advance compensation on page 11). After fixing any substrate-advance issue, retry automatic printhead alignment. ● You are using a highly-textured (some banners), non-white or very reflective (some satinated offset) substrate. Please use manual printhead alignment in these cases. ● The substrate is wrinkled. Check that the substrate is correctly loaded with uniform tension. Try using the diverter rollers to increase the tension. If necessary, try adjusting substrate parameters such as tension or drying and curing temperatures. ● The substrate is not wide enough. Repeat the alignment process using a substrate roll at least 914 mm (36 in) wide. ● The printer window was open during the printhead alignment process. ● The printheads are not clean. See Clean the printheads on page 33. If the problem persists, please try using manual printhead alignment, or call your service representative (see HP Customer Care Centers on page 93). Printhead alignment diagnostic plot The printer offers a printhead alignment diagnostic plot, to assess the quality of the current printhead alignment. To print it, start the HP Internal Print Server and select Printer > Printhead alignment > Diagnostics plot. Printer calibration 1. The colored crosses on the left side of the plot should show the lines correctly aligned with each other. 2. The vertical lines to left of center should be straight, without kinks. 3. Of the four vertical lines at the top right of the plot, the leftmost show the acceptable level of 'steps'. 10 Chapter 3 Printer calibration ENWW
-
 1
1 -
2
-
3
-
4
-
5
-
6
-
7
-
8
-
9
-
10
-
 11
11 -
 12
12 -
 13
13 -
 14
14 -
 15
15 -
 16
16 -
 17
17 -
 18
18 -
 19
19 -
 20
20 -
 21
21 -
22
-
23
-
24
-
25
-
26
-
27
-
28
-
29
-
30
-
31
-
32
-
33
-
34
-
35
-
36
-
37
-
38
-
39
-
40
-
41
-
42
-
43
-
44
-
45
-
46
-
47
-
48
-
49
-
50
-
51
-
52
-
53
-
54
-
55
-
56
-
57
-
58
-
59
-
60
-
61
-
62
-
63
-
64
-
65
-
66
-
67
-
68
-
69
-
70
-
71
-
72
-
73
-
74
-
75
-
76
-
77
-
78
-
79
-
80
-
81
-
82
-
83
-
84
-
85
-
86
-
87
-
88
-
89
-
90
-
91
-
92
-
93
-
94
-
95
-
96
-
97
-
98
-
99
-
100
-
101
-
102
-
103
-
104
-
105
-
106
-
107
-
108
 |
 |