HP Scitex LX850 HP Scitex LX850 & LX820 Printers: Maintenance and troubles - Page 43
Replace the carriage oiler foams, Unlock and open the printhead access door.
 |
View all HP Scitex LX850 manuals
Add to My Manuals
Save this manual to your list of manuals |
Page 43 highlights
Replace the carriage oiler foams The printhead carriage contains two chunks of foam impregnated with oil that continuously lubricate the carriage rails. They may need to be replaced about every 2 or 3 months, depending on your use of the printer. Replacement foams are available in the cleaning kit. 1. Go to the front panel and select Replace oiler foam from the Preventive Maintenance menu . The carriage moves into the electrical compartment and heating is turned off. 2. Unlock and open the printhead access door. 3. Slide off the cover of the front oiler foam. 4. Remove the old foam, insert the new foam, and replace the cover. Maintain hardware ENWW Replace the carriage oiler foams 37
-
 1
1 -
2
-
3
-
4
-
5
-
6
-
7
-
8
-
9
-
10
-
11
-
12
-
13
-
14
-
15
-
16
-
17
-
18
-
19
-
20
-
21
-
22
-
23
-
24
-
25
-
26
-
27
-
28
-
29
-
30
-
31
-
32
-
33
-
34
-
35
-
36
-
37
-
 38
38 -
 39
39 -
 40
40 -
 41
41 -
 42
42 -
 43
43 -
 44
44 -
 45
45 -
 46
46 -
 47
47 -
 48
48 -
49
-
50
-
51
-
52
-
53
-
54
-
55
-
56
-
57
-
58
-
59
-
60
-
61
-
62
-
63
-
64
-
65
-
66
-
67
-
68
-
69
-
70
-
71
-
72
-
73
-
74
-
75
-
76
-
77
-
78
-
79
-
80
-
81
-
82
-
83
-
84
-
85
-
86
-
87
-
88
-
89
-
90
-
91
-
92
-
93
-
94
-
95
-
96
-
97
-
98
-
99
-
100
-
101
-
102
-
103
-
104
-
105
-
106
-
107
-
108
 |
 |
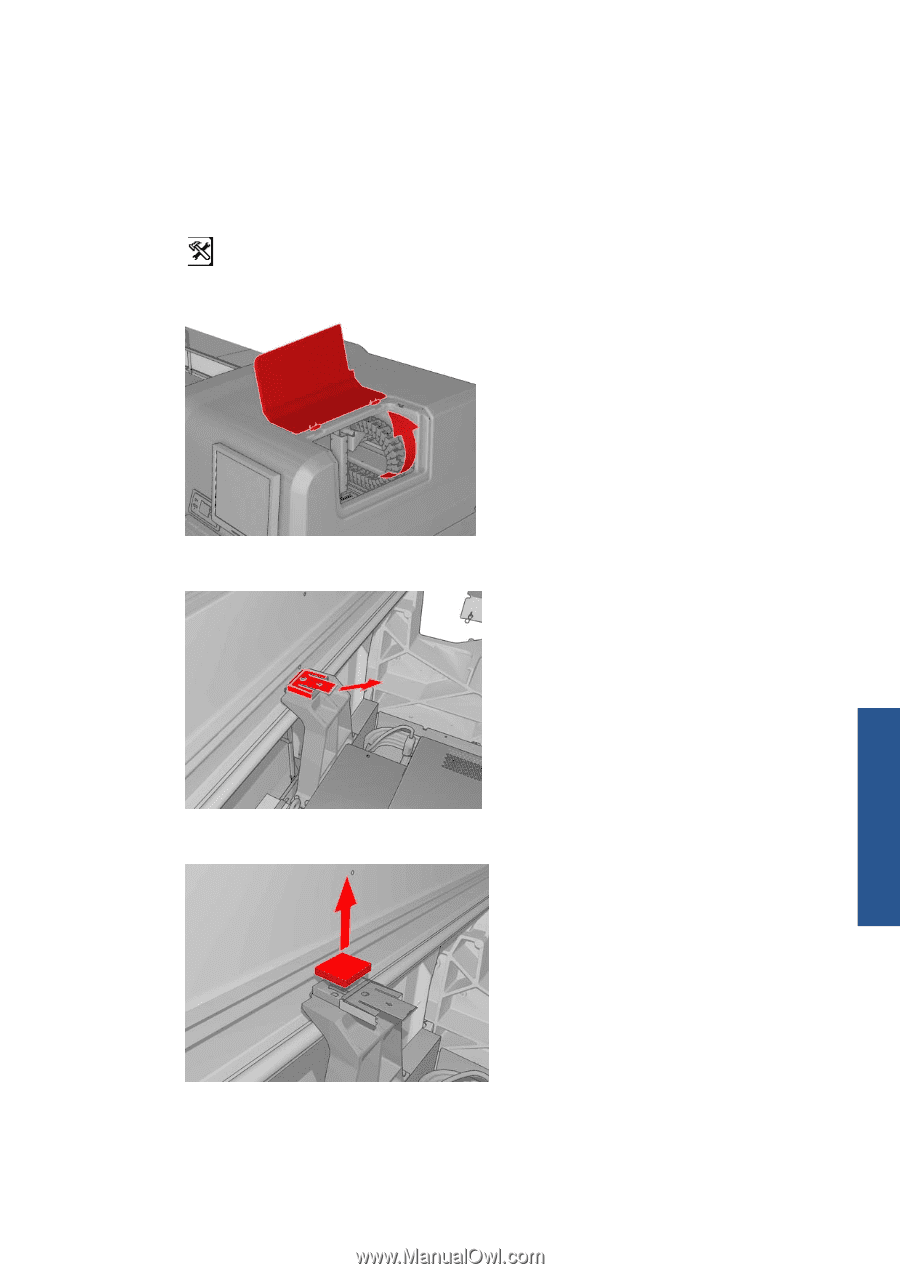
Replace the carriage oiler foams
The printhead carriage contains two chunks of foam impregnated with oil that continuously lubricate the
carriage rails. They may need to be replaced about every 2 or 3 months, depending on your use of the
printer. Replacement foams are available in the cleaning kit.
1.
Go to the front panel and select
Replace oiler foam
from the Preventive Maintenance menu
. The carriage moves into the electrical compartment and heating is turned off.
2.
Unlock and open the printhead access door.
3.
Slide off the cover of the front oiler foam.
4.
Remove the old foam, insert the new foam, and replace the cover.
ENWW
Replace the carriage oiler foams
37
Maintain hardware