HP Scitex LX850 HP Scitex LX850 & LX820 Printers: Maintenance and troubles - Page 25
Dynamic color registration without the test pattern, Dynamic color registration on the fly, Printer
 |
View all HP Scitex LX850 manuals
Add to My Manuals
Save this manual to your list of manuals |
Page 25 highlights
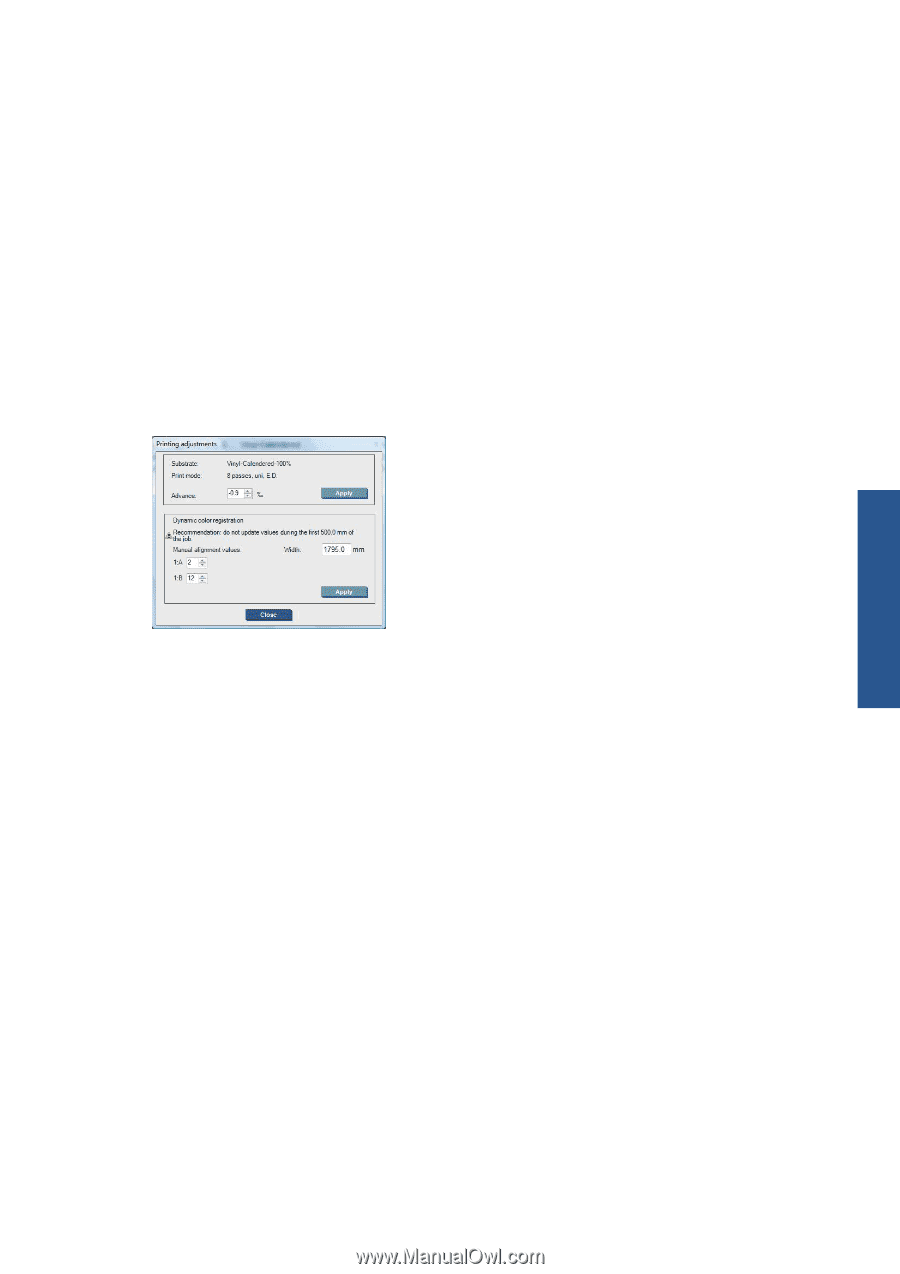
Dynamic color registration without the test pattern You can enter the A and B values without printing the test pattern. There are two scenarios in which you may want to do this. ● You intend to find the correct A and B values by trial and error. In this case, you need to know that the A value affects printing on the right-hand side of the substrate, while the B value affects printing on the left-hand side. Increasing the value moves magenta to the left, decreasing it moves magenta to the right. ● If there is a warning message while performing the Dynamic Color Registration, that the values cannot be relied upon. This will occur if the values are off the scale. Dynamic color registration on the fly You can adjust the dynamic color registration while the printer is printing. In the HP Internal Print Server, select Printer > Printing adjustments. Printer calibration Change the A and/or B values and click Apply. The A value affects printing on the right-hand side of the substrate, while the B value affects printing on the left-hand side. Increasing the value moves magenta to the left, decreasing it moves magenta to the right. The new calibration will be visible after a certain length of substrate has been printed on. The length will depend on the print mode. Examples: ● With a 2-pass print mode, about 1 m (40 in) of substrate will be printed before the calibration takes effect. ● With a 4-pass print mode, about 0.5 m (20 in) of substrate will be printed before the calibration takes effect. ● With an 8-pass print mode, about 0.25 m (10 in) of substrate will be printed before the calibration takes effect. For some substrates where the dynamic color registration calibration is not working as expected, the following steps should be used. Be patient, wait for the right quantity of material to be printed before making any new adjustments on the fly: How to fine-tune and check the printer configuration: A series of crosses can be printed on the full width of the substrate for one meter and then the calibration can be done 'on the fly' through the Print Adjustment button. Make sure that the Printheads are aligned. To do this print the Printhead alignment check (printer -> Printhead alignment -> Verify alignment and click on print, (refer to the maintenance and ENWW Dynamic color registration 19
-
 1
1 -
2
-
3
-
4
-
5
-
6
-
7
-
8
-
9
-
10
-
11
-
12
-
13
-
14
-
15
-
16
-
17
-
18
-
19
-
 20
20 -
 21
21 -
 22
22 -
 23
23 -
 24
24 -
 25
25 -
 26
26 -
 27
27 -
 28
28 -
 29
29 -
 30
30 -
31
-
32
-
33
-
34
-
35
-
36
-
37
-
38
-
39
-
40
-
41
-
42
-
43
-
44
-
45
-
46
-
47
-
48
-
49
-
50
-
51
-
52
-
53
-
54
-
55
-
56
-
57
-
58
-
59
-
60
-
61
-
62
-
63
-
64
-
65
-
66
-
67
-
68
-
69
-
70
-
71
-
72
-
73
-
74
-
75
-
76
-
77
-
78
-
79
-
80
-
81
-
82
-
83
-
84
-
85
-
86
-
87
-
88
-
89
-
90
-
91
-
92
-
93
-
94
-
95
-
96
-
97
-
98
-
99
-
100
-
101
-
102
-
103
-
104
-
105
-
106
-
107
-
108
 |
 |